Bathroom Grout Cleaning: Master Your Grout Care
Learn proven methods to clean bathroom grout, remove mildew, prevent staining, and extend tile life with practical tools, step-by-step techniques, and maintenance tips from Grout Maintenance.

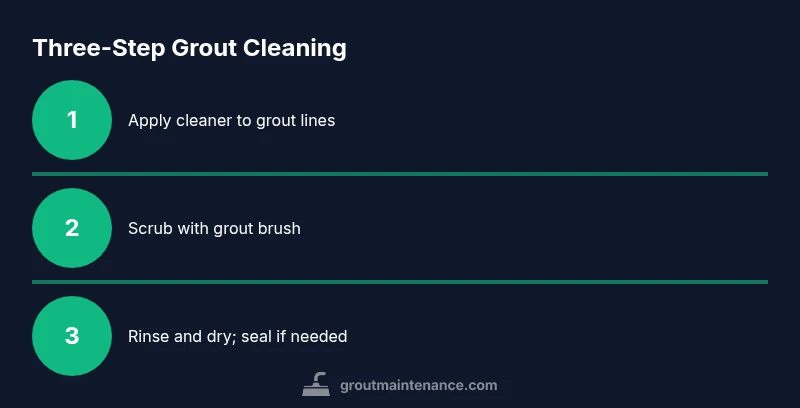
You can restore bright, stain-free bathroom grout by a targeted cleaning routine: test cleaners on a small area, choose a gentle approach, scrub with a soft brush, rinse thoroughly, and seal afterward to prevent future staining. Use a pH-neutral cleaner or a baking-soda paste for stubborn spots, and ventilate the room during the process.
Why Bathroom Grout Cleaning Matters
Regular bathroom grout cleaning isn't just about aesthetics. Over time, soap scum, mineral deposits, and humidity create a damp environment where mildew and mold can thrive. Left unaddressed, stained grout can become permanently discolored and grout joints can deteriorate, leading to cracked tiles or water leakage behind the wall. According to Grout Maintenance, consistent cleaning and sealing are foundational practices that protect tile installations and maintain a healthy bathroom ecosystem. Effective cleaning also makes subsequent repairs easier and cheaper. When grout looks clean and uniform, it reflects more light and makes the entire space feel brighter and more sanitary. Homeowners who adopt a routine schedule for grout care report fewer deep-clean headaches and longer tile life. By understanding the biology of grime and the physics of moisture, you can tailor cleaning methods to your grout type and bathroom layout. In short: clean grout is the first defense against staining, odor, and structural wear in wet rooms like showers and tub surrounds. This guide will give you practical steps grounded in real-world experience.
What Causes Stains and Mildew in Bathroom Grout
Bathroom grout stains and mildew arise from a combination of moisture, temperature, and contaminants like soap scum and mineral deposits. Cementitious grout is porous, so water and oils can penetrate the joint and create a favorable environment for mold and mildew to flourish. Harsh cleaning practices or neglecting routine maintenance can worsen discoloration, leading to brown, gray, or black lines that are hard to remove. Epoxy grout behaves differently and is more resistant to staining, but it can still show wear if cleaners are too aggressive. Humidity in showers and bathtubs accelerates mildew growth, especially if ventilation is poor. Recognizing the type of grout you have (cementitious vs. epoxy) helps you choose the right cleaner and scrubbing technique, reducing the chance of surface damage. Grout maintenance habits that address moisture control, rapid drying, and regular cleaning dramatically reduce the risk of recurring staining and odor.
Cleaning Methods: Choose the Right Approach
There isn’t a one-size-fits-all solution for bathroom grout cleaning. For most cementitious grout, a pH-neutral cleaner or a baking soda paste mixed with water provides effective removal of soap scum and mineral deposits without weakening the grout. Hydrogen peroxide (3%) can brighten white grout and kill surface mold when used with care. Enzymatic cleaners can be helpful for organic stains, while chlorine-based bleach is sometimes effective but can fade color and degrade grout seals if used improperly. Epoxy grout is generally more stain-resistant but should be treated with gentler formulas and avoided with acidic cleaners. Always test a cleaner on a small, inconspicuous area before full application, and never mix cleaners, especially ammonia with chlorine bleach, which creates toxic fumes. Safety first: wear gloves and ensure adequate ventilation while cleaning.
Preparing Your Cleaning Plan
Before reaching for brushes and cleaners, map out a clear plan. Identify high-visibility areas (shower corners and back walls) and areas with persistent staining. Schedule cleaning for a dry part of the day to minimize humidity, and open windows or run an exhaust fan to ventilate. Remove all bath mats, towels, and toiletries to avoid accidental contact with cleaners. Prepare a dedicated work zone using towels to protect surrounding tile and fixtures from splashes. Having a plan reduces cleanup time and helps you focus on grout lines, where most dirt accumulates. Grout care becomes easier when you approach cleaning as a scheduled maintenance task rather than a one-off chore.
Tools and Safe Cleaning Solutions
The right tools speed up the job and protect grout from damage. You’ll typically need a stiff-grout brush, an old toothbrush for corners, a spray bottle for applying cleaners, a bucket for rinsing, and a microfiber cloth for drying. For solutions, start with a pH-neutral grout cleaner and a baking soda paste (2 parts baking soda to 1 part water). Hydrogen peroxide can be used to brighten white grout in stubborn spots. Optional but helpful items include gloves, safety goggles, and a small steam device for hard-to-reach areas. Always avoid highly acidic cleaners on cementitious grout and test every cleaner in a discreet spot first. A routine approach to supplies keeps the process smooth and repeatable.
Deep Cleaning Techniques for Tile Grout
Deep cleaning grout requires time, patience, and the right technique. Begin by applying cleaner to the grout lines and letting it sit for 5–10 minutes to soften stains. Scrub with a grout brush using short, diagonal strokes to dislodge embedded grime. For stubborn areas, apply baking soda paste and scrub again, then rinse thoroughly with clean water. Rinse residue can cause whitening or streaking, so wipe the joints dry with a microfiber cloth. In damp bathrooms, repeat the process on problem sections and dry promptly to prevent new mildew growth. If you see white haze after cleaning, this is usually grout haze—wipe it away with a damp cloth before it hardens. Consistency matters; frequent, lighter cleanings beat infrequent, intensive scrubs in both time and effort.
Sealing and Maintenance After Cleaning
Sealing grout after cleaning helps repel water, oils, and mildew, extending the time between deep cleans. Wait until grout is completely dry (usually 24–48 hours) before applying sealant. Use a penetrating silicone-based or fluoropolymer sealant appropriate for your grout type, and apply according to the manufacturer’s directions. Over-application can create a glossy film or uneven seal, so apply in thin, even coats and wipe off excess. For high-moisture areas like showers, reseal every 12–24 months or as recommended by the sealant you choose. Regular maintenance—wiping surfaces dry after use and performing a light weekly clean—keeps grout looking fresh and reduces the frequency of heavy cleaning sessions.
Troubleshooting Common Problems
If grout remains discolored after cleaning, reassess the cleaner choice and dwell time. Persistent staining can indicate mineral deposits or hard water buildup that requires a stronger cleaner or professional regrouting. If grout joints crumble or crumble around tiles, cleaning may have exposed structural issues rather than surface staining. In that case, replacement or regrouting may be the best long-term solution. For moldy grout that returns after cleaning, ensure humidity control and ventilation to reduce moisture levels. If DIY methods fail repeatedly, consider a professional assessment to prevent further tile damage and ensure a proper seal.
When to Consider Regrouting or Professional Help
There are times when DIY grout cleaning isn’t enough. If grout is crumbling, consistently dark or moldy despite cleaning, or if tiles show movement or cracks, regrouting may be necessary. Professional pro tips include choosing epoxy grout for high-moisture areas or matching cementitious grout to the tile texture for a seamless finish. Grout replacement can be a sizeable job, but it often yields the best long-term results in showers and tub surrounds. If you prefer a guaranteed outcome and want to minimize risk, seeking a qualified contractor can save time and extend the life of your tile investment.
Final Note: A Grout Care Mindset
A sustainable grout care routine combines regular cleaning, moisture management, and timely sealing. The goal is not only to remove visible grime but also to prevent the underlying conditions that foster mildew and staining. By treating bathroom grout cleaning as proactive maintenance, you’ll enjoy a cleaner, healthier bathroom with fewer headaches over time. Regular, gentle cleaning keeps grout vibrant and tile installations sound, preserving value and comfort in your home.
Tools & Materials
- Grout brush(Stiff nylon bristles; 6-8 inch head; longer handle for reach)
- Old toothbrush(For corners and narrow joints)
- Bucket(For mixing cleaners and rinsing)
- Spray bottle(Apply cleaners evenly to grout lines)
- pH-neutral grout cleaner(Avoid acidic cleaners on cementitious grout)
- Baking soda(Make a paste with water for spot cleaning)
- Hydrogen peroxide (3%)(Brightens white grout; test on colored grout first)
- Gloves(Protect skin from cleaners)
- Goggles(Eye protection if splashes are likely)
- Microfiber cloths(Dry joints and wipe haze)
Steps
Estimated time: 60-120 minutes
- 1
Prep the space
Clear the area, remove bath mats, and lay towels to catch splashes. Ventilate the room by opening a window or turning on the exhaust fan. This reduces chemical fumes and speeds drying, making the job safer and more effective.
Tip: Keep a dry towel handy to immediately blot any excess cleaner from the grout. - 2
Test cleaners in a hidden area
Apply a small amount of cleaner in an inconspicuous corner to confirm grout reaction. If there’s no adverse effect after 5–10 minutes, proceed with confidence. This minimizes the risk of discoloration or damage.
Tip: If color fades or grout texture changes, switch to a milder cleaner. - 3
Apply cleaner to grout lines
Spray or dab cleaner along the grout lines, focusing on stained sections. Let it sit for 5–10 minutes to break down soap scum and mineral deposits. Avoid saturating adjacent tiles to prevent seepage behind walls.
Tip: Use a timer to avoid over-wetting the joint. - 4
Scrub with a grout brush
Scrub with firm, short strokes along the grout line. Use the toothbrush for corners and tight spots. Work in small sections to maintain cleaning momentum and keep the room manageable.
Tip: Rinse the brush frequently to prevent re-depositing grime. - 5
Rinse thoroughly
Rinse with clean water, ensuring all cleaner residues are removed. Wipe with a microfiber cloth and inspect for remaining stains. Residue can make grout look dull or attract new dirt.
Tip: Repeat rinsing if you see faint residues. - 6
Dry and inspect
Dry the joints completely to prevent new mildew growth. Inspect for remaining stains and repeat the process on stubborn areas if needed. Proper drying is crucial before sealing.
Tip: Use a fan or dehumidifier in humid spaces. - 7
Seal if appropriate
If your grout is cementitious and not damaged, apply a penetrating sealant after full drying. Follow manufacturer directions for application and curing times. Sealing helps repel water and stains, extending the life of grout.
Tip: Apply thin, even coats and wipe away excess to avoid haze. - 8
Plan ongoing maintenance
Set a routine: quick monthly wipe-downs and a deeper clean every 2–4 months. Regular maintenance prevents heavy buildup and reduces the need for aggressive cleaning later.
Tip: Schedule reminders on your calendar to stay consistent.
Got Questions?
What is the best cleaner for bathroom grout?
A pH-neutral cleaner or a baking soda paste works well for most cementitious grout. For stubborn stains, hydrogen peroxide can brighten the grout without aggressive scrubbing. Always test a cleaner first in a hidden area.
For best results, start with a pH-neutral cleaner or a baking soda paste, and test it in a hidden spot before cleaning the full area.
How often should I deep-clean bathroom grout?
Deep-clean grout every 1–3 months depending on humidity, usage, and the level of staining. In high-moisture spaces, more frequent cleanings help prevent mildew buildup.
Typically every one to three months, more often in bathrooms with heavy use or high humidity.
Can I use bleach on grout?
Bleach can remove stains but may fade color and weaken some grout types. Use it cautiously, never mix with ammonia, and prefer it only on white, epoxy, or color-insensitive grout after testing.
Bleach can help with stains, but it can fade color and damage some grout. Test first and avoid mixing with ammonia.
Is sealing grout after cleaning necessary?
Sealing helps repel water and stains, extending grout life. In shower areas, reseal every 12–24 months, following the product instructions and ensuring the grout is fully dry before application.
Sealing is recommended to prevent future staining; reapply every year or two as advised.
What should I do about mold returning after cleaning?
Persistent mold indicates high humidity or inadequate ventilation. Improve airflow, dry surfaces after use, and consider stronger cleaners or professional assessment if mold recurs.
If mold keeps coming back, increase ventilation and consider a more effective cleaning approach or expert help.
Watch Video
The Essentials
- Test cleaners first to protect grout
- Ventilate to reduce fumes and moisture
- Choose pH-neutral cleaners for cementitious grout
- Seal after drying to resist future staining
- Maintain a regular cleaning schedule