The Best Method of Cleaning Grout: A Practical Home Guide
Discover the best method of cleaning grout with safe, effective techniques for cementitious and epoxy grout, plus tools, step-by-step guidance, and maintenance from Grout Maintenance.

To achieve the best method of cleaning grout, start with surface prep and a gentle cleaner, then scrub with a grout brush and rinse thoroughly. For stubborn stains, apply a baking soda paste or enzyme cleaner, and avoid mixing cleaners. Dry completely and seal to prevent future staining. Choose pH-neutral products for daily cleaning and reserve stronger formulas for deep clean sessions.
Why the best method of cleaning grout matters
Grout is porous and rough, acting like a tiny sponge for dirt, soap scum, and mold. The right cleaning method not only brightens the joints but also preserves grout integrity over time. A thoughtful approach minimizes wear on joints and reduces the chance of regrowth between cleanings. According to Grout Maintenance, combining gentle cleaners with careful agitation yields the most reliable results for most homes, whether you’re working with light cementitious grout or more durable epoxy grout. For DIYers, the goal is to balance cleanliness with preservation: you want white, bright grout without cracking or eroding the joints. Regular maintenance makes future cleanings easier and helps protect tile surfaces from staining and water damage. This article walks you through how to select cleaners, prepare surfaces, and execute a proven routine across kitchens, bathrooms, and utility spaces. The Grout Maintenance team emphasizes safety, consistency, and methodical technique for dependable outcomes.
Grout types and how cleaning methods vary
Not all grout is created equal. Cementitious grout, the most common type in homes, benefits from milder cleaners and shorter dwell times to avoid weakening the seal. Epoxy grout, engineered for higher stain resistance, can tolerate slightly stronger cleaners but dislikes acidic formulas that can dull its surface. Understanding these differences helps you choose the right product and technique. Grout Maintenance analysis suggests starting with a gentle, pH-neutral cleaner and progressing to more robust options only if the stain persists. For natural stone installations, extra care is warranted to avoid etching. Always test a small, inconspicuous area before applying any cleaner broadly, and never mix cleaners, especially bleach with ammonia or acids, which create hazardous fumes. By tailoring your approach to grout type, you protect color, texture, and structural integrity while achieving a brighter, cleaner appearance.
Safety and surface prep before cleaning
Preparation is the most overlooked step, yet it sets the stage for a successful cleaning session. Ensure the space is well-ventilated, wear gloves and eye protection, and remove nearby items that could be damaged by moisture or cleaners. Use a dry brush or microfiber duster to remove loose debris from grout lines before applying any liquid cleaner. Protect surrounding surfaces with dropped cloths or painter’s tape, especially along tile edges and metal fixtures. If you’re cleaning a shower, keep your footing stable and use a non-slip mat. In our experience at Grout Maintenance, a quick test on a hidden area confirms that no adverse reaction occurs between grout sealant and the chosen cleaner. After prep, you’ll be ready to apply cleaners with confidence and minimize the chance of streaks or residue.
Choosing cleaners: pH, strength, and compatibility
For most grout cleaning tasks, a pH-neutral cleaner paired with mechanical agitation does the bulk of the work. Mild agents break down soap scum without attacking grout joints. For tougher stains, a paste made from baking soda and water or a specialized enzyme cleaner can tackle organic soils without harsh chemical reactions. Avoid acidic cleaners on cementitious grout, particularly if the grout is not fully cured, as acids can erode mineral binders and reduce the grout’s lifespan. Epoxy grout generally tolerates slightly more aggressive cleaners, but still benefits from test patches and quick rinses. When in doubt, start with the gentlest option and escalate slowly. Always read product labels for compatibility with your grout type and sealant. The goal is to remove stains while preserving color, texture, and protective sealers.
The proven method: a stepwise approach
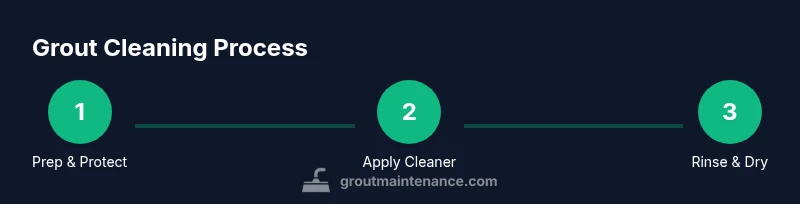
Imagine a three-phase routine: surface prep, targeted cleaning, and thorough rinsing. Begin with dry cleaning to lift dust, then apply your chosen cleaner to grout lines and scrub with a dedicated grout brush. Work in sections to avoid drying cleaner on the surface unevenly. Rinse with clean water frequently to prevent residue buildup, then inspect for remaining staining and repeat as needed. Dry the area completely and consider applying a grout sealer to slow future staining. Diagrammatic guidance and recommended angles can be found in the accompanying infographic, which mirrors the step-by-step logic used by Grout Maintenance team members. For heavy soils, extend dwell time slightly or switch to a more robust but still non-abrasive cleaner. Always prioritize gentle action, avoiding metal brushes that can scratch joints.
Deep cleaning for stubborn stains
Stubborn stains may require a more deliberate approach. Apply a baking soda paste to the stain, let it sit for 5–10 minutes, then scrub with a soft brush and rinse thoroughly. Enzyme cleaners are effective against organic soils but should be used according to label directions. If grout looks gray or black near a shower door, humidity and mildew could be present; in such cases, treat with a mildew-specific cleaner and ensure complete drying afterward. For porcelain and ceramic installations, test any cleaner in a hidden area first, then proceed. If staining persists after multiple cycles, you might consider regrouting or applying a color-safe tint, especially for high-traffic areas. Consistent cleaning habits and fast drying times dramatically improve long-term appearance and hygiene.
Homemade cleaners vs commercial products
Many homeowners prefer homemade options such as baking soda pastes or hydrogen peroxide solutions for their safety, low cost, and accessibility. Enzyme-based cleaners can lift organic soils with minimal scrubbing, while commercial grout cleaners often include surfactants that speed up the cleaning process. The key is to avoid abrasive or acidic formulas that can wear away grout. When choosing commercial products, look for neutral or alkaline pH, stain-fighting claims compatible with your grout type, and clear directions. Always perform a patch test and follow label instructions for dilution and dwell times. Grout Maintenance recommends starting with milder cleaners and only moving to stronger agents if needed, to preserve grout integrity and seal effectiveness.
Maintenance and sealing to prevent future staining
Cleaning is most effective when followed by sealing. After a proper clean and a full dry, apply a penetrating grout sealer that suits your grout type and tile material. Sealers create a protective barrier against liquids and soils, making future cleanings faster and more effective. Reapply sealer according to the product’s schedule, typically every 6–24 months depending on wear and moisture exposure. Regular maintenance includes wipe-down after showers, quick rinses for kitchen spills, and a monthly light cleaning routine that uses a pH-neutral product. Proper sealing also helps prevent mold and mildew by reducing moisture penetration into the grout. By adopting these routines, you’ll keep grout looking fresh with less effort over time.
Common mistakes and how to avoid them
Avoid aggressive scrubbing with metal brushes that can gouge grout lines. Don’t skip drying times; moisture trapped in joints invites mildew. Never mix cleaners, especially bleach with ammonia or acids, which produce dangerous fumes. Don’t assume that a brighter color means deeper cleaning; sometimes discoloration requires targeted stain removal or regrouting. Finally, invest in quality sealers and reseason them when your grout darkens or loses hydrophobic properties. Following these cautions will save time, effort, and money while delivering consistently improved results.
Tools & Materials
- Grout brush or stiff nylon brush(Dedicated brush with firm, non-metal bristles; avoid metal wire brushes)
- Soft microfiber cloths(For wiping and drying; helps prevent streaks)
- Spray bottle(For applying cleaner; keep to a fine mist)
- pH-neutral grout cleaner or enzyme cleaner(Choose based on grout type; avoid acidic products on cement grout if possible)
- Baking soda(Used with water to form a gentle paste for tough stains)
- Hydrogen peroxide (3%)(Good for organic stains; test first on pigment-free areas)
- White vinegar(Only for cementitious grout and not on epoxy; avoid with colored grout)
- Gloves(Protect skin from cleaners and detergents)
- Goggles or safety glasses(Eye protection when splashes occur)
- Bucket and mop or sponge(For rinsing large areas and removing residue)
- Painter’s tape or drop cloths(Protect adjacent surfaces during treatment)
- Grout sealer (penetrating sealant)(Apply after thoroughly dry; reapply as recommended by manufacturer)
Steps
Estimated time: 60-90 minutes
- 1
Prep and protect
Clear the area, lay down cloths, and tape off adjacent surfaces. Ventilate the space and wear gloves and eye protection. Dry sweep or vacuum to remove loose soil from grout lines.
Tip: A quick pre-clean test on a small area helps avoid adverse reactions. - 2
Dry-clean the surface
Use a dry brush or microfiber cloth to remove surface dust and prevent muddy water from spreading stains. This makes subsequent cleaning more effective.
Tip: Dry removal reduces the amount of cleaner needed and speeds up the process. - 3
Apply cleaner and dwell
Mist the grout lines with a pH-neutral cleaner or enzyme cleaner and let it sit for 3–5 minutes. Do not let the cleaner dry on tile surfaces; re-wet as needed to avoid streaks.
Tip: For stubborn stains, add a paste of baking soda and water to the grout lines before scrubbing. - 4
Scrub the grout
Scrub along the length of each grout joint with the nylon brush, employing short, firm strokes. Work in small sections to maintain consistent cleaning and avoid overwetting.
Tip: Angle the brush slightly toward the grout line to maximize dirt removal without gouging the grout. - 5
Rinse and inspect
Rinse with clean water and wipe with a microfiber cloth. Inspect for remaining stains and repeat the cleaning cycle on stubborn areas.
Tip: Rinsing immediately prevents cleaner residue from re-staining the grout. - 6
Dry and seal
Allow joints to dry completely (at least 2–4 hours, longer in damp spaces). Apply a penetrating grout sealer per manufacturer instructions.
Tip: Do not seal until grout is bone dry; moisture trapped under sealer can cause cloudy joints.
Got Questions?
What is the best method of cleaning grout?
The best method combines surface prep, a gentle cleaner, and careful agitation with a grout brush, followed by thorough rinsing and complete drying. For stubborn stains, use baking soda paste or enzyme cleaners and finish with sealing to protect the joints.
Use a gentle cleaner, scrub with a grout brush, rinse well, and seal for lasting results.
Can I use bleach on cementitious grout?
Bleach can whiten cementitious grout, but it may discolor or degrade if used improperly. Always test, rinse thoroughly, and avoid mixing with ammonia.
Bleach can help whiten grout but test first and rinse well; avoid mixing with ammonia.
Is sealing grout necessary after cleaning?
Yes. Sealing helps repel moisture and soils, making future cleaning easier and extending grout life. Allow grout to dry fully before applying sealant.
Sealing after cleaning protects grout and makes future cleaning easier.
How often should grout be cleaned?
Frequency depends on traffic, moisture, and staining. A routine light clean every 1–2 weeks, with a deeper clean every 3–6 months, is a good starting point to maintain appearance.
Clean regularly, with deeper clean every few months depending on use.
Can vinegar be used on grout?
Vinegar is best avoided on epoxy grout and colored cementitious grout; it can etch or discolor. If used, dilute and test first on a hidden area.
Vinegar may harm some types of grout; test or avoid on epoxy.
What if stains remain after cleaning?
If stains persist, consider a second cleaning cycle with a stronger but non-abrasive cleaner, or explore regrouting options for severely stained joints.
If stains persist, repeat cleaning or consider regrouting.
Watch Video
The Essentials
- Assess grout type before cleaning.
- Start gentle, escalate slowly when needed.
- Rinse thoroughly and dry completely after cleaning.
- Seal grout after cleaning to prevent future staining.