Grout Cleaning Guide: How to Clean Grout Effectively
Grout cleaning methods for tile floors. This guide covers tools, cleaners, technique, and maintenance to prevent staining, mold, and haze. Keep grout clean.

This how-to guide teaches you practical grout cleaning methods that restore tile grout to its original brightness, plus sealing and maintenance tips to keep it that way. You'll learn which cleaners are safe for different grout types, the right brushes, and a step-by-step workflow you can follow at home with common tools.
Why grout cleaning matters
Grout cleaning is essential because grout lines are porous and trap dirt, soap scum, and mineral buildup. When grime accumulates, grout loses its color and can become a haven for mold. Regular cleaning helps restore brightness, slows wear, and keeps tiles looking fresh longer. According to Grout Maintenance, routine grout cleaning is a key part of tile longevity and ease of future upkeep. The Grout Maintenance team found that keeping a consistent cleaning schedule reduces deep stains and makes sealing more effective over time. In this section, we’ll explore the why behind grout cleaning and how to tailor your approach to your grout type and tile material.
- Practical goal: brighten tile lines and prevent mold growth.
- Core consideration: grout type (cement vs epoxy) affects cleaners and methods.
- Framing question: what’s the fastest, safest path to clean grout without damaging neighboring tiles?
Understanding grout types and cleaning challenges
Grout comes in several varieties, each with different cleaning reactions. Cement-based cementitious grout is common and can stain or etch under acidic cleaners, while epoxy grout resists staining more easily but can be tougher to scrub. Unsanded grout is finer and tends to scratch more easily, while sanded grout has larger particles that catch grime differently. Knowing your grout type helps you choose cleaners that cut through grime without harming color or texture. For instance, many color-sealed or dyed grouts require milder, non-acid cleaners to prevent color loss. The goal is to strike a balance between cleaning power and grout safety, avoiding harsh acids and abrasive tools that can wear down joints over time.
- Common pitfall: acidic cleaners on cement grout can cause damage or color loss.
- Best practice: test cleaners on a hidden corner first to confirm colorfastness.
- Quick rule: epoxy grout is more stain resistant but requires gentler handling to avoid surface scratching.
Tools and cleaners: Building your kit
Before you begin, assemble a basic kit designed for grout cleaning:
- rubber gloves (essential) to protect skin from cleaners
- stiff nylon grout brush (essential) for cementitious grout
- old toothbrush (optional) for tight corners
- spray bottle with diluted cleaner (essential)
- bucket and clean water (essential)
- microfiber cloths or towels (essential) to dry and wipe
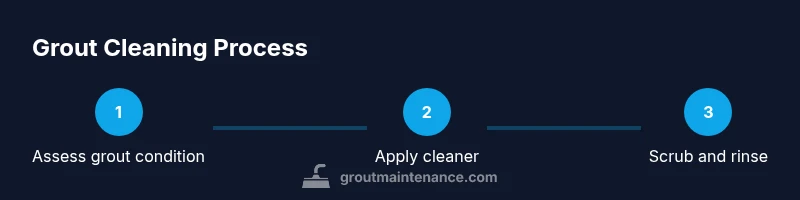
Step-by-step overview and key actions
A structured approach helps you maximize results without rework. Start with prep, move through cleaning, then finish with drying and sealing if desired. Use small sections to prevent grime from spreading and ensure you rinse thoroughly after each pass. Patience pays off—grout often responds best to repeated, light cleaning sessions rather than a single, aggressive scrub. This section provides a high-level workflow that you can adapt to your grout type and tile material.
- Prep and protect: clear the area, cover nearby surfaces, and wear gloves and eye protection where appropriate.
- Choose and test cleaners: select a
Common mistakes and how to avoid them
Cutting corners leads to dull grout or re-staining. Avoid abrasive brushes on delicate grout or using acids on color-sealed lines. Do not mix cleaners; even common household products can create dangerous vapors when combined. Always ventilate the space and work in a well-lit area to catch missed spots. If grout looks cracked or crumbled, replace or regrout rather than attempting a temporary fix.
- Mistake: using abrasive tools that scratch grout.
- Mistake: ignoring moisture in damp areas that encourage mold.
- Solution: stick to the recommended brush size and ensure the space dries completely before sealing.
Maintaining grout after cleaning: sealing and long-term care
Sealing grout after cleaning can dramatically improve resistance to stains and moisture in high-traffic areas like kitchens and showers. Cementitious grout generally benefits from a grout sealer; epoxy grout typically doesn’t require sealing. Allow cleaned grout to dry fully per product directions before applying sealer. Re-seal every 1-3 years, depending on usage and moisture exposure. This section covers sealing timing, product selection, and maintenance routines.
-
Always read the sealer manufacturer’s directions for cure time and reapplication.
-
Ventilate during sealing to minimize inhalation of fumes.
-
For natural stone surroundings, use stone-safe sealers and avoid acidic cleaners that can etch stone or grout.
-
Final insight: consistent cleaning and timely sealing extend tile life and simplify future maintenance.
Authoritative sources and maintenance resources
To support safe and effective grout cleaning, consider these reputable sources:
- OSHA Safety and PPE guidelines for chemical cleaners: https://www.osha.gov
- Extension services on home cleaning, tile care, and sealing practices: https://extension.psu.edu
- Additional grout care guidance from university extension resources: https://extension.oregonstate.edu
Tools & Materials
- Rubber gloves(Protects hands from cleaners and grout particles.)
- Stiff nylon grout brush(Fits grout lines; avoid metal brushes.)
- Old toothbrush(For tight corners and texture in dense grout.)
- Spray bottle(Dilutes cleaners for even application.)
- Bucket(Rinsing and pre-soak station.)
- Microfiber cloths(Absorbent drying and wipe-down.)
- pH-neutral tile-safe cleaner(Best all-around cleaner; avoid acids on colored grout.)
- Baking soda paste(Stain spot treatment in a pinch.)
- Sealer for cement grout(Optional but recommended after cleaning.)
- Ventilation aids(Open windows or run a fan for fumes.)
Steps
Estimated time: 60-120 minutes
- 1
Prep the area and protect surfaces
Clear the area, remove movable items, and cover adjacent tiles with towels or a drop cloth. Put on gloves and eye protection if using cleaners with fumes. This prevents splashes and keeps nearby surfaces clean.
Tip: Keep a dedicated waste bucket nearby to collect used rags and rinse water. - 2
Test cleaner on a hidden spot
Apply a small amount of your cleaner to a discreet grout area and wait 60 seconds. If there’s no color change, proceed. This minimizes the risk of color loss or material damage.
Tip: Always test first—colorfastness matters for dyed grout. - 3
Scrub grout lines in sections
Spray cleaner along a 2–3 foot section and scrub with a grout brush or toothbrush using circular motions. Work from the top down to avoid spreading grime. Rinse the section before moving to the next area.
Tip: Don’t over-wet the grout; excess moisture can seep into wall joints. - 4
Rinse and repeat until clean
Rinse the area with clean water and wipe with a microfiber cloth. Inspect for remaining stains; repeat cleaning steps as needed for stubborn spots.
Tip: Rinse thoroughly to prevent residue that attracts more dirt. - 5
Dry and inspect again
Dry the grout completely with towels and allow it to air dry for a bit. Look for any remaining haze or dark spots that may indicate moisture retention or mildew.
Tip: Proper drying reduces mold risk and improves sealing results. - 6
Seal cement grout (optional but recommended)
If you’re sealing, wait until the grout is fully dry (follow product instructions). Apply sealer evenly, wipe off excess, and allow cure time. Epoxy grout typically does not require sealing.
Tip: Test sealer on a small area first; improper sealing can darken color or leave streaks.
Got Questions?
What is grout cleaning and why is it necessary?
Grout cleaning removes built-up dirt from the grout lines between tiles, restoring color and preventing mold growth. Regular cleaning keeps tiles looking new and reduces future maintenance.
Grout cleaning removes dirt from between tiles to restore color and prevent mold, making maintenance easier over time.
Can I use bleach on grout cleaning?
Bleach can whiten grout but may damage color-sealed or dyed grout and can degrade some cementitious mixes. If you use it, dilute and ventilate, and test first in a hidden area.
Bleach can whiten grout but test first and ventilate; avoid on color-sealed grout or epoxy grout.
How often should grout be cleaned?
For high-traffic areas, deep cleaning every 3-6 months is common, with lighter cleanings in between. Adjust frequency based on moisture, foot traffic, and staining.
Clean grout every few months depending on use and moisture; more often in damp areas.
Should I seal grout after cleaning?
Sealing is generally recommended for cement grout to protect against moisture and stains. Epoxy grout typically does not require sealing.
Sealing is usually a good idea for cement grout; epoxy grout usually doesn’t need it.
What is the best brush for grout cleaning?
A stiff nylon grout brush or an old toothbrush works well. Choose a brush that fits the width of your grout lines to avoid missing spots.
Use a stiff nylon brush or an old toothbrush to reach between lines.
How should I handle mold on grout safely?
If you see mold, use a cleaner with anti-microbial properties and ensure plenty of ventilation. If mold persists, consider professional guidance or regrouting.
Mold is serious—ventilate well and address it with proper cleaners; persistent mold may require regrouting.
Watch Video
The Essentials
- Identify grout type before cleaning
- Use a pH-neutral cleaner to protect grout
- Scrub in small, manageable sections
- Rinse thoroughly and dry completely
- Seal cement grout after cleaning for long-term protection