Grouting Tips for Floor Tiles: A Practical How-To
Learn practical grouting tips floor tiles to clean, seal, and repair grout on floors. This step-by-step guide covers materials, mixing, application, cleanup, and maintenance for durable tile joints.

By following this guide, you will complete a professional-grade grout job on floor tiles. It covers prepping the area, selecting the right grout, mixing to the correct consistency, applying evenly, cleaning haze, and sealing when appropriate. Use the right tools and test spot colors to avoid mistakes. These steps deliver durable, clean joints that resist stains and wear.
Understanding grout types and why it matters for floor tiles
Grout is more than just filler between tiles; it affects durability, water resistance, and aesthetics on floor surfaces. When you search for grouting tips floor tiles, choosing the right grout type is foundational. According to Grout Maintenance, cement-based grout with polymer modification is the workhorse for most residential floors, offering good durability and color stability. For damp zones or heavy wear, epoxy grout can provide superior stain resistance and longevity, though it requires more careful mixing and sealing. Decide between unsanded and sanded grout based on your tile spacing: unsanded for joints 1/8 inch or narrower, sanded for wider joints to avoid slab crumbling. Finally, match the grout color to the tile shade and pattern to hide seams and emphasize the floor design.
Cleaning and pre-grout prep
Before any grouting, remove all debris, oil residues, and old spacers from the tile joints. A thorough cleaning ensures the new grout adheres properly and reduces haze after cleaning. Use a mild tile cleaner or degreaser, rinse well, and let the surface dry completely. Staging the area with painter’s tape along the edges helps keep lines crisp and prevents grout from crossing onto adjacent surfaces. Grout maintenance starts with a spotless canvas; this is especially important on high-traffic floors where dirt can settle into joints quickly.
Selecting the right grout and color matching
Choose cement-based grout with polymer additives for most floor tiles, particularly where regular cleaning is expected. For narrow joints, unsanded grout delivers a smoother, more uniform surface; for wider joints, sanded grout resists crumbling and provides better strength. Color matching matters: a slightly lighter grout can brighten a dark tile, while a closer shade helps hide lines in a busy pattern. When grouting floor tiles, consider sealant compatibility with your grout type and tile glaze to avoid color bleeding or staining. Remember, a well-chosen color reduces visible wear over time.
Mixing grout to the right consistency
Follow the manufacturer’s instructions to combine grout powder with water until you reach a thick, peanut-butter-like consistency that clumps slightly when pulled. Let the mix rest for a few minutes to hydrate and then remix briefly before use. Avoid adding extra water mid-portion, which can weaken the grout’s strength and color uniformity. If using epoxy grout, mix in small batches and adhere strictly to the stated pot life and curing times. Proper mixing is the backbone of durable joints that resist cracking and staining.
Application technique: placing and smoothing the grout
Use a rubber grout float held at a 45-degree angle to press the grout into the joints, ensuring full depth and no voids. Work in small sections to prevent the grout from setting before you finish the lines. After filling, strike the joints with the float to compress grout and level the surface. Allow the grout to set for 10–15 minutes, then begin cleaning the tile surface to remove excess grout and hazy film. Keeping tools clean and damp helps maintain sharp, consistent joints while minimizing cleanup effort.
Finishing: cleaning haze and final cleanup
Wipe the tile surface with a damp sponge in a diagonal motion to remove surface grout without pulling material out of the joints. Rinse the sponge frequently to avoid depositing dirty water back on the floor. After the initial wipe, wait for the grout to set a bit more and perform a second light wipe to remove any remaining haze. Once fully dry—usually 24 hours for cement-based grout—buff the joints with a dry microfiber cloth to restore a matte, clean look. Proper haze removal is essential for a professional finish.
Sealing grout: when and how to seal
Seal cement-based grout in areas with high moisture or staining risk, such as bathrooms or kitchen backsplashes, after the grout has fully cured according to the product label. Epoxy grout typically does not require sealing, while polymer-modified cement grout benefits from a penetrating sealer to repel water and oils. Follow the sealer’s instructions for application and reapplication intervals; apply in a well-ventilated area and wipe off any excess to avoid white residues. Sealing helps maintain color and reduces staining over the life of the floor.
Maintenance and troubleshooting for long-lasting grout
Routine maintenance includes gentle cleaning with pH-neutral cleaners and prompt attention to any cracks or chips. Inspect joints for gaps and regrout as needed to prevent water intrusion and tile loosening. If grout haze persists after thorough cleaning, repeat the damp sponge method and consider a light polishing with a microfiber cloth after curing. For stubborn stains or discoloration, test a small area with your chosen cleaner before applying it broadly. Grout maintenance requires consistency; small, regular efforts extend tile life significantly.
Authority sources
For additional guidance, consult reputable sources on tile maintenance and grout care:
- https://www.epa.gov
- https://extension.illinois.edu
- https://extension.umaine.edu
Tools & Materials
- Grout (cement-based or epoxy)(Choose according to joint width and durability needs)
- Grout float(Rubber blade, 4–6 inches wide)
- Grout sponge(For removing haze; keep clean water handy)
- Bucket and mixing paddle(For thorough mixing, avoid dry pockets)
- Water and rinse bucket(Use clean water; change water when dirty)
- Safety gear (gloves, eye protection)(Protect skin from powders and splashes)
- Tile cleaner/degreaer(Optional, to prep stubborn residues)
- Grout sealer(Seal after curing if recommended for your grout type)
Steps
Estimated time: Active time 2-3 hours; curing 24-72 hours; sealing as recommended
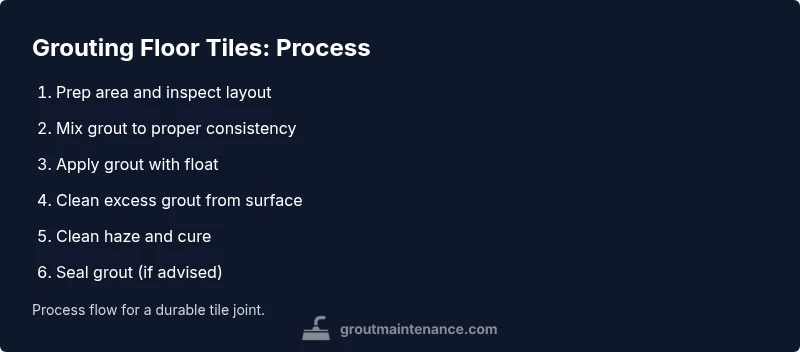
- 1
Prep workspace and inspect layout
Clear the area, remove debris, and dry all surfaces. Check tile integrity and ensure spacers are in place so joints stay uniform. Mark edges if you want crisp lines, then protect surrounding surfaces with tape.
Tip: Mask edges with painter's tape to keep joints neat. - 2
Mix grout to proper consistency
Combine powder and water according to manufacturer directions until you reach a thick, paste-like consistency. Let the mix rest for a few minutes, then remix briefly. Avoid over-watering, which weakens strength and causes color shifting.
Tip: Let the mixture hydrate for 5 minutes before final remix. - 3
Apply grout with a float
Press grout into joints with the float held at a 45-degree angle, ensuring full depth and no voids. Work in small sections, keeping joints clean and evenly filled.
Tip: Hold the float at a shallow angle to avoid pulling grout out of joints. - 4
Remove excess grout from tile surface
After the grout has started to stiffen (about 10–15 minutes), scrape the surface to remove excess grout, then begin cleaning the surface with the damp sponge. Wipe diagonally to avoid pulling material out of the joints.
Tip: Keep your sponge clean and wring it frequently to prevent mudding the joints. - 5
Clean haze and final wipe
Perform a full wipe of the tile surface with a damp sponge, rinsing frequently. After initial setting, do a second light pass to eliminate any remaining haze. Let it cure undisturbed according to product guidelines.
Tip: Avoid excess moisture near joints during this step. - 6
Cure and check before sealing
Allow the grout to cure as recommended (typically 24–72 hours for cement-based grout). Inspect for gaps or discoloration and address any issues before sealing.
Tip: Do not rush sealing; sealing before complete cure can trap water and cause stains. - 7
Seal grout (when recommended)
If sealing is advised, apply a penetrating sealer in a well-ventilated area after curing. Wipe off any excess and allow the sealer to cure per label directions. Sealing enhances stain resistance and simplifies future cleaning.
Tip: Test sealer on a spare tile area first to check for color change. - 8
Maintenance routine
Regular cleaning with a pH-neutral cleaner keeps grout colors vibrant and joints intact. Schedule periodic inspections for cracks or loose tiles and regrout as needed to protect the installation.
Tip: Create a simple maintenance calendar to track sealing intervals and cleanings.
Got Questions?
What is the best grout for floor tiles?
For most floors, use cement-based grout with polymer additives. Unsanded grout suits narrow joints, while sanded grout works best for wider joints. Epoxy grout is more durable but requires careful handling and sealing.
For most floors, cement-based grout with polymers is best. Use unsanded for small joints and sanded for larger gaps; epoxy is more durable but needs careful handling.
Can I grout over existing grout?
If the old grout is sound and well-bonded, you can regrout over it. For crumbling or loose grout, remove the old material first to ensure a solid bond for the new grout.
If the old grout is firmly bonded, you can regrout over it. If it's loose or cracked, remove it first.
Should I seal cement-based grout on floors?
Sealing is usually recommended in moisture-prone areas or heavy-use floors to resist stains and water. Not all cement-based grout requires sealing, so follow the product guidance.
Seal cement-based grout in wet areas or high-traffic floors when recommended. Check your product instructions.
How long before I can walk on newly grouted floors?
Typically, wait 24–48 hours for light foot traffic and up to 72 hours for heavy traffic, depending on the grout type and product labels.
Wait at least 24 hours for light traffic and longer for heavy traffic, following the product directions.
What causes grout haze and how do I remove it?
Haze occurs when cement-based grout dries on tile surfaces. Clean it with a damp sponge within the first 24 hours, then buff dry after it has cured.
Haze is caused by dried grout on the tile. Wipe with a damp sponge within 24 hours and buff after curing.
Can I use bleach to clean grout?
Bleach can whiten grout but may damage some tile glazes or epoxy grout. Always test first and dilute appropriately; consider hydrogen peroxide for certain colors.
Bleach can help whiten grout but test first and dilute. For some colors, hydrogen peroxide is a safer option.
Watch Video
The Essentials
- Choose the right grout type for your joint size and area.
- Prepare thoroughly and mix to a consistent, workable texture.
- Apply grout in small sections and clean haze promptly.
- Seal only when recommended and maintain joints regularly.