How to Clean Grout When Applying: A Practical Guide
Learn how to clean grout when applying new tile grout. This guide covers prep, safe cleaners, scrubbing techniques, drying, sealing timing, and maintenance for durable, pristine grout.

You will learn how to clean grout during the applying process, including prep, choosing safe cleaners, scrubbing techniques, and timing for sealing. The key requirements are a clean work area, proper ventilation, pH-neutral cleaners, nylon brushes, and allowing grout to dry before sealing. This approach minimizes haze, prevents staining, and extends grout life. We'll also cover safety and how to test for color-fastness before full application.
Why cleaning grout during applying matters
Cleaning grout as you apply it is a best-practice that can dramatically improve the final look and longevity of a tiled surface. When grout is dirty or hazy from the start, you risk embedded dust, cement haze, or efflorescence that can affect adhesion, color uniformity, and sealant performance. The Grout Maintenance team notes that consistent cleaning during application helps prevent staining and reduces the need for heavy remediation later. By keeping grout lines clean, you facilitate even curing, better grout color development, and more reliable sealing results. In short, proactive cleaning saves time and money while delivering a more durable finish that resists wear and moisture intrusion over the years.
Workspace Setup and Surface Prep
A clean, well-ventilated workspace is essential when applying grout and cleaning it during the process. Start by removing loose debris from the joints and surrounding tile, covering nearby surfaces to protect from splashes, and ensuring good airflow. Pre-wet the tile slightly to reduce suction that can pull cleaning solutions into the grout during scrubbing. If you’re sealing later, plan the workflow so you can complete cleaning, rinse, and drying before applying the sealant. A tidy prep area minimizes accidental damage and helps you track progress across large surfaces.
Cleaning Agents and Grout Types: What to Use
Choose cleaners that are specifically designed for tile and grout and avoid harsh acids on cementitious grout. A pH-neutral cleaner is generally safe for most cement-based grouts, while epoxy grout may tolerate slightly more robust cleaners but still benefits from gentler products. For dirty grout lines, a soft nylon brush and a microfiber cloth typically provide the best results without scratching the grout. If you are unsure about your grout type, test a small, inconspicuous area first before proceeding with the full job. This reduces the risk of discoloration or surface damage.
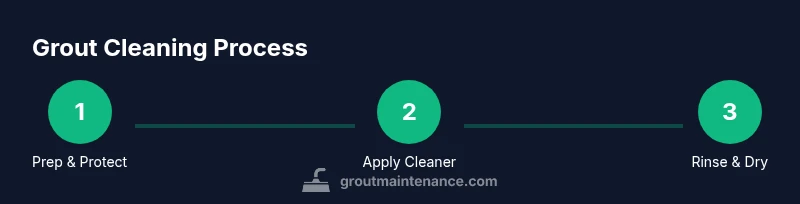
Step-by-Step Overview for Cleaning While Applying
The cleaning phase should be integrated into the grouting process rather than treated as a separate aftercare task. Begin with a light mist of water and a neutral cleaner on grout lines, then scrub with a nylon brush to remove surface dust and haze. Rinse with clean water and wipe with a microfiber cloth to prevent streaks. For difficult stains, apply a second pass with a slightly more concentrated cleaner, then rinse again. Allow the grout to dry partially before testing color and proceeding to sealing.
Scrubbing Techniques for Best Results
Use gentle, circular motions with a soft-bristled nylon brush to avoid grinding grout into the joint. Let the bristles do the work rather than applying heavy pressure; hard scrubbing can abrade the grout surface and create rough patches. Pay attention to corners and along tile edges where grime tends to accumulate. Rinse frequently to prevent redepositing dirty water into the joints. If you notice haze or film, switch to a fresh cloth and re-rinse the area before proceeding.
Rinsing and Drying: Getting It Right
After cleaning, rinse grout lines thoroughly with clean water to remove all cleaner residues, which can hinder curing and sealing. Wipe down surfaces with a microfiber cloth to remove trapped moisture and allow the grout to air-dry in a well-ventilated space. Avoid sealing until the grout is fully dry; sealing damp grout can trap moisture and lead to cloudiness or mold growth. If time allows, a full 1–2 hour drying window can improve results, especially in humid environments.
Sealing Timing and Application Considerations
Sealing grout should be scheduled after the grout has fully dried per the manufacturer’s instructions. A clean and dry surface ensures the sealant bonds uniformly, preventing patchy color or incomplete coverage. If you seal too early, moisture can become trapped beneath the sealant, leading to hazing or discoloration. Plan your cleaning, drying, and sealing sequence so there is no overlap that could compromise the finish. Grout sealing is a crucial step for long-term stain resistance and moisture management.
Patch Testing and Color Considerations
Before committing to a full cleaning and sealing plan, perform a patch test on a small, inconspicuous area to confirm color-fastness and adhesion. Different cleaners can slightly alter grout color or sheen, so it’s essential to verify you’re satisfied with the result on a hidden spot. If you’re changing grout color or sealing with a tinted product, confirm compatibility and drying times with the product label. Patch testing saves you from surprises after the sealant is applied on a large scale.
Maintenance After Application: Keeping Grout Looking New
Ongoing maintenance reduces the frequency of deep cleanings and helps preserve readability and color. Wipe up spills promptly, use a pH-neutral cleaner for routine cleaning, and re-seal as recommended by the grout manufacturer or sealant product you choose. Periodic inspection of the grout joints for cracks or gaps allows early repair, which is easier and more affordable than regrouting a large area. Grout Maintenance emphasizes consistent care as a core part of tile upkeep.
Safety, Ventilation, and Environmental Notes
Work in a well-ventilated area to minimize inhaling cleaner fumes and dust. Wear gloves, eye protection, and a mask if you’re sensitive to cleaning agents. Keep cleaning products out of reach of children and pets, and never mix cleaners, especially ammonia-based products with chlorine bleach. Dispose of rinse water in accordance with local waste guidelines. A careful, methodical approach keeps the process safe and effective for you and your home.
Troubleshooting Stubborn Stains and Haze
If stains persist or a cloudy haze forms, re-clean the area with a fresh batch of pH-neutral cleaner and a nylon brush, paying particular attention to the joints. You may need to repeat rinsing and drying steps to ensure clear grout lines. For deep-seated stains, consult grout manufacturer guidelines or consider replacing the affected grout if necessary. Avoid aggressive scraping or acidic cleaners that can damage the grout surface. This methodical, measured approach reduces the risk of damage while achieving a cleaner result.
Authoritative Sources and Further Reading
For additional guidance on grout care and safe cleaning practices, refer to sources from regulatory and educational institutions. The EPA provides general cleaning and environmental advice, while OSHA offers safety guidelines for handling cleaning chemicals in work areas. University extension resources (EDU) can provide practical grout maintenance tips tailored to home projects. These external references supplement practical, hands-on guidance from Grout Maintenance and reinforce best practices for durable, clean grout.
Practical Takeaway Checklist
- Start with a clean workspace and pre-wet the tile to reduce suction.
- Use a pH-neutral cleaner and a nylon brush for grout lines.
- Rinse thoroughly and wipe dry to prevent residue and hazing.
- Test color-fastness on a small patch before full-scale cleaning.
- Wait for full drying before sealing to ensure even coverage.
Tools & Materials
- pH-neutral grout cleaner(Suitable for cementitious grout; avoid acidic cleaners on most grout types)
- nylon scrub brush(Soft bristles to avoid scratching grout; size varies by tile area)
- microfiber cloths(Lint-free; use damp for rinsing and dry for buffing)
- spray bottle(For applying cleaner evenly over grout lines)
- bucket(For rinsing water; change water frequently to avoid redepositing dirt)
- sponge or grout sponge(Helpful for wiping larger areas and smoothing excess grout during sealing prep)
- protective gloves(Wash hands after use; choose nitrile or latex depending on sensitivity)
- eye protection(Safety first when spraying cleaners and handling tools)
- ventilation mask(Use if you are sensitive to cleaning fumes or working in poorly ventilated spaces)
- grout sealer (compatible with grout type)(Plan sealing for after grout dries per manufacturer guidelines)
Steps
Estimated time: 60-90 minutes active; 2-4 hours drying time before sealing (varies by environment)
- 1
Prep workspace and grout lines
Clear the area, protect adjacent surfaces, and lightly dampen tile edges to reduce cleaner suction. This makes it easier to control the cleaning solution and prevents water from spreading into areas you don’t want affected. A tidy workspace speeds up the entire process.
Tip: Have your cleaning solution already mixed and ready to apply so you don’t pause mid-task. - 2
Apply cleaner to grout lines
Mist or lightly spray the cleaner along the grout lines. Avoid soaking the entire surface; focus on the joints to minimize water in the tile edge and reduce runoff. Let the cleaner dwell for 2–3 minutes to loosen grime.
Tip: For stubborn spots, apply a second light pass rather than a heavy, prolonged dwell. - 3
Scrub grout with nylon brush
Use a nylon brush in small circular motions, working the cleaner into the pores of the grout. Keep the brush moving to avoid wearing away grout at the edges. Periodically rinse the brush to prevent redepositing dirt.
Tip: Let bristles do the work; applying too much pressure can wear down the grout surface. - 4
Rinse and wipe excess
Rinse grout lines with clean water from a sprayer or sponge, then wipe with a microfiber cloth to remove residue. Avoid leaving soapy film which can hinder curing and sealing.
Tip: Rinse from the top down to avoid pooling in joints. - 5
Inspect and repeat if needed
Check lines for remaining stains or haze. If needed, repeat the cleaner application and scrubbing steps on problem areas. Dry areas before moving on to the next section.
Tip: Don’t rush; repeating a light cleaning pass yields better results than forcing a single strong pass. - 6
Dry thoroughly before sealing
Allow grout to dry completely according to product guidelines. If the room is humid, use a fan to expedite drying. Sealing over damp grout can trap moisture and cause hazing.
Tip: Check for a dry, powdery feel on the surface as a simple dryness indicator. - 7
Patch test before full sealing
Test a small area to confirm color and finish after cleaning and drying, ensuring no adverse reactions before applying sealant to the full surface.
Tip: Use a color-safe test spot that mirrors the majority of the area. - 8
Apply sealer after full dry
Follow sealer instructions, applying evenly with a clean applicator or cloth. Allow the sealer to cure without foot traffic or moisture to achieve consistent protection.
Tip: Work in small sections to maintain even coverage and avoid streaks.
Got Questions?
Do I need to clean grout before sealing?
Yes. Clean grout thoroughly so sealer can penetrate evenly. Allow grout to dry completely per product label before applying sealer.
Yes. Clean first, then seal once the grout is dry.
Can I use vinegar or bleach on new grout?
Acidic cleaners can degrade cementitious grout and cause discoloration. Prefer pH-neutral cleaners for routine cleaning.
Avoid acidic cleaners on fresh grout.
How long should I wait before cleaning after applying?
Wait for the grout to cure as per the product label before cleaning. Follow manufacturer guidance to avoid affecting adhesion.
Wait until the grout has cured per the product label.
Is steam cleaning safe on grout?
Steam can push moisture into grout and weaken the bond; use standard cleaning methods first and reserve steam for non-grout areas if necessary.
Steam isn’t usually recommended for new grout.
Should I test on a small patch before full cleaning?
Yes. Test a small, inconspicuous area to confirm color-fastness and product compatibility before full use.
Always test a small area first.
What tools are essential for cleaning grout during applying?
Essential tools are a nylon brush, microfiber cloth, spray bottle, and a pH-neutral cleaner. Optional: sponge and control mats.
Have the right tools ready before you start.
Watch Video
The Essentials
- Follow a prep-first approach for best results
- Choose pH-neutral cleaners for grout safety
- Dry thoroughly before sealing to ensure even coverage
- Patch test to verify color-fastness
- Maintain ventilation and safety precautions throughout