How to Get Grout Stain Off Tile: A Practical Guide
Learn proven methods to remove grout stains from tile surfaces, with safe cleaners, step-by-step techniques, and prevention tips to keep grout pristine.

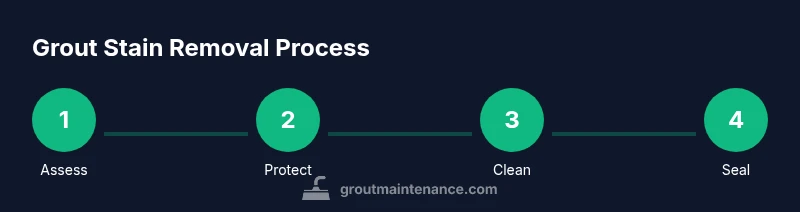
Get grout stains off tile quickly and safely with a plan that matches the stain type. Identify whether the stain is mineral, organic, or mold-related, choose a grout-safe cleaner, test it first, then scrub the grout lines with a dedicated brush, rinse, and repeat as needed. For stubborn marks, try a mild oxygen-bleach treatment and seal afterward.
Why grout stains happen and how to approach removal
Grout’s porous, cement-based structure tends to absorb spills, minerals, and mold spores faster than tile. The best removal approach depends on the grout type (cementitious vs epoxy) and the stain category. Before you attack, verify compatibility between cleaner and grout to avoid etching or discoloration. According to Grout Maintenance, most stains respond best to careful, surface-safe cleaners rather than harsh solvents. Stains on light-colored grout are especially noticeable, so start with milder products and test in an inconspicuous area.
Grout vs tile: knowing your materials
Tile itself is relatively non-porous, but grout sits between tiles and is typically more absorbent. Cementitious grout (sand-based) will absorb liquids and dyes more readily than epoxy grout, which is more resistant but may still stain. When choosing cleaners, avoid harsh acids on cementitious grout and never assume all epoxy grout is immune—test cleaners first and follow tile manufacturer recommendations. Understanding these differences helps you select the right cleaner and scrubbing method for your surface.
Pre-clean evaluation: stain type and grout type
Identify the stain category as mineral, organic, or mold-related. Mineral stains come from hard water, mineral deposits, or iron; organic stains include coffee, tea, and food dyes; mold/mildew appears as dark, fuzzy growth. Confirm grout type by checking installation records if possible, or perform a small test patch with your chosen cleaner to observe any adverse reactions. This step prevents wasted effort and potential damage to tile.
Safe prep and safety considerations
Before you begin, put on gloves and eye protection, and ensure good ventilation. Lay down a plastic sheet or old towels to protect adjacent surfaces, and keep cleaners away from metal fixtures to prevent corrosion. If using bleach or oxidizing agents, never mix with ammonia or vinegar simultaneously, as dangerous gases can form. Clean in a well-lit area so you can see the stain’s true color and progress.
Common stain types and best cleaning methods
Organic stains (coffee, tea, food residue) respond well to hydrogen peroxide or oxygen bleach combined with a mild dish soap base. Mineral deposits from hard water are often best tackled with a paste of baking soda and water or a non-chlorine bleach designed for grout. Mold and mildew typically require hydrogen peroxide or a borax solution and thorough rinsing to remove spores. Epoxy grout, while more resistant, still benefits from gentle, non-abrasive cleaners to avoid scratching the surface.
Step-by-step method for mineral and organic stains
Prepare your area: remove loose debris and protect nearby surfaces. Mix a cleaning solution suitable for your grout type (e.g., oxygen bleach with warm water or hydrogen peroxide 3% with a bit of dish soap). Apply to the grout lines and scrub with a stiff nylon grout brush or old toothbrush, working in small sections. Rinse thoroughly with clean water, and repeat if the stain persists. Dry with a microfiber cloth and check for remaining color. If needed, repeat the process, but avoid over-wetting to prevent grout seepage.
Specialty stains: mold, mildew, epoxy grout
Mold and mildew require a stronger oxidizing cleaner and proper ventilation. For epoxy grout, avoid abrasive or acidic cleaners that could dull the surface; instead, use a
Dealing with tough stains: baking soda paste, oxygen bleach, hydrogen peroxide
Create a paste with baking soda and water (about 3:1 ratio by volume) and apply to the stain. Let sit for 5–15 minutes, then scrub and rinse. For organic or darker stains, apply hydrogen peroxide (3%) directly to the grout, wait 5–10 minutes, scrub, and rinse. Oxygen bleach options require following label instructions and a longer dwell time in a well-ventilated area. Always test first.
Rinsing, drying, and testing results
Rinse with plenty of clean water after each treatment to remove residue. Dry the grout with a microfiber cloth, then inspect under bright light. If stain returns, repeat the appropriate method once more, then switch to a sealing step to prevent future staining. Document which method worked best for future reference.
Sealing and maintenance to prevent future stains
Once grout is clean and completely dry (usually 24–48 hours), apply a grout sealer appropriate for cementitious or epoxy grout. Sealing creates a protective barrier that reduces dye absorption and makes future cleaning easier. Maintain a regular cleaning routine with non-abrasive cleaners and re-seal as recommended by the grout and tile manufacturers. Grout maintenance is easier when stains are caught early and surfaces are kept dry.
Troubleshooting and when to call a pro
If stains persist after multiple, careful attempts, or if the grout shows cracking, crumbling, or extensive discoloration, consult a professional. Regrouting or epoxy grout repair may be necessary for long-term stain resistance and tile integrity. Always test products in an inconspicuous area before applying to larger sections.
Authoritative guidance and further reading
For safety and best practices, consult authoritative sources before chemical cleaning: • https://www.epa.gov/mold (Mold cleanup and prevention) • https://www.cdc.gov/mold/dampness_growing_homes.html (Mold and dampness guidance) • https://www.wbdg.org/ (Building regulates best practices and materials guidance). These resources provide general guidelines that complement DIY grout cleaning and maintenance.
Tools & Materials
- baking soda(For paste with water to create a mild abrasive cleaner.)
- white vinegar(Use cautiously; avoid on natural stone and check grout type.)
- hydrogen peroxide (3%)(Effective for organic stains; test first.)
- oxygen bleach (sodium percarbonate)(Safe for colorfast grout; follow label.)
- mild dish soap(For gentle cleaning as needed.)
- grout brush(Stiff nylon bristles; comfortable handle.)
- old toothbrush(Small area scrubbing for detail work.)
- sponge(Dabs and rinses; avoid leaving residue.)
- microfiber cloths(For drying and final wipe-down.)
- spray bottle(Mix cleaning solutions safely.)
- gloves(Protect skin during cleaning.)
- eye protection(Optional but recommended when handling cleaners.)
- bucket(For rinsing and dilution.)
- grout sealer(Optional, for post-clean maintenance.)
- pH-neutral tile cleaner(Backup option for sensitive tiles.)
Steps
Estimated time: 45-90 minutes active, plus 24-48 hours for sealing to cure.
- 1
Prepare the area and protect yourself
Clear the workspace, lay towels to catch drips, and wear gloves and eye protection. Ventilate the area well if using oxidizers or bleach. This reduces exposure to fumes and prevents damage to surrounding surfaces.
Tip: Set up a dedicated workspace so you don’t contaminate adjacent grout or tile. - 2
Test cleaners in a hidden spot
Apply a small amount of cleaner on an inconspicuous grout spot to check for discoloration or damage. If no adverse reaction occurs after a few minutes, you can proceed with confidence.
Tip: A small patch test saves time and preserves grout color. - 3
Apply the cleaner to the stain
Dampen the grout with water, then apply your chosen cleaner to the stained lines. Let it sit for 5–10 minutes to loosen the stain without soaking the grout.
Tip: Do not allow cleaner to dry on the grout; re-wet as needed. - 4
Scrub with a grout brush
Scrub along the grout lines with a firm, even stroke, focusing on stained sections. Use the old toothbrush for tight corners.
Tip: Move in a circular pattern to lift embedded particles. - 5
Rinse thoroughly
Rinse the area with clean water to remove all cleaner and loosened debris. Repeat if necessary until the rinse water runs clear.
Tip: Moisture left behind can reinstate staining; thorough rinsing is essential. - 6
Inspect and repeat if needed
Check for remaining stain. If persistence persists, repeat the cleaner application and scrubbing steps once more before moving to sealing.
Tip: Limit repeats to avoid over-scrubbing that can wear grout. - 7
Dry and evaluate
Dry with microfiber cloths and inspect under bright light. A dry surface makes staining more visible and helps you judge results.
Tip: A dry surface shows true grout color and texture. - 8
Seal (optional but recommended)
Apply a grout sealer suitable for your grout type after the surface is fully dry. Follow the sealer’s instructions for cure time and reapplication schedule.
Tip: Sealing reduces future staining and simplifies maintenance.
Got Questions?
Can I use bleach to remove grout stains?
Bleach can whiten or discolor grout; it’s not ideal for colored or epoxy grout. Prefer oxygen bleach or hydrogen peroxide and test first.
Bleach can damage color and grout, so test first and consider oxygen bleach instead.
Will vinegar damage grout?
Acidic vinegar can erode some cementitious grout and dull tile glaze. If you use vinegar, do so only on non-porous grout and always dilute heavily, testing first.
Vinegar can hurt grout, so use sparingly and test before widespread use.
Is heat or steam safe for grout?
Excessive heat or steam can loosen or crack grout, especially older cementitious grout. Use cool to warm water and avoid direct steam on grout lines.
Be careful with steam—the heat can damage grout over time.
How long after cleaning should I seal grout?
Wait 24–48 hours after cleaning and drying before sealing to ensure no moisture remains and the grout has stabilized.
Seal after the grout is completely dry and stable, usually within a day or two.
Can epoxy grout stains be treated like cement grout?
Epoxy grout is more stain resistant but can still show discoloration from strong cleaners. Use milder cleaners and avoid harsh acids or abrasive scrubs.
Epoxy grout needs gentler care to avoid scratching or dulling the surface.
What’s the best way to prevent future grout stains?
Seal cementitious grout after cleaning and keep tiles dry to minimize absorption. Regular non-abrasive cleaning also helps maintain color and integrity.
Seal and clean regularly to keep grout looking new.
The Essentials
- Start with a patch test to protect grout color.
- Use non-abrasive cleaners and dedicated grout brushes.
- Rinse thoroughly and dry—residual moisture invites staining.
- Seal grout after cleaning to greatly reduce future staining.