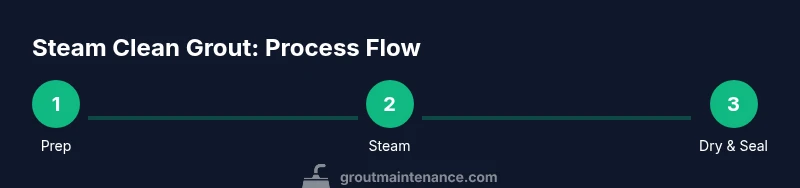
How to Steam Clean Grout: A Practical Guide for Homes
Learn how to steam clean grout safely and effectively with a step-by-step approach, expert tips, and maintenance strategies to keep tilework pristine.

Steam cleaning grout restores brightness and reduces embedded dirt without harsh chemicals. To start, gather a steam cleaner with a grout nozzle, distilled water, microfiber cloths, and a soft grout brush. Follow a steady, overlapping technique, keep the nozzle close but not touching the grout, and pause to wipe away loosened grime.
Why steam cleaning grout is worth it
Steam cleaning grout offers a chemical-free way to lift embedded dirt and mildew from tile joints. For homeowners, this method can save time and effort compared with scrubbing, while reducing the need for harsh cleaners. The Grout Maintenance team found that steam can rejuvenate grout color in many bathrooms and kitchens when used with proper technique and equipment. Before you start, assess the grout’s condition: if the grout is cracked or loose, repair should come first to avoid spreading damage. This approach aligns with practical grout care guidance that keeps tile projects durable and looking fresh.
Safety and prep before steam cleaning
Safety is the foundation of a successful grout cleaning session. Wear protective gloves and eye protection to shield against splashes. Ensure good ventilation, especially if your bathroom is small or poorly ventilated, and keep children or pets away from the work area. Clear the space of loose debris and remove mats or towels that could trap moisture. This prep minimizes slip hazards and helps heat-damage risks stay low. As you prepare, remember that steam works best on clean surfaces; a pre-clean with a dry wipe removes surface dirt and speeds up the process.
Choosing the right steam cleaner for grout
Not all steam cleaners are created equal when it comes to grout care. Look for a unit with adjustable heat, a grout or jet nozzle, and a wide steam head suitable for tight joints. A continuous-fill reservoir reduces downtime between passes, and a microfiber cloth attachment helps absorb loosened grime quickly. If you have large grout areas or multiple bathrooms, select a model with enough power to maintain steady steam without overheating. The right tool makes grout steam cleaning faster and more reliable.
Surface prep and stain identification
Before you apply heat, identify stains or heavy buildup. Lighter, dirtier grout responds well to steam, while deeply set staining may require a pre-treatment with a mild, non-acid cleaner or a baking soda paste. Always test a small, inconspicuous area first to confirm colorfastness and avoid discoloration. Removing loose debris with a dry brush or vacuum eases steam penetration and reduces debris that could clog the nozzle. Proper prep ensures you target only the grime you want to lift.
Step-by-step technique overview for grout lines
Using a grout nozzle, position the steam head roughly 1/4 inch from the grout line. Move in short, overlapping strokes along each joint, pausing briefly on stubborn spots. Wipe the nozzle’s exit path with a microfiber cloth to catch drips and prevent re-deposit. For wider joints, make multiple passes from different angles to ensure all surfaces receive heat. Keep the surface as dry as possible between passes to avoid pooling water in the grout.
Handling different grout types and tile materials
Cement-based grout and epoxy grout respond differently to heat. Steam is generally safer for cementitious grout but may not be recommended for epoxy grout or some natural stone tiles. If your grout is cracked, chipped, or very old, skipped passes may prevent further damage. When in doubt, consult the tile manufacturer’s guidance or an expert from Grout Maintenance to avoid unintended effects. Always test on a small area first before committing to larger sections.
Dealing with mold and mildew
Mold and mildew are common targets for steam cleaning, as heat can kill mold spores on grout surfaces. If you notice persistent growth, you may need to combine steam with light scrubbing and a mild hydrogen peroxide solution afterward. Ensure thorough drying after cleaning, as moisture left behind can promote new growth. For heavy mold, consider professional remediation to supplement your steam-cleaning efforts.
Post-cleaning care: drying and sealing grout
Drying is essential to prevent re-soiling. Use a clean microfiber towel to blot away excess moisture and follow with a fan or open windows to accelerate drying. Once grout is completely dry, sealing helps protect against future stains and moisture ingress. Use a sealer compatible with your grout type and apply according to the manufacturer’s directions. Regular sealing can extend the life of grout between deep cleans.
Pros and cons vs traditional cleaners
Steam cleaning removes surface grime without relying on harsh chemicals, reducing chemical exposure in homes. It is particularly effective for high-traffic areas with light to moderate buildup. However, steam may be less effective on very deep stains or hard-to-reach areas unless you combine it with targeted scrubbing. Balancing steam with gentle manual cleaning often yields the best overall results for grout upkeep.
Maintenance routine to extend grout life
Set a regular cleaning cadence to prevent heavy buildup: weekly quick wipe-downs for showers and kitchens, with monthly steam sessions for grout lines in high-use areas. Immediately address spills on grout to avoid staining, and re-seal grout every 1-2 years or as recommended by the sealer manufacturer. Keeping up with routine maintenance reduces the effort needed during deeper cleanings and preserves the tile’s appearance.
Troubleshooting common issues
If steam leaves behind a cloudy residue, wipe with a dry microfiber cloth and re-pass with a lower steam setting. For stubborn spots, a gentle baking soda paste can be applied and removed with a soft brush before re-steaming. If you notice discoloration or damage after steam, pause and evaluate whether the grout needs repair or replacement. Persistent problems may require professional advice.
Quick-start checklist for your next project
- Verify grout condition and tile compatibility
- Gather a grout nozzle steam cleaner, distilled water, microfiber cloths, and a grout brush
- Test on a hidden area before full use
- Work in small sections with overlapping strokes
- Dry thoroughly and seal after cleaning
- Maintain a regular cleaning schedule for best results
Tools & Materials
- Steam cleaner with grout nozzle(Choose a model with adjustable heat and continuous steam)
- Distilled water(Prevents mineral buildup in the steamer)
- Microfiber cloths(Multiple clean cloths for wiping and drying)
- Soft grout brush or nylon scrub brush(Gentle bristles to avoid scratching)
- Protective gloves(Heat-resistant for hand protection)
- Safety goggles(Protect eyes from splashes)
- Vacuum or shop vac (optional)(Pre-remove loose debris)
- Fan or dehumidifier (optional)(Aid drying time)
- Spray bottle with mild cleaner (optional)(For pre-treatment on tough stains)
Steps
Estimated time: 60-90 minutes
- 1
Prepare area and tools
Clear the work area, remove rugs, and lay towels to catch drips. Inspect grout for cracks and repair any damage if needed. Gather all tools before you begin to minimize interruptions.
Tip: Having everything at arm’s reach keeps the workflow smooth. - 2
Wear safety gear
Put on gloves and goggles. Ensure ventilation by opening a window or turning on a vent fan. This protects you from steam and airborne debris.
Tip: Never skip eye protection when using high-temperature steam. - 3
Fill water and attach nozzle
Fill the steam cleaner with distilled water and attach the grout nozzle. Check that the nozzle is securely connected to prevent steam leaks.
Tip: Use distilled water to reduce mineral buildup in the steam system. - 4
Test on a hidden area
Run a short pass on an inconspicuous tile edge to confirm grout color stability and system performance. Remove any residue from the test area.
Tip: If you notice discoloration, stop and reassess the area. - 5
Begin with lighter sections
Start with clean, lighter grout in low-traffic zones. Move slowly with small, overlapping strokes along each grout line.
Tip: Keep the steam head about 1/4 inch from the grout. - 6
Address stubborn spots
Return to stubborn stains with additional passes. For tough areas, pause briefly to allow heat to work before re-wiping.
Tip: Do not press hard; let the steam do the cleaning. - 7
Proceed to wider joints
Work methodically along wider joints, maintaining consistent pressure and distance to avoid gaps or damage.
Tip: Steady, even strokes yield the best results. - 8
Wipe and inspect progress
After a section cools a bit, wipe away loosened grime with a microfiber cloth. Inspect for any remaining residue.
Tip: Switch to a fresh cloth often to prevent re-deposit. - 9
Rinse or wipe down surfaces
Lightly wipe with a clean cloth to remove any moisture that could pool in grout joints. This reduces splotching and streaks.
Tip: Drying before sealing helps sealant absorb properly. - 10
Dry thoroughly
Use fans or dehumidifiers to speed drying. Do not seal grout until it is completely dry to avoid trapping moisture.
Tip: Aim for a dry time of several hours in humid rooms. - 11
Apply sealant after drying
If your grout requires sealing, apply a breathable grout sealer according to the manufacturer’s instructions. Recoat as needed for best protection.
Tip: Seal in a well-ventilated area to avoid inhaling fumes. - 12
Final inspection and maintenance plan
Check for any remaining stains and plan a routine maintenance schedule. Record when you last sealed grout for reference.
Tip: Consistent maintenance prevents heavy buildup over time.
Got Questions?
Is steam cleaning grout safe for all tile types?
Steam cleaning is generally safe for most cementitious grout and ceramic tiles when used with the proper nozzle and settings. Avoid epoxy grout unless the manufacturer confirms compatibility. Always test a small area first.
Steam cleaning is usually safe for common tiles and cement grout, but check epoxy grout and test a small area first.
Can steam cleaning remove mold from grout?
Steam can kill many mold spores on grout surfaces and help lift mildew. For persistent mold, combine steam with mild cleaners and consider professional remediation if it recurs.
Steam helps with mold and mildew, but persistent growth may need extra methods or professional help.
Do I need to seal grout after steaming?
Sealing after the grout is completely dry helps protect against moisture and stains. Follow the sealer’s instructions, and re-seal as recommended by the manufacturer.
Seal grout once it’s fully dry to keep it looking clean longer.
How long does grout take to dry after steam cleaning?
Drying times vary with humidity but typically range from a few hours to half a day. Use a fan or dehumidifier to speed up the process in damp spaces.
Drying usually takes several hours; use a fan to speed it up.
Should I use chemical cleaners with steam?
In most cases, steam alone is effective for routine cleaning. If you need added cleaning power, opt for mild cleaners compatible with your grout type and always rinse afterward.
Steam usually works best by itself; add mild cleaners only if needed and compatible.
What nozzle is best for grout cleaning?
A dedicated grout nozzle or jet nozzle helps concentrate heat on joints and improves agitation without impacting the surrounding tile.
Use a grout-specific nozzle for best results.
Watch Video
The Essentials
- Plan and prep thoroughly before steam cleaning.
- Use a grout nozzle and overlapping strokes for best results.
- Dry and seal grout after cleaning to extend life.
- Choose the right steam cleaner compatible with your grout type.
- Shift to maintenance routines to minimize deep cleanings.