Is It Hard to Grout Tile? A Practical DIY Guide
Find out if grouting tile is hard and learn practical steps, tools, and sealing tips from Grout Maintenance. Perfect for homeowners and DIY enthusiasts seeking reliable grout care guidance.

Is it hard to grout tile? For most homeowners, grouting is approachable with proper prep, the right grout type, and a straightforward process. Start by cleaning joints, choosing unsanded or sanded grout appropriately, and using a rubber float. With patience and accuracy, you can achieve professional-looking results.
Is Grouting Tile Hard? What to Expect
Grouting tile is often perceived as a daunting task, but with the right approach, it becomes a manageable home project. The Grout Maintenance team has seen that most people can achieve solid, durable joints when they start with clean, dry surfaces and a clear plan. The real difficulty lies in surface prep, choosing the correct grout type, and maintaining a steady hand during the application. Joints that are dusty or contaminated increase the chance of crumbling grout or an uneven finish. For showers and wet areas, extra care with water exposure and curing times is essential. In practice, the question isn’t whether grouting is hard; it’s whether you have the right expectations and the right tools. Grout types (sanded vs. unsanded vs. epoxy) influence difficulty because some formulations require more precise mixing and longer cure times. A well-lit workspace and clean-up station drastically reduce frustration. Reading this ahead of time sets you up for success and helps you avoid common pitfalls.
Types of Grout and When They Matter
The most common choices for homeowners are cement-based sanded grout for wide joints and unsanded grout for narrow joints. Epoxy grout is more stain-resistant but requires different mixing and longer curing. The Grout Maintenance analysis highlights that selecting the right grout based on joint width, tile type, and exposure (bathroom vs. backsplash) can prevent cracking and staining. Always check product data sheets for water absorption and curing times. In bathrooms, epoxy grout can simplify maintenance but often demands more careful handling and cleanup. If you’re grouting over existing grout, ensure it’s sound and thoroughly scraped; loose material can cause failure. Using a color-matched grout also reduces the visibility of minor imperfections.
Tools, Materials, and Surface Preparation
This section outlines what you’ll need before you begin and why.
- Grout (sanded or unsanded as needed)
- Rubber grout float
- Sponge and clean water bucket
- Grout sealer (if using cement grout) and a sealant applicator
- Utility knife or grout saw for cleanup
- Protective gloves and eyewear
- Clean rags or microfiber cloths
- Knee pads and a steady work surface
Surface prep is critical. Remove all old caulk, clean mold or mildew, and ensure joints are completely dry. A dull blade can remove old grout from joints without damaging tiles. Vacuum and wipe loose dust to ensure the grout bonds well. If you’re sealing after grout, plan the timing according to product labels. This step reduces the chance of pinholes and efflorescence.
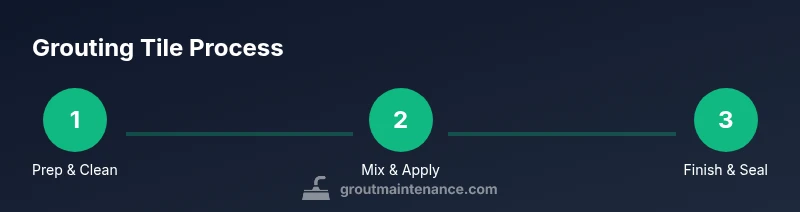
Step-by-Step Overview for Grouting Tile
This high-level overview gives you a practical sense of the workflow before you dive into the detailed steps. Start with a small area to build confidence, work in sections to prevent the grout from drying too quickly, and clean up as you go. The step-by-step guide that follows will break this into precise actions, but knowing the sequence helps you stay organized and reduce errors. Remember to work with steady, even pressure and to keep your joints evenly filled. Grout lines should be fully filled, but avoid pushing grout into areas you intend to grout later to minimize cleanup. If you’re ever unsure, consult Grout Maintenance resources for product-specific tips.
Common Mistakes That Add Time and Stress
Common mistakes include mixed grout that’s too dry or too runny, over-wiping, and letting grout dry on the tile surface. Using a dirty or dried sponge can leave a chalky film, making sealing and cleaning harder later. Another frequent error is not allowing proper curing time before sealing, which traps moisture and can weaken the grout. Always read labeling, follow recommended mixing ratios, and test a small area first. If you encounter a stubborn stain, avoid bleach-based cleaners on epoxy grout unless the product explicitly allows it. Small imperfections can be corrected with a damp sponge and a light touch, but major errors are best handled with regrouting.
Sealing, Cleaning, and Maintaining Grout
Sealing cement-based grout after curing adds stain resistance and helps long-term maintenance. Penetrating sealers work best when applied to dry joints and after the grout has cured fully. Epoxy grout is more durable and typically does not require sealing, but routine cleaning is still important. Regular cleaning with a neutral pH cleaner helps preserve color and prevent mold growth. If you notice mildew or staining, address it early with a specialized grout cleaner for bathrooms. The Grout Maintenance team recommends periodic inspection of grout lines and resealing every 1-2 years in high-moisture areas. Early intervention saves repair costs later.
When to Call a Pro or Regrout
If multiple joints are cracked, if there’s significant mold penetration, or if you’re dealing with large areas, professional regrouting might be the best path. A professional can assess substrate movement, tile looseness, and grout failures more accurately, and can match grout color across a large area. For DIYers, if you’re unsure about epoxy grout’s handling or large surfaces, consider practicing on a small section first and then expand. The Grout Maintenance team’s verdict is that most renovations benefit from careful planning, proper tools, and a willingness to redo corners that don’t meet your standards.
Tools & Materials
- Grout (sanded or unsanded as needed)(Check joint width; unsanded for joints under 1/8 inch.)
- Rubber grout float(Use a firm, flexible float to press grout into joints.)
- Sponges (non-abrasive)(Use a damp sponge for cleanup and smoothing.)
- Bucket and clean water(For diluting grout and rinsing sponge.)
- Grout sealer(Apply after curing if using cement-based grout.)
- Grout saw or Utility knife(For removing old grout or cleaning joints.)
- Gloves and eye protection(Protect hands and eyes during mixing and cleanup.)
- Towel/rag or microfiber cloth(Wipe excess grout after initial set.)
- Kneepads(For comfortable kneeling during work.)
Steps
Estimated time: Active work 60-90 minutes; total project time 2-4 hours including wait times and cure
- 1
Prepare the joints and surface
Clear the area and remove old grout or debris. Ensure tiles are immobile and the surface is dry. This foundation helps grout bond properly and reduces later cracking.
Tip: Dry joints help grout adhere; wipe away moisture and dust before mixing. - 2
Mix grout to correct consistency
Follow the product’s guidelines to achieve a peanut-butter-like consistency. Too dry makes it crumbly; too wet causes shrinking and color variation.
Tip: Avoid over-watering; mix in small batches and test a small amount. - 3
Pack grout into joints with a float
Hold the float at a 45-degree angle and press grout into the joints, twisting slightly for a compact fill. Scrape off excess grout from tile surfaces.
Tip: Work in small sections to prevent skinning of grout. - 4
Remove excess grout and smooth joints
After about 10-20 minutes, wipe the tile surface with a damp sponge in a circular motion. Rinse sponge frequently to avoid spreading residue.
Tip: Don’t over-wipe; you want grout to remain in joints. - 5
Cure time before final cleaning
Let grout cure as per product instructions, usually 24-72 hours before heavy cleaning. Protect area from water during this time.
Tip: Avoid foot traffic or water exposure during cure. - 6
Seal (optional) and finish
Apply a penetrating sealer only after grout has cured; follow instructions for dwell time and remove any residue. Epoxy grout often doesn’t require sealing.
Tip: Seal in a well-ventilated area and wipe away excess sealer.
Got Questions?
Is grouting tile difficult for beginners?
No—grouting can be beginner-friendly when you plan, prep, and work in small sections. Use the right grout and follow the manufacturer's instructions, and you’ll get solid joints.
Grouting tile is doable for beginners with good prep and the right tools.
What grout type should you choose for bathroom tile?
For most bathrooms, unsanded or sanded cement-based grout works well depending on joint width. Epoxy grout is more durable but requires careful mixing and longer cure times.
In bathrooms, unsanded or sanded cement grout is common, with epoxy grout as an option if you want extra durability.
How long before you can seal grout?
Cement-based grout typically needs to cure for 72 hours or as recommended by the product before sealing. Always check product label instructions.
Seal after the grout has fully cured, usually a few days, per product instructions.
Can you grout over old grout?
Grouting over existing grout is possible if the old grout is sound and clean. If there are cracks or crumbling areas, remove those sections before grouting.
If the old grout is intact and clean, you can grout over it; otherwise, remove bad areas first.
Do I need to seal all grout?
Sealing is typically recommended for cement-based grout, especially in damp areas. Epoxy grout generally does not require sealing.
Seal cement-based grout in damp areas; epoxy grout usually doesn’t need sealing.
What should I do if grout cracks after install?
Small cracks can be repaired with spot re-grouting. Widespread cracking may indicate substrate movement; reassess tile anchoring and consider professional help.
If cracks appear, start with spot re-grouting and check for movement in the substrate.
Watch Video
The Essentials
- Grouting tile is doable with proper prep and tools
- Choose the right grout for joint width
- Work in sections and clean as you go
- Seal or maintain grout to extend life