Oxygen Bleach for Grout: A Safe, Effective Cleaning Guide
This Grout Maintenance guide explains how to safely use oxygen bleach for grout, including prep, application, timing, and sealing tips for clean, bright grout.

You can safely clean grout with oxygen bleach for grout by mixing it with warm water to form a cleaning solution, applying it to grout lines, letting it sit briefly, then scrubbing with a stiff brush and rinsing thoroughly. Test a small area first, protect surrounding surfaces, and avoid mixing with ammonia or acids.
What oxygen bleach for grout is and how it works
Oxygen bleach for grout is a non-chlorine cleaner based on sodium percarbonate that releases oxygen when exposed to moisture. The released oxygen helps lift organic stains, soap scum, and mildew from the porous grout joints without the strong chlorine smell. For homeowners, this translates to a safer, milder option that can brighten grout lines while protecting adjacent tiles. According to Grout Maintenance, when used correctly it is often gentler on color grout and skin compared with chlorine bleach, provided you follow basic safety steps.
In practice, the fizzing action penetrates the cementitious matrix and loosens deeply embedded dirt. The process is especially effective in bathrooms and kitchens where soap buildup and organic stains accumulate. It does not rely on harsh chlorine to whiten grout, so it typically avoids yellowing in white or light grout. However, every grout type (sand-and-cement vs epoxy, for example) reacts differently; always start with a small test area and avoid long dwell times on delicate surfaces.
Color and porosity matter: light-colored grout tends to show the brightest results, while darker grout may require additional passes for a uniform look. Never mix oxygen bleach with ammonia, acids, or other cleaners that can release harmful gases. Work in a well-ventilated area, wear gloves, and protect nearby metal or wood finishes.
When to use oxygen bleach on grout
Use oxygen bleach for grout primarily to remove organic stains, soap scum, and mildew that remain after routine cleaning. It is well suited for showers, backsplashes, and tile floors in kitchens where moisture and organic material are common. Grout Maintenance notes that oxygen bleach can brighten grout lines without the harsh odor of chlorine and is safer for color variations in many homes.
It is not a miracle cure for every stain: deep-set mineral staining or sealant damage may require regrouting or replacement. Epoxy grout, in particular, can respond differently to oxidizing cleaners, so always test first on a small area. If you’re trying to restore brightness to an aged grout, oxygen bleach is often the first and simplest step before deciding on more aggressive options.
Safety and surface testing before you begin
Before applying any cleaner, prepare the space: remove loose debris, protect surfaces, and ventilate. Do a colorfastness test on an inconspicuous grout joint by applying a small amount of oxygen bleach solution or paste and waiting 5-10 minutes. If there is any color change, skip that area or reduce dwell time. Wear protective gloves and eye protection, and consider a mask in poorly ventilated bathrooms. Do not mix with ammonia or acids, which can release dangerous gases. Grout Maintenance recommends performing a spot test in multiple areas if possible to prevent widespread damage.
Mixing, applying, and soaking: methods you can use
Typically you’ll apply the cleaner as a solution or a paste, depending on the stain severity. Dissolve the oxygen bleach in warm water until it forms a clear solution, or create a thicker paste for spot cleaning. Apply to grout lines with a sponge to keep the surrounding tiles dry, and let it sit for several minutes to allow the chemical action to work. For very stubborn grime, reapply and re-soak as needed, but avoid letting the product dry on the surface. The goal is to maintain moisture long enough for the oxygen to lift the dirt without over-wetting nearby surfaces.
Scrubbing, rinsing, and drying for best results
Scrub grout lines with a dedicated grout brush or an old toothbrush, using a gentle back-and-forth motion. Work along the length of each joint and pay attention to corners and patterns in mosaic tiles. After scrubbing, rinse with clean water and wipe away any residue with a sponge. Allow the grout to dry completely—use fans or open windows to speed drying. This step prevents new dirt from soaking into damp grout while the joints stabilize.
Maintenance after cleaning: sealing and long-term care
Once grout is dry, assess whether sealing is appropriate for your grout type. Sealing can help resist future staining and mildew, particularly in high-moisture areas like showers. If you seal, choose a grout sealer compatible with your tile and grout material and follow the manufacturer’s instructions. Regular maintenance should include routine cleaning with a pH-neutral cleaner to preserve the grout’s color and seal, and periodic deep cleaning with oxygen bleach as needed.
Troubleshooting common issues with oxygen bleach
If staining recurs after the first pass, repeat the cleaning cycle with fresh solution. Some dark colors may appear uneven immediately after cleaning; rinse thoroughly and allow full drying before evaluating color balance. If grout shows whitening after use, you may have over-dwelled; revert to shorter dwell times or perform spot treatments rather than whole-grout cleaning. For persistent mildew, consider ventilation improvements or additional cleaning cycles.
Color and material considerations: grout types and sealers
White or light gray cementitious grout responds well to oxygen bleach, often restoring brightness without altering color. Epoxy grout, polyblend mixes, or dense stone tile can react differently, so always test first. If you have pre-mixed colorant or dyed grout, test in a hidden spot and be prepared to re-color or re-seal after deep cleaning. Sealing after cleaning is a recommended step to protect color and resist future staining.
Real-world tips and best practices you can trust from Grout Maintenance
Plan your cleaning in sections to avoid over-wetting large areas. Use non-abrasive brushes for most surfaces, and reserve stiffer tools for tougher stains only. Keep a damp cloth handy to wipe away overflow quickly. Document the process with photos to track color changes over time, especially in bathrooms with mineral buildup. Grout Maintenance suggests keeping oxygen bleach away from plants and using proper disposal methods for any leftover solution.
Tools & Materials
- oxygen bleach powder (sodium percarbonate)(Follow product directions; avoid mixing with ammonia or acids.)
- warm water(Used to dissolve the powder or form a paste.)
- bucket(For mixing and soaking.)
- stiff-bristle grout brush(For aggressive cleaning along joints.)
- old toothbrush or small brush(For corners and tough angles.)
- sponge or microfiber cloth(For applying and rinsing.)
- protective gloves(Wear to protect skin during cleaning.)
- safety goggles(Protect eyes from splashes.)
- ventilation mask (optional)(Use in poorly ventilated areas.)
- spray bottle (optional)(Helpful for applying solution to large areas.)
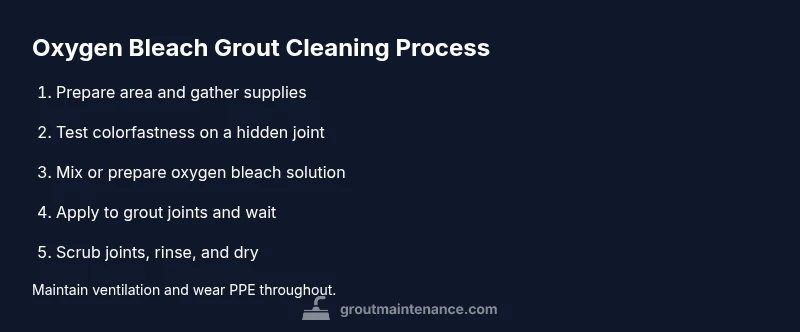
Steps
Estimated time: 60-90 minutes
- 1
Prepare area and gather supplies
Clear the space and assemble all tools and cleaners before you start. Protect nearby surfaces with plastic sheeting or towels to catch splashes. This reduces cleanup time and prevents staining on adjacent tiles.
Tip: Have a water source nearby to rinse frequently without moving around the room. - 2
Test a color-sensitive area
Choose a small, inconspicuous grout joint and apply a small amount of the prepared oxygen bleach solution or paste. Wait 5-10 minutes and inspect for color change. If no change, you can proceed with confidence.
Tip: If color shifts, reduce dwell time or skip that area to avoid damage. - 3
Mix or prepare the cleaning paste
Dissolve the oxygen bleach in warm water until the solution is clear, or whip up a thicker paste for stubborn spots. The goal is a workable consistency that stays on grout without running onto tiles.
Tip: Warm water helps dissolution, but avoid boiling temperatures that could irritate skin. - 4
Apply to grout lines and dwell
Spread the solution or paste along grout lines, keeping adjacent tiles dry. Let it sit for several minutes to activate the oxygen release and loosen grime.
Tip: Do not let the cleaner dry on the surface; re-wet as needed for even action. - 5
Scrub grout lines
Using a grout brush or old toothbrush, scrub along each joint with steady pressure. Focus on corners and areas with soap scum and mildew buildup.
Tip: Use a 45-degree angle and back-and-forth motions to lift embedded dirt. - 6
Rinse and dry
Rinse thoroughly with clean water, removing all cleaner residue. Wipe with a sponge and allow the grout to dry completely. Use a fan or open windows to speed drying.
Tip: Residue can attract dirt if not fully rinsed.
Got Questions?
Is oxygen bleach safe to use on all grout types?
Oxygen bleach is generally safe on many grout types when used as directed, but always test first, especially on epoxy or dyed grout which may react differently.
Oxygen bleach works for many grouts, but test first because epoxy or dyed grout can react differently.
Will oxygen bleach remove mildew and mold stains from grout?
Yes, oxygen bleach can lift organic mildew and stains from grout, especially in bathrooms and kitchens. For stubborn mold, repeat treatments may be needed.
It helps lift mildew, but some stubborn mold may need a second treatment.
Can I use oxygen bleach on colored or dark grout without whitening it?
Color grout can lighten with oxygen bleach in some cases. Always test first and limit dwell time to minimize color loss.
Color grout might lighten; test first and keep dwell time short.
How long should I leave the solution on grout?
Typically 5-15 minutes is enough for most stains. Do not let the solution dry on the surface.
Most stains respond in about 5-15 minutes; don’t let it dry.
Do I need to seal grout after using oxygen bleach?
Sealing after cleaning helps protect grout from future staining and mildew. Wait until the grout is completely dry before sealing.
Yes, sealing helps protect against future stains after cleaning.
Is it safe to mix oxygen bleach with other cleaners?
Never mix with ammonia or acids. Use oxygen bleach with water or per manufacturer directions.
Don’t mix with ammonia or acids.
Watch Video
The Essentials
- Test colorfastness before broad use
- Follow product directions and safety guidelines
- Apply as a solution or paste and avoid drying on surfaces
- Rinse thoroughly and dry completely
- Seal grout after cleaning to protect color and longevity