Prospec Polish Grout: DIY Shine Guide
Learn how to prospec polish grout to restore color, ease cleaning, and seal for lasting shine. Grout Maintenance provides practical, expert guidance for DIY homeowners.

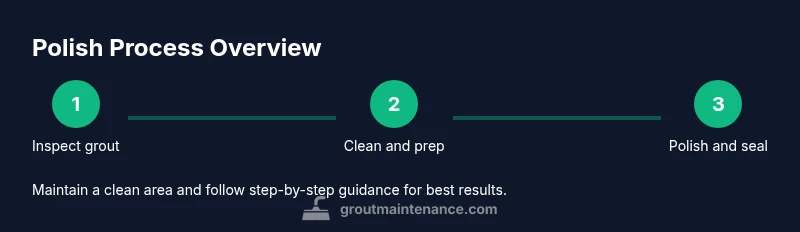
You can restore grout shine by following a structured prospec polish grout routine: clean thoroughly, apply a grout polish, and seal for protection. This quick-start guide shows the key steps, tools, and safety practices to get durable results with minimal risk. Follow the process described to reduce staining and simplify future cleaning.
Why Prospec Polish Grout Elevates Your Tilework
According to Grout Maintenance, a thoughtful prospec polish grout routine can restore color, resist stains, and simplify routine cleaning. When grout looks dull or darkens with moisture, a polish sequence—clean, polish, seal—can create a uniform, showroom-ready appearance without expensive replacements. In this section, we explore why this method matters, the science behind why some grouts accept a shine, and realistic expectations for shade restoration and long-term performance. The goal is to empower homeowners to make informed choices about cleaning agents, finishing products, and maintenance schedules that maximize tile longevity. This approach prioritizes safety, practicality, and reproducible results across common household grout lines.
Understanding the Basics: What is prospec polish grout?
Prospec polish grout is a polishing-oriented approach that uses a dedicated grout polish product to restore color and highlight the natural texture of cementitious grout. While it can improve appearance, it is not a substitute for proper cleaning or sealing. Epoxy grout behaves differently than cementitious grout, and some products are formulated specifically for one type or the other. This block lays the groundwork for understanding product compatibility, the roles of cleaners, polishes, and sealers, and what homeowners should expect in terms of finish and durability. The key is to manage expectations and follow product instructions for best results.
Prep Before You Polish: Safety, Tests, and Setup
Preparation matters as much as the polish itself. Start by testing a small, inconspicuous area to verify compatibility with your grout type and tile surface. Ensure the work area is well ventilated and that you wear safety goggles and gloves. Protect surrounding tiles and finishes with painter’s tape or towels. By planning a controlled test and setup, you can avoid unexpected discoloration or residue migration during the polishing step.
Tools and Materials: What You Need
A well-chosen set of tools makes prospec polish grout easier and safer. Essential items include a pH-neutral cleaner, a soft-bristle brush, microfiber cloths, a sponge, and the grout polish product designed for your grout type. Protective gear is important, including safety goggles and gloves. Keep a bucket of warm water handy for rinsing and a drying towel to ensure grout is completely dry before sealing. Optional items like masking tape and drop cloths help protect adjacent surfaces.
Step-by-Step Overview: What You’ll Do
The polishing workflow can be broken into prep, cleaning, applying the polish, buffing, curing, and sealing. Begin with a thorough cleaning to remove surface grime, then apply the prospec polish grout evenly across the joints using a brush or cloth. Buff off excess product with a clean microfiber cloth in circular motions until you achieve a uniform sheen. Finally, allow the product to cure according to the manufacturer’s guidance before applying a grout sealer for added protection.
Finishing Touches: Sealing and Maintenance
Sealing after polishing helps lock in the shine and protect against future staining. Use a sealer compatible with your grout type and follow the application directions exactly, including any required curing time before the first use of the tiled area. Daily maintenance should involve gentle cleaning with a pH-neutral cleaner and avoiding harsh acids that can degrade the finish. With proper sealing and routine care, prospec polish grout can stay bright for longer, reducing the need for frequent touch-ups.
Troubleshooting and Common Pitfalls
If staining returns or the grout looks streaky, re-evaluate the prep steps and ensure the surface was completely dry before sealing. Incompatibility between polish and grout type can cause uneven appearance, so verify compatibility with the grout manufacturer. Avoid using aggressive scrubbing tools that can wear down the surface; instead, repeat the gentle cleaning and polishing cycle as needed.
Real-World Results and Maintenance Expectations
Homeowners who consistently follow prep, polish, and seal steps often report noticeable improvements in grout brightness and stain resistance. Results vary with grout porosity, tile color, and traffic patterns. Regular maintenance—gentle cleaning and periodic resealing—helps maintain the shine and extend the life of the grout appearance.
Tools & Materials
- Safety goggles(Protect eyes from splashes and dust.)
- Nitrile gloves(Keep hands dry and protected.)
- N100 mask or respirator (if ventilation is poor)(Use when cleaners emit strong fumes.)
- pH-neutral grout cleaner(Avoid acidic cleaners that can damage cementitious grout.)
- Soft-bristle brush(Gentle enough to avoid scrubbing grout away.)
- Microfiber cloths(For buffing and drying without lint.)
- Sponge and bucket of warm water(Rinse and remove residues effectively.)
- Prospec polish grout product(Product designed for grout polishing in your chosen grout type.)
- Grout sealer(Seal after polishing according to product label.)
- Painter’s tape and drop cloths(Protect adjacent tiles and fixtures.)
Steps
Estimated time: 60-120 minutes active time; cure times vary by product
- 1
Assess grout condition and plan
Survey the grout lines for cracks, loose grout, and deeply stained areas. Decide if polishing is appropriate or if repairs are needed first. Document any high-traffic zones where results may wear sooner.
Tip: Take before photos to compare after results. - 2
Protect surrounding surfaces
Cover adjacent tiles and fixtures with tape or drop cloths. This prevents accidental exposure to cleaners or polish and keeps other surfaces pristine.
Tip: Use multiple layers of drop cloths for protection on larger projects. - 3
Clean the grout thoroughly
Use a pH-neutral cleaner and a soft-bristle brush to remove surface grime. Rinse well and allow grout to dry completely before applying polish.
Tip: Damp grout can dilute polish; ensure dryness before application. - 4
Apply prospec polish grout
Apply the grout polish evenly along joints using a brush or microfiber applicator. Work in small sections to maintain control and ensure even coverage.
Tip: Follow product directions for the amount and dwell time. - 5
Buff and remove excess product
Buff with a clean microfiber cloth in circular motions until the surface shines and there is no visible residue on the tile surface.
Tip: Use fresh cloths to avoid re-depositing residue. - 6
Allow to cure before sealing
Let the polish cure per the product label before applying sealer. Curing times vary; do not rush the process.
Tip: Ventilate the area to speed up curing and avoid fumes. - 7
Seal the grout
Apply a compatible grout sealer evenly across joints. Allow the sealer to cure as recommended before exposing the area to moisture.
Tip: Wipe off excess sealer to avoid hazing on tile surfaces. - 8
Check results and plan maintenance
Inspect the shine and uniformity after sealing. Schedule routine cleanings with a pH-neutral cleaner and reseal as needed based on wear.
Tip: Keep a maintenance log for future reference.
Got Questions?
What is prospec polish grout?
Prospec polish grout refers to a polishing approach using a grout-specific polish product to restore color and brightness to cementitious grout. Always verify product compatibility with your grout type and tile surface before proceeding.
Prospec polish grout is a polishing method using a dedicated grout polish to brighten cementitious grout, checked for compatibility with your grout type.
Is it suitable for epoxy grout?
Epoxy grout behaves differently from cementitious grout and requires products formulated for epoxy. Check the polish product label for compatibility with epoxy grout to avoid dulling or residue.
Epoxy grout needs epoxy-compatible products; always check the label before using a polish on epoxy grout.
How long does the shine last?
Durability depends on traffic, cleaning regimen, and porosity. With proper sealing and maintenance, you can expect longer intervals between re-polishing, but results vary by installation.
The shine lasts longer with proper sealing and maintenance, but duration varies based on traffic and grout type.
Can I polish grout myself, or should I hire a pro?
Many homeowners can complete a successful prospec polish grout project with the right tools and strict adherence to product instructions. For large areas or uncertain grout types, consider consulting a pro or testing a small area first.
DIY is possible with the right products; for large jobs or uncertain grout types, start with a test area or hire a pro.
What safety precautions should I take?
Wear safety goggles and gloves, ensure good ventilation, and avoid mixing cleaners that may react negatively with your grout. Follow label directions closely and keep kids and pets away from the work zone.
Wear eye protection, gloves, and ventilate the area; follow product directions and keep kids away during work.
Do I need to seal after polishing?
Yes. Sealing after polishing provides extra protection against stains and moisture. Use a sealer compatible with your grout type and follow the curing times specified by the manufacturer.
Sealing after polishing is recommended to protect the shine; use a compatible sealer and follow cure times.
Watch Video
The Essentials
- Prepare the area and protect adjacent surfaces.
- Thoroughly clean and dry grout before polishing.
- Apply prospec polish grout evenly and buff to a uniform shine.
- Seal grout after polishing for lasting protection.
- Follow product cure times and maintain with gentle cleaners.