Wet vs Dry Grout: A Comprehensive Practical Tile-Care Guide
Grout Maintenance analyzes wet grout vs dry grout, outlining pros and cons, sealing guidance, maintenance steps, and when to regrout for long-lasting tile care.

Wet grout vs dry grout highlights a fundamental trade-off for tile care. Wet grout cures with moisture, offering a potentially tighter seal but risking mold growth if moisture isn’t controlled. Dry grout dries faster and is easier to clean, yet sealing and uniform color must be managed carefully in damp areas. This comparison explains when each approach shines and common pitfalls to avoid.
Wet vs Dry Grout: Core Concept
In tile work, the phrase wet grout vs dry grout captures a fundamental decision about moisture, curing, and long-term performance. The primary difference is moisture content during installation and curing. Wet grout uses higher moisture during setting, which can help with compaction and initial sealing, but requires careful moisture management to prevent mold or efflorescence. Dry grout uses lower moisture, dries quickly, and can feel grittier if not packed; it often shows more texture and can be easier to clean when sealed properly. In this guide by the Grout Maintenance Team, we break down why one approach may be preferable depending on room, climate, and maintenance plan. For homeowners, the choice affects sealing schedules, cleaning routines, and long-term tile aesthetics. The term wet grout vs dry grout recurs across tile projects, emphasizing how moisture control intertwines with grout color selection, tile type, and substrate conditions.
The Chemistry and Curing Process
Grout is typically cementitious; water drives the chemical reaction that hardens the mix. With wet grout, extra moisture can help the cement hydrate completely, creating a dense matrix, but it also introduces moisture into the grout bed. If mold-prone environments exist or ventilation is poor, moisture can linger, contributing to musty odors, staining, and mildew growth. Dry grout uses a drier mix and relies on rapid water loss to set. This changes curing dynamics: the grout may finish with a lighter sheen and less surface moisture, which some homeowners prefer for visibility of joints. The Grout Maintenance analysis, 2026, underscores that proper curing conditions and ventilation play a larger role than the chosen moisture level alone. Regardless of method, temperature and humidity influence cure time and final hardness, so plan installation for a dry period or use fans and dehumidifiers to optimize results.
Practical Scenarios: Bathrooms, Kitchens, Showers
In bathrooms and showers, humidity is a constant factor; yet many installations use wet grout to reduce voids and gaps in irregular substrates. The risk is that excess moisture can become trapped if grout is not sealed or if grout is damaged by movement or cracking. Kitchens and entryways, by contrast, may benefit from dry grout when the area is less exposed to direct moisture, provided you seal thoroughly and maintain a dry routine. We highlight case studies from typical DIY projects and professional installations and show how the location dictates the moisture strategy. Grout Maintenance's practical recommendations emphasize testing moisture tolerance with a simple paper towel method and verifying grout hardness before sealing. The ultimate goal is to balance moisture management with your tile layout, ensuring cleanable joints and lasting color consistency.
Sealing, Staining, and Cleaning Considerations
Sealing is often the most critical step following either method. Wet grout may require deeper sealing to prevent moisture infiltration, while dry grout benefits from a consistent seal to guard against staining and color mismatches. The choice of sealant (water-based vs solvent-based) interacts with grout porosity and cement type. Cleaners for wet grout should target biofilm and efflorescence prevention, using pH-neutral formulas that won't degrade the grout. Dry grout cleaning emphasizes avoiding abrasive tools that can mineralize the clay; microfiber cloths and soft brushes often suffice. A well-sealed system reduces maintenance burdens, minimizes mildew risk, and preserves tile color uniformity. The Grout Maintenance team notes that maintenance routines should be adapted to the grout's moisture exposure and the tile surface, not solely the preferred method.
Durability and Longevity: Which Lasts Longer?
The answer depends on environmental exposure and maintenance. Wet grout can liquefy slightly during high humidity if not properly sealed, potentially increasing micro-cracks and resealing frequency. Dry grout has less bound moisture and can perform well in dry climates but may be more susceptible to cracking if the substrate shifts or if joints are poorly filled. Longevity improves with proper surface preparation, substrate flattening, and uniform joint depth. Both methods benefit from consistent maintenance and periodic re-sealing. Grout Maintenance data shows that long-term success hinges on moisture management, adequate ventilation, and timely repair of any hairline cracks before they widen.
Maintenance Routines for Both Types
Daily maintenance includes sweeping debris, wiping with a damp microfiber cloth, and avoiding harsh acidic cleaners that can degrade grout. For wet grout installations, schedule more frequent inspections of caulk lines, grout edges, and corners where moisture collects. Use non-abrasive cleaners and rinse thoroughly to remove residue that can trap moisture. For dry grout installations, be mindful of staining and color changes; sealing after curing is essential, and re-sealing intervals may be longer if the grout is less porous. Both approaches benefit from a planned cleaning calendar, using pH-balanced products and avoiding bleach when possible, as it can alter color or degrade some sealants. Grout Maintenance's recommendations emphasize testing for dampness and inspecting joints during seasonal changes.
Installation and Finishing: Best Practices for Each
During installation, moisture content should align with the product's instructions. For wet grout, ensure proper mixing ratios, thorough compaction, and removal of extra grout slurry before cure begins to minimize efflorescence. For dry grout, work in small sections, press the cementitious powder firmly, and use consistent joint depth. Finishing touches include smoothing joints, cleaning excess grout promptly, and applying a compatible sealer after a complete cure. The goal is uniform color and a tight, durable joint. Both methods benefit from test patches on a small area to ensure color and texture match with the tile.
Common Myths About Wet vs Dry Grout
Myth 1: Wet grout is always stronger. Reality: strength comes from the cement matrix and curing, not solely moisture. Myth 2: Dry grout is always easier to seal. Reality: coverage and porosity matter; some dry grouts seal well with the right product. Myth 3: Sealing eliminates all moisture risk. Reality: sealing reduces moisture movement but cannot fix existing mold or cracks. Grout Maintenance reinforces that moisture, substrate, and ventilation determine performance more than the label wet or dry.
How to Decide: A Step-by-Step Checklist
- Step 1: Assess moisture exposure in the space.
- Step 2: Check substrate flatness and joint depth capability.
- Step 3: Choose sealing strategy based on porosity and tile type.
- Step 4: Plan ventilation and humidity controls for cure.
- Step 5: Schedule maintenance windows and cleaning routines.
Comparison
| Feature | Wet Grout | Dry Grout |
|---|---|---|
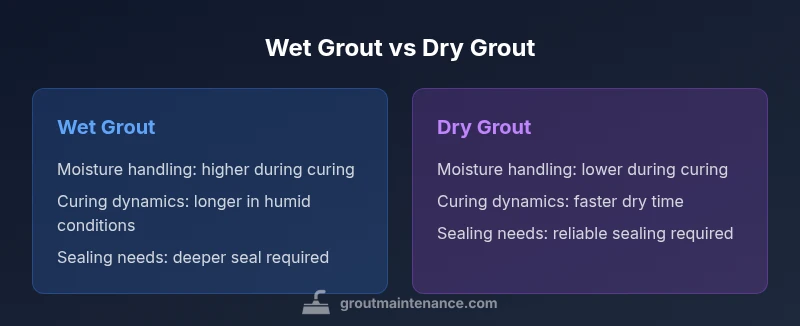
| Moisture handling | Better with controlled moisture during curing | Lower moisture, relies on proper sealing |
| Curing dynamics | Longer cure in humid conditions | Quicker cure with less moisture |
| Sealing needs | Often requires deeper sealing to prevent moisture ingress | Requires reliable sealing to prevent stains |
| Maintenance frequency | Higher vigilance for mold in damp spaces | Lower maintenance if properly sealed and kept dry |
| Best for | Moist, high-humidity environments with good ventilation | Dry, low-humidity spaces with robust sealing |
| Common use areas | Showers, baths, steam rooms | Kitchens, powder rooms, dry walls |
Pros
- Potentially tighter initial seal when moisture is properly controlled
- Easier leveling and smoothing during application with moisture aid
- Sealing strategy can be tailored to space with either method
What's Bad
- Moisture retention increases mold and mildew risk in poorly ventilated spaces
- Dry grout can be harder to seal evenly on textured tiles
- Improper curing or sealing undermines durability in both methods
Neither method is universally best; choose based on space, moisture exposure, and maintenance plan.
In consistently damp areas, wet grout with strict moisture control and sealing performs well. In drier spaces, dry grout with thorough sealing and light maintenance offers easier upkeep. Grout Maintenance's verdict is to tailor the approach to your environment and maintenance routine.
Got Questions?
What is the main difference between wet grout and dry grout?
Wet grout uses higher moisture during curing, potentially sealing better but with moisture risks; dry grout uses less moisture, cures faster, and requires solid sealing to prevent stains. Both require proper ventilation.
The main difference is moisture during curing: wet grout seals well when ventilated, but mold risk exists without proper ventilation.
In a humid bathroom, which grout method should I choose?
In humid spaces, wet grout can perform well if you manage moisture and seal correctly; otherwise, dry grout with excellent sealing and ventilation is safer.
In humidity, seal and ventilate; either method works with good moisture control.
Can I switch from wet grout to dry grout after installation?
You typically cannot simply switch once cured; it usually requires removing and regrouting. Consider planning the moisture strategy before starting.
Switching grout types isn’t practical—regrouting is usually required.
How does sealing affect moisture management for wet vs dry grout?
Sealing reduces moisture movement for both methods, but wet grout benefits more from a thorough, compatible sealant in damp spaces.
Seal well to reduce moisture movement, especially with wet grout.
What maintenance steps reduce mold risk in wet grout installations?
Ventilate spaces well, clean with pH-balanced products, dry any spills promptly, and inspect joints for cracks to prevent mold growth.
Ventilate, clean gently, and inspect regularly to curb mold in wet grout setups.
The Essentials
- Assess moisture exposure before choosing grout method
- Seal promptly and correctly to minimize stains and mold
- Ventilation is critical for wet grout performance
- Maintenance routines drive long-term results more than the chosen method
- Test a small area before committing to a full installation