zep cleaning grout: a practical DIY guide
Learn how to clean grout using Zep and comparable cleaners with practical steps, tools, safety tips, and sealing guidance from Grout Maintenance.

By using a gentle grout cleaner, a stiff brush, and a thorough rinse, you can restore dingy grout. For best results, start with a pH-neutral cleaner and consider a product like Zep cleaning grout. This quick guide outlines the exact steps, tools, and precautions to keep tile joints bright and protected.
Why Cleaning Grout Matters
Keeping grout clean is essential for both appearance and hygiene. Over time, dirt, soap scum, and mineral deposits build up in the tiny pores between tiles, which can lead to discoloration and mold growth. Regular maintenance reduces staining, prolongs tile life, and makes deep cleanings easier. According to Grout Maintenance, a proactive grout care routine saves time and preserves grout integrity, especially in high-traffic areas like kitchens and bathrooms. In this guide, we explore why a routine clean matters, how pH-neutral cleaners work, and how to choose products such as Zep cleaning grout without risking tile damage. You’ll learn practical, DIY-friendly steps you can perform in a weekend to restore grout brightness and keep it looking fresh.
Understanding Zep Cleaning Grout and Similar Products
Zep cleaning grout is part of a family of grout cleaners designed to break down soap scum, hard water deposits, and organic stains in tile joints. When selecting a cleaner, most homeowners prefer pH-neutral formulas that are gentle on grout and tile while still effective. The Grout Maintenance team notes that while brand names vary, the key is to follow label directions, test on a small area first, and avoid cleaners with highly acidic or bleach-heavy formulations on delicate surfaces. For many projects, a standard grout cleaner from a reputable brand, used as directed, will yield noticeable improvements in color and brightness. If you choose Zep or similar products, use them in well-ventilated areas and rinse thoroughly to prevent residue buildup.
Grout Types and Stains: What Changes Cleaning Strategy
Grout comes in several formulations (sanded, unsanded, epoxy, cement-based) and colors that respond differently to cleaners. Epoxy grout is tougher and water-resistant but can be stained by aggressive acids. Cement-based grout, common in DIY projects, stains more readily and benefits from slower dwell times and gentle scrubbing. Color-matched grout is particularly sensitive to strong cleaners that may alter shade. Before cleaning, identify grout type and perform a small patch test in an inconspicuous corner. The goal is to remove surface grime without eroding the binder or causing color changes.
Safety and Prep: Protecting You and Your Tiles
Safety first. Ventilate the area well and wear gloves and eye protection to prevent skin and eye irritation. Remove nearby decor, lay down drop cloths, and cover metal or wood surfaces that could corrode from cleaning solutions. If you are unsure about grout age or composition, perform a patch test in a hidden area and wait to confirm no discoloration. Grout that is older or previously sealed may respond differently, so proceed gradually and observe results. According to Grout Maintenance, using PPE and working in small sections reduces risk while maximizing control over the cleaning process.
Tools and Materials You’ll Need
A quick inventory keeps you efficient. You’ll want a stiff-bristled grout brush, a spray bottle or dab applicator, a bucket for rinsing, a sponge or microfiber cloth, safety gloves, and protective eyewear. Optional items include baking soda paste for stubborn stains, old towels for moisture control, and a grout sealer for post-cleaning protection. This section ties into the Tools & Materials list to ensure you have everything ready before you begin.
Pre-Treatment and Spot Stain Assessment
Identify obvious stains and consider pre-treating tough spots with a targeted cleaner. Apply a small amount to the area, rub gently, and check for any color change. If staining persists after an initial pass, repeat in a controlled manner or switch to a gentler cleaner. Patch testing remains essential for color-fastness, especially on darker grout or bespoke tile colors. The goal is to lift surface grime without weakening the grout binder.
Application Techniques by Tile Type
Tile type and grout depth influence technique. For ceramic and porcelain, a standard grout cleaner with a stiff brush often suffices. For very dense cement-based grout, a slightly longer dwell time or a mild paste can improve results. If you encounter bevelled or recessed grout, angle the brush to reach tight corners and work in linear strokes along the grout lines. Always avoid saturating old mortar beds, which can lead to crumbling in extreme cases.
Rinsing, Drying, and Verification
Rinse thoroughly to remove cleaner residue, then wipe dry with a microfiber towel. Residue can attract more dirt or leave a dull film if not removed. Allow grout to dry completely, then inspect for remaining stains or haze. If needed, repeat the cleaning cycle on stubborn spots, but avoid aggressive scrubbing that could damage grout integrity. Verification is key: a clean joint should reveal uniform color and tight mortar lines.
Common Mistakes and How to Avoid Them
Common errors include using highly acidic cleaners on non-specified grout, over-wetting tile surfaces, and skipping patches or tests. Another pitfall is neglecting to rinse thoroughly, which can leave film and attract new grime. Plan multiple passes for heavy buildup and be mindful of older grout that might crumble if treated too aggressively. A methodical approach reduces risk and improves long-term results.
Maintenance Schedule to Keep Grout Clean
Set a routine: light weekly wipe-downs with a mild cleaner, monthly spot treatment for high-traffic areas, and quarterly deep cleans in bathrooms and kitchens. Sealing grout after cleaning adds a protective layer; ensure the grout is completely dry before applying sealer. Regular maintenance preserves color, blocks mold growth, and minimizes the need for harsh restoration work in the future.
When to Call a Pro
Not every project benefits from DIY cleaning, especially if grout is epoxy-based, extensively damaged, or shows signs of large-scale cracking. If color changes persist after multiple cleanings or if you notice crumbling mortar, seek professional help to prevent further damage. A pro can assess grout health and recommend appropriate sealing or re-grouting if necessary.
Tools & Materials
- Stiff-bristled grout brush(Nylon or stiff natural bristles; 2-4 inch head recommended)
- Spray bottle or dab applicator(Contain cleaner solution; label directions followed)
- Bucket for rinsing(Clean water for rinsing; keep separate from dirty water)
- Sponge or microfiber cloth(For wiping and rinsing; avoid leaving lint in joints)
- Safety gloves(Protect skin from cleaners; choose chemical-resistant gloves)
- Safety goggles(Eye protection against splashes)
- Grout sealer (optional)(Apply only after grout is fully dry to 24–48 hours)
Steps
Estimated time: 60-90 minutes plus drying time
- 1
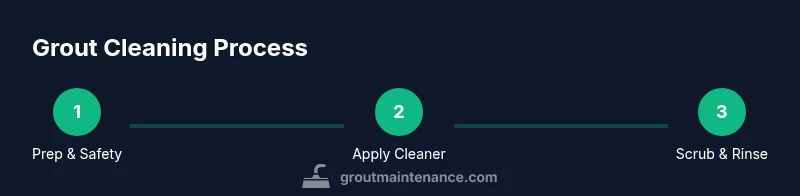
Prepare area and safety
Clear the work zone, cover nearby surfaces, and put on PPE. Remove loose debris from tiles and set up drop cloths to protect floors. Why: proper prep minimizes cleanup and reduces exposure to chemicals.
Tip: Lay a drop cloth and remove nearby items to keep the workspace contained. - 2
Apply cleaner to grout
Apply a controlled amount of cleaner along grout lines using a spray bottle or dab applicator. Work in small sections to avoid runoff and tile oversaturation. Why: targeted application prevents data loss and ensures even coverage.
Tip: Avoid pooling cleaner on the tile faces to prevent slippery slips. - 3
Let cleaner dwell
Allow the cleaner to sit for 5–10 minutes to loosen grime. Do not let it dry on vertical surfaces. Why: dwell time improves stain lift without risking grout damage.
Tip: For very stained grout, a second pass after initial rinse can help. - 4
Scrub grout lines
Scrub along each grout line with firm, vertical or angled strokes to lift embedded grime. Why: mechanical action is essential for removing deep dirt.
Tip: Use long, even strokes to avoid gouging the grout. - 5
Rinse tiles and grout
Rinse thoroughly with clean water, then wipe with a microfiber cloth. Why: residue can attract new dirt and leave a dull haze.
Tip: Rinse from the top down to keep dirty rinse water from re-soaking cleaned areas. - 6
Treat stubborn stains
If stains persist, apply a targeted cleaner or make a gentle baking-soda paste and re-clean. Why: stubborn spots need stronger but controlled intervention.
Tip: Test any paste on a hidden area first. - 7
Dry and seal
Let grout dry completely (24–48 hours) before applying sealer. Apply sealer per label directions in light coats, allowing ventilation.
Tip: Sealants work best on dry grout and may require reapplication after several years.
Got Questions?
What is the best cleaner for dingy grout?
A pH-neutral grout cleaner that’s appropriate for your grout type, used as directed and tested on a small area first, is usually effective. Follow label instructions and ventilate the space.
Choose a pH-neutral grout cleaner and test on a hidden area first.
Can I use bleach on grout?
Bleach can whiten grout but may alter color or damage certain grout types. If you choose to use it, dilute and test first, and avoid mixing with ammonia.
Bleach can help whiten grout, but test first and dilute.
Should I seal the grout after cleaning?
Yes. Sealing helps repel stains and moisture. Ensure grout is completely dry before application and choose a breathable sealer.
Yes, sealing helps keep grout clean after cleaning.
How long should I wait after cleaning before sealing?
Most sealers require 24–48 hours of drying before application. Always follow the sealant label for drying times and curing.
Let the grout dry fully, then seal according to the product directions.
What if the grout is epoxy-based?
Epoxy grout is more resistant to stains and requires milder cleaners. Use cleaners labeled safe for epoxy and avoid aggressive acids; consult a pro if unsure.
Epoxy grout needs gentle cleaners—check product directions or consult a pro.
Watch Video
The Essentials
- Test a small area before full cleaning
- Use a pH-neutral cleaner and follow labels
- Scrub with a stiff brush and consistent pressure
- Rinse thoroughly and dry before sealing
- Maintain grout with regular, scheduled cleanings