Grout Darkener: A Practical Guide for Home Tile Projects
Learn how grout darkeners work, choose the right product, and follow a safe, step-by-step process to deepen grout color while maintaining tile integrity and ease of cleaning.

You can darken grout safely using a grout darkener that slightly colors and seals the grout. Key steps: pick a shade matching your tile, clean and dry grout, apply evenly with a brush or sponge, and wipe excess to avoid staining. Always test on a small area first and follow product instructions.
What grout darkener is and why it matters
Grout darkener is a color-enhancing treatment designed to tint grout joints while also offering a light protective layer. The goal is to restore or shift the grout shade toward a deeper tone without removing tiles or regrouting. For homeowners, this is a practical alternative to a costly replacement or a full grout restoration. According to Grout Maintenance, selecting the right shade and product type matters for achieving a natural look instead of an overly dramatic change. When used correctly, grout darkeners can refresh the appearance of a tiled surface, reduce visible staining from soap scum and mineral deposits, and make routine cleaning feel more effective because the grout appears cleaner for longer. However, a darkener is not a cure-all: it cannot repair structural damage, and results depend on the grout's porosity, existing color, and the tile pattern. In this section, we’ll lay a foundation—what these products do, how they differ, and what you should expect in terms of longevity and maintenance.
How grout darkener works
Most grout darkeners are sealers with added pigment. They penetrate the grout slightly and form a thin film on top, which shifts the perceived color and creates a more uniform appearance. Product types vary: water-based formulas tend to be easier to wipe off, have lower odor, and dry relatively quickly, while solvent-based choices can offer deeper color with longer-lasting wear but require more ventilation and care. The shade range usually spans from one shade darker to a couple of tones darker than the original grout. The color outcome will depend on grout porosity and whether the grout is sanded or unsanded; rougher grout joints absorb more pigment, yielding a darker or more saturated look. A key takeaway: always test on a small, inconspicuous patch before applying to entire joints, and read the manufacturer’s instructions for mixing ratios, application thickness, and cure times. As noted by the Grout Maintenance team, even high-quality products can appear different when used on vintage tiles or darker tile colors, so trialing shade options is essential to avoid surprises.
When to use grout darkener and who should avoid it
Grout darkeners are well-suited for grout that has faded, yellowed, or stained due to mineral buildup, cleaning products, or natural aging. They work best on grout that is light-colored where the contrast with tile makes changes noticeable. They’re also useful when you want a uniform appearance across a large area with multiple tile sizes or patterns. Avoid applying a darkener if the grout has extensive cracking, crumbling, or visible mold that penetrates deeply; in such cases, color will not hide underlying damage and you may need to address structural issues first. Additionally, avoid use on epoxy grout, as the resin-based material may react differently than cementitious grout. The takeaway is to evaluate grout condition, tile type, and the allowed shade options before choosing a product. If in doubt, perform a test on a small section to see how the shade looks under your lighting and with your cleaning routine.
Choosing the right product
Selecting the right grout darkener requires matching the product to grout type (sanded vs unsanded), existing grout color, and the desired final shade. Decide between water-based vs solvent-based formulations: water-based are generally user-friendly, have fewer fumes, and are easier to clean up; solvent-based products can produce deeper colors but require good ventilation and longer cure times. Look for products labeled safe for your grout type and surface, and beware of formulations that claim to seal and color in one step if your grout is still porous. Shade selection is subjective; consider starting with a lighter shade in a test area and evaluating under both daylight and artificial lighting. Some products apply in a single coat while others demand multiple thin coats; understand the recommended coverage per square foot and the expected fade or color shift over time. Finally, check whether the product explicitly mentions being able to darken dark grout further or only slightly intensify color. Our recommendation from Grout Maintenance is to choose a tested, reputable brand and avoid off-brand products that do not specify compatibility with your grout type.
Preparing the grout for darkening
Proper prep is essential for even results and durability. Start by removing all surface grime from the grout lines with a neutral cleaner and a soft brush; avoid acidic cleaners that can erode cementitious grout. Rinse well and allow grout to dry completely, ideally for 24 hours in a cool, dry room. If you have sealed grout previously, review the sealer’s compatibility with the darkener; some products require a bare grout surface for best absorption. Protect surrounding tiles and stone with painter’s tape or masking paper if you are concerned about accidental staining. Finally, do a small patch test in a hidden area to ensure you understand how the shade will look when dry, since wet vs dry appearance can vary.
Application guidelines and common mistakes
In applying the product, use the recommended tool—often a small brush or sponge applicator—working grout lines in small sections. Apply a thin, even coat and avoid saturating the joints; thick coats can produce uneven color and longer cure times. After application, wipe away any excess from tile faces before it dries, using a damp sponge. Allow the product to cure for the time specified by the manufacturer; this can vary from a few hours to a full day. Once cured, inspect for streaks or patchy spots and reapply only to affected areas if needed. Do not rush the curing process, as incomplete drying can lead to color variability or peeling. If your grout lines are wide and deep, consider applying a second, lighter coat to achieve a consistent tone.
Maintenance after darkening
Grout darkened color can visually stay fresh longer with routine care. Use a mild,
Tools & Materials
- Grout darkener product (water-based or solvent-based)(Choose shade compatible with tile and grout color; read label for compatibility with sanded/unsanded grout)
- Sponge or fine brush/applicator(Non-abrasive tools recommended to avoid grinding grout surface)
- Nitrile gloves(Protect skin from chemicals and dyes)
- Ventilated workspace or mask(Ventilation is important for solvent-based formulas)
- Neutral cleaner(Used for initial grout cleaning before applying darkener)
- Microfiber cloths(For polishing and wiping excess product)
- Masking tape(Optional protection for surrounding tiles)
- Water and bucket(For cleaning and rinsing during prep and cleanup)
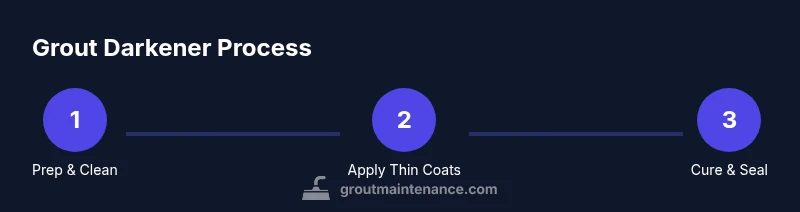
Steps
Estimated time: 60-120 minutes active work; cure times per product instructions (often 2-24 hours)
- 1
Inspect and test shade
Inspect grout lines for damage and select a test patch area. Choose a shade close to the final look you desire and apply a small amount to a hidden joint. Observe color change as it dries to set expectations.
Tip: Always test on an inconspicuous area and compare under both daylight and artificial lighting. - 2
Prepare workspace and materials
Clear the area, lay down drop cloths, and gather your tools. Ensure good ventilation if using solvent-based products, and wear gloves to protect skin.
Tip: Open windows or use a fan to maintain airflow during application. - 3
Clean and dry grout thoroughly
Remove dirt, soap scum, and efflorescence with a neutral cleaner and a soft brush. Rinse with clean water and allow grout to dry completely (often 24 hours in a dry room).
Tip: Dry grout completely to avoid trapping moisture under the darkener. - 4
Apply the darkener in thin coats
Using your sponge or brush, apply a uniform, thin coat along each grout line. Work in small sections to maintain control and minimize drips.
Tip: Avoid saturating joints; thick coats can cause uneven color and longer cure times. - 5
Wipe away excess from tile faces
Immediately wipe off any pigment that strays onto tile surfaces with a damp cloth or sponge. Excess pigment can leave halos that are hard to remove after drying.
Tip: Keep a damp sponge handy to catch drips before they dry. - 6
Allow curing per manufacturer guidance
Let the darkener cure undisturbed according to the label—this can range from a few hours to an entire day. Avoid cleaning or heavy traffic during this period.
Tip: Do not rush curing; premature exposure can affect color uniformity. - 7
Inspect and seal if advised
Review the final color under different lighting. Some products require a sealer for additional protection; others do not. Apply sealant only if specified by the product instructions.
Tip: If sealing, follow curing times between application and sealant use.
Got Questions?
What is grout darkener and why should I use it?
A grout darkener is a pigment-enhancing sealer that deepens grout color and adds a protective layer. It’s used to refresh faded grout and create a uniform appearance, not to fix structural problems.
A grout darkener is a pigment-sealer that deepens grout color and adds protection. It refreshes grout and creates a uniform look, but doesn’t fix structural damage.
Will a grout darkener stain adjacent tiles or stone?
When applied carefully and wiped promptly, the risk to adjacent tiles is low. Always protect surrounding surfaces and perform a patch test. Clean up spills quickly to minimize staining.
If you apply it carefully and wipe away spills quickly, it’s unlikely to stain nearby tiles. Always test first and protect surrounding surfaces.
Can I use grout darkener on epoxy grout?
Epoxy grout behaves differently from cementitious grout. Some darkeners are not compatible with epoxy grout, so check the product label or consult the manufacturer before applying.
Some grout darkeners aren’t compatible with epoxy grout. Always check the product label or contact the maker before use.
How long does the color last after applying a grout darkener?
Durability depends on product formulation and usage. Reapplication is often recommended after several months to a few years, especially in high-traffic areas or kitchens and bathrooms.
Color lasts vary; many require reapplication every few months to years depending on wear and washing.
Should I seal after applying a grout darkener?
Some products include sealing properties, while others require a separate sealer. Follow the product instructions to determine if additional sealing is needed.
Some products seal automatically; others need a separate sealer. Check the instructions for your specific product.
What preparation steps improve color evenness?
Thorough cleaning and complete drying of grout prior to application are crucial. Any residual moisture or grime can cause uneven color or blotches.
Clean and dry the grout completely before applying color for the best, even result.
Watch Video
The Essentials
- Test shade on a hidden area before full application
- Clean and dry grout thoroughly for even color
- Apply thin coats and wipe excess promptly
- Cure fully per product instructions before use
- Follow sealing guidance if required by product