Grout Dye Guide: Color-Refresh Grout Safely
Learn how to dye grout to refresh tile grout, with prep, dye types, application steps, sealing, and maintenance. Practical, DIY-friendly guidance for homeowners.

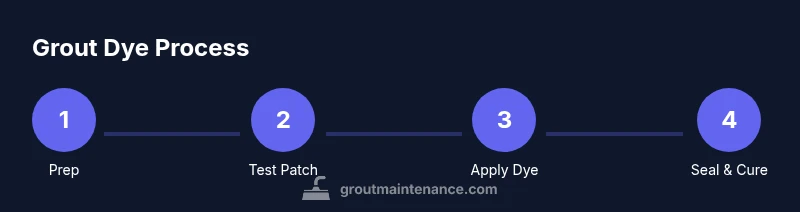
Grout dye lets you refresh tile grout with a new color without removing existing grout. According to Grout Maintenance, grout dye can restore a uniform look and extend tile life. This guide covers choosing the right dye, testing color, prepping surfaces, applying evenly, and sealing for durability, so you can achieve a professional finish with minimal mess. This approach is ideal for renovations and color refreshes.
What grout dye is and when to use it
Grout dye is a colorant formulated to penetrate and tint the cementitious material in grout joints without removing the grout. It’s a practical option when grout has faded, stained, or developed discoloration that staining or sealing alone cannot fully correct. Dyeing grout is especially useful for reviving old white grout to a brighter shade or changing a color to better match new tile or decor. While not a substitute for re-grouting in extreme cases, dye can save time, reduce mess, and extend the life of your tile installation. This approach is popular in kitchens and bathrooms where high traffic and moisture can dull grout tones over time.
A well-executed dye job creates a uniform appearance across all joints, hides staining, and refreshes the overall look of the room. It’s important to recognize that grout dye sits on the surface of the grout and may wear more quickly in high-traffic areas or where aggressive cleaning methods are used. For best results, choose a dye compatible with your grout type (sanded vs unsanded) and follow the manufacturer’s instructions closely.
Types of grout dye: epoxy-based vs water-based
Grout dye options generally fall into two categories: epoxy-based and water-based dyes. Epoxy-based dyes tend to be highly durable and stain-resistant, making them a solid choice for showers and damp environments. They require careful mixing and longer curing times, but their hard-wearing film resists water and mildew better than many water-based dyes. Water-based dyes are more forgiving for DIY projects, with easier application and quicker cleanup; however, they may wear down faster in areas with heavy foot traffic or frequent cleaning.
When selecting a grout dye, consider the grout porosity, tile location, and the expected cleaning regimen. Sanded grout is slightly rougher and may affect dye absorption differently than unsanded grout. Always test a small, inconspicuous area first and verify color-fastness after curing. Grout Maintenance notes that matching the dye to your grout type improves longevity and evenness (Grout Maintenance Analysis, 2026).
Color selection and colorfastness expectations
Choosing the right color is more than picking a shade you love. Consider the tile color, room lighting, and the existing grout line size. Lighter colors can reveal cleaning imperfections, while darker colors may accentuate grout texture. The goal is to achieve uniform coverage that looks natural over time. Colorfastness depends on the dye chemistry, sealing, and how well the surface was prepared. In general, expect a refreshed look that remains vibrant if properly sealed and cleaned with non-abrasive methods.
Before finalizing a color, compare swatches in both daylight and indoor lighting to see how the hue shifts. Remember that the final appearance can look slightly different once the dye dries, so perform a patch test in an inconspicuous area and document the result for reference.
Preparation steps before dyeing grout
A successful grout dye project starts with meticulous prep. Begin by cleaning the entire tiled area to remove soap film, mold, mold spores, and mineral deposits. Use a grout-specific cleaner or a vinegar-free cleaner that won’t degrade the grout. Rinse thoroughly and let the grout dry completely—moisture can affect dye absorption and lead to blotchy results. Remove any loose grout from the joints with a small brush and wipe away debris. Finally, protect adjacent tiles and surfaces with painter’s tape and drop cloths to prevent accidental staining during application.
Safety and ventilation considerations
Dye products can emit fumes, and some dyes require solvents that irritate skin and eyes. Work in a well-ventilated area and wear protective gloves, safety glasses, and a mask if recommended by the manufacturer. Keep children and pets away from the work zone. Do not mix cleaners or cleaners with dye in closed spaces; follow the product’s safety data sheet (SDS) for ventilation requirements and disposal guidance. If you have respiratory sensitivities, consider a respirator rated for organic vapors and ensure good cross-ventilation.
Testing color in a small area and shade selection
Always test the dye in a small, hidden area before full application. Apply a thin coat and allow it to cure per the manufacturer’s instructions. Compare the result under multiple lighting conditions to ensure it meets your expectations. Keep a color log of the test patch and note any required adjustments (e.g., deeper shade by layering, or lighter tone by diluting). A patch test is the safest way to prevent surprises after the entire floor or wall has been treated.
Step-by-step dye application overview
Prepare the workspace, protect tiles, and ensure the grout is clean and dry. Apply the dye in thin, even layers along each grout line, using a small brush or applicator to prevent overspill. Wipe excess dye from tile edges immediately with a damp cloth. Allow curing time between coats if multiple passes are required, and avoid heavy cleaning or water exposure until the dye has fully cured. After final cure, gently wipe the surface and inspect for uniform color.
For best results, work in small sections to maintain control and minimize streaks. Work with multiple passes if needed to achieve uniform saturation without pooling in joints.
Aftercare and sealing considerations
Once the dye has cured, apply a grout sealer suitable for the dye type and grout porosity. Sealing helps lock in color and protect against moisture and staining. Follow the manufacturer’s recommended cure times before exposing the grout to moisture. Refrain from aggressive scrubbing for the first 72 hours and use non-abrasive cleaners designed for colored grout. Routine maintenance should include gentle cleaning and re-sealing on a schedule guided by traffic levels and cleaning frequency.
Common mistakes and how to fix them
Common errors include applying dye to damp grout, overapplying in one spot, or not masking adjacent tiles. If color bleed occurs, wipe immediately with a damp cloth and re-treat the affected area after it dries. If color appears uneven, apply additional light coats rather than a single heavy coat. Always work in a ventilated area and follow the dye’s cure times to avoid trapping moisture that can dull color.
Maintenance to extend color life
Regular cleaning with
Tools & Materials
- Grout dye kit (water-based or epoxy-based)(Choose dye type compatible with your grout (sanded vs unsanded))
- Nitrile gloves(Protect skin from dyes and cleaners)
- Microfiber cloths(For wiping spills and buffing)
- Painter's tape(Mask adjacent tiles and edges)
- Small brushes or applicator bottle(Apply dye precisely in grout lines)
- Sponge and clean water(Remove excess dye and rinse)
- Grout sealer compatible with dye(Seal after cure to lock in color)
- Ventilation mask or respirator(Use as directed by dye manufacturer)
- Drop cloths/old towels(Protect floors and fixtures)
Steps
Estimated time: 60-120 minutes
- 1
Prepare workspace
Clear area, lay drop cloths, and ensure you have ample lighting. This keeps the project tidy and reduces mistakes.
Tip: Organize tools within arm’s reach before starting. - 2
Mask surrounding tiles
Apply painter’s tape along tile edges to prevent dye bleed onto faces of tiles.
Tip: Press tape firmly so there are no gaps. - 3
Clean grout thoroughly
Use a grout cleaner to remove soap scum and deposits. Let grout dry completely before dyeing.
Tip: Rely on a grout brush to reach deep joints. - 4
Test dye on a hidden patch
Apply a small amount to a discreet joint and let cure to verify shade and compatibility.
Tip: Document the test color for later reference. - 5
Mix and prepare dye
Follow manufacturer directions to mix dye with any required activator or reducer.
Tip: Label the mixture and avoid cross-contamination. - 6
Apply dye in sections
Work in small sections, applying thin, even coats along each joint with a fine brush.
Tip: Avoid pooling by brushing along the length of each joint. - 7
Wipe excess dye immediately
Use a damp cloth to wipe dye from tile faces and joints as you go.
Tip: Work back from the edge to prevent drips. - 8
Allow to cure between coats
If multiple coats are needed, wait per manufacturer’s instruction before applying the next layer.
Tip: Do not wash or scrub until fully cured. - 9
Seal after final cure
Apply an appropriate grout sealer once the dye has fully cured to protect color.
Tip: Choose a sealer compatible with your dye and grout type. - 10
Final inspection and cleanup
Check for even color, remove tape, and clean tools. Document any touch-ups.
Tip: Take a before-and-after photo for future reference.
Got Questions?
Is grout dye permanent?
Grout dye provides durable color, but longevity varies with traffic and cleaning. Re-sealing and gentle maintenance extend the color life. Always follow the manufacturer's curing and maintenance guidelines.
Grout dye offers durable color, with longevity depending on use and care. Seal after curing to maximize life.
Can I dye epoxy grout?
Yes, you can dye epoxy grout, but use a dye designed for epoxy grouts and follow the product instructions carefully. Epoxy-compatible dyes tend to be more durable in moisture-prone areas.
You can dye epoxy grout, but pick an epoxy-compatible dye and follow directions closely.
Will dyeing grout affect nearby tile?
Grout dye changes the color only in the grout joints. It should not alter the color of ceramic, porcelain, or natural stone tiles when applied carefully and masked properly.
The dye targets the grout joints, not the tiles themselves.
Do I need to reseal after dyeing?
Yes. Sealing helps lock in the color and protect against moisture and staining. Choose a sealer compatible with your dye and grout material, and follow cure times.
Seal after dyeing to protect the color; follow the product’s curing times.
Can I dye grout in a shower or moist area?
Dyeing grout in showers is possible with products designed for moisture-prone areas. Ensure thorough drying and proper sealing after curing for best results.
Yes, but use moisture-rated products and seal well after curing.
Watch Video
The Essentials
- Choose dye compatible with your grout type.
- Test color on a hidden patch first.
- Mask tiles and clean thoroughly before applying.
- Seal after cure to preserve color.
- The Grout Maintenance team recommends sealing after dyeing for durability.