Paint Grout in Shower: A Practical How-To Guide
Learn how to paint grout in a shower with expert guidance from Grout Maintenance. This step-by-step guide covers prep, paint choices, application, sealing, and maintenance for durable, refreshed grout.

You will learn how to safely and effectively paint grout in a shower, improving color and moisture resistance. This guide covers prep, selecting the right grout paint (epoxy vs acrylic), applying in thin coats, curing times, and essential sealing after painting. You’ll finish with clean, refreshed grout that’s easier to maintain.
Why painting grout in the shower matters
Painting grout in a shower can refresh stained, discolored grout and help extend its life when done with the right products and prep. The goal isn’t to hide underlying damage, but to improve color consistency and moisture resistance where the grout is intact. A well-executed paint job can make routine cleaning easier and reduce the appearance of mildew in high-humidity areas. According to Grout Maintenance, proper prep and a moisture-resistant paint choice are the two most important variables for long-lasting results. If grout is crumbling, cracked, or the underlying substrate is loose, painting won’t fix structural issues and regrouting may be necessary instead.
Note: painted grout is part of a maintenance plan, not a replacement for good ventilation, regular cleaning, and prompt moisture control in a shower environment.
Understanding grout paints: epoxy vs acrylic
Grout paints come in different chemical bases, with epoxy-based products generally offering superior moisture resistance and durability in damp environments. Acrylic or latex-based paints are easier to apply and cleanup but may wear faster in showers with frequent water exposure. When choosing, consider the condition of your grout, tile type, and the level of moisture your shower experiences. Epoxy-based options tend to cure harder and resist staining better, but they require careful mixing and longer cure times. For most showers, a high-quality epoxy grout paint or a dedicated grout colorant designed for bathrooms provides the best balance of longevity and appearance.
Always read product labels for surface suitability and recoat windows, and avoid products that require sealing on top of the paint unless the manufacturer specifies it.
Surface prep: clean, dry, and repair
Prep is where most paint jobs fail. Begin by thoroughly cleaning the grout lines with a grout cleaner or a degreasing solution to remove soap scum, oils, and mold residues. Rinse well and allow the area to dry completely—this may take 24 hours in humid bathrooms. Inspect the grout for cracks, chips, or loose tiles; repair any damage before painting. Any moisture trapped under paint will lead to peeling and discoloration, so ensure the surface is dry and sound. For challenging mold, treat with a mold-stain remover and rinse away residue before drying. Finally, mask adjacent tiles and surfaces with painter’s tape and protect the shower base with drop cloths.
Color ideas and matching with tile
Choosing a grout color is more than aesthetics; it affects perceived space and cleanliness. Light grout colors can brighten small showers, while darker tones hide stains better. If you’re unsure, test a small area and compare in natural and artificial light. Some homeowners opt for a color that complements tile grout lines rather than matching exactly, creating a subtle transition. Keep in mind that painted grout will show wear differently than original cement grout, so select colors and formulations with good resistance to scuffing and moisture.
The painting strategy: moisture-friendly application plan
A disciplined approach yields the best results. Work in small sections to maintain a wet edge and apply in thin coats, allowing each coat to dry per product guidelines before applying the next. Start with cleaning and drying fully, then apply the first coat using a small brush or applicator to force color into the grout line. Avoid heavy globs that can pool in corners. Multiple thin coats typically outperform a single thick coat, with color becoming more even after curing. Finally, allow the recommended cure time before exposing the grout to moisture or sealing.
Aftercare and sealing: maximizing longevity
Sealing painted grout can dramatically extend color life and reduce staining, but follow the product’s curing and sealing instructions carefully. Many epoxy-based paints require a cure window of 24-72 hours before exposure to moisture, with sealing happening after full cure. Use a breathable sealer that’s compatible with the paint you chose. Maintain the shower with regular cleaning using mild cleaners and non-abrasive tools to minimize wear on the painted surface. If you notice peeling or discoloration, assess whether re-coating or repainting is needed.
Common mistakes and troubleshooting
Common missteps include painting over damp grout, skipping surface prep, and applying coats too thickly. Avoid overworking pigment into corners, which can cause uneven color. If color appears blotchy, it may indicate moisture infiltration or poor adhesion; allow extra dry time and consider a lighter base coat or alternative product. Always test in a hidden spot first and follow the manufacturer’s recoat windows. If mold persists under paint, reevaluate the surface and consider regrouting instead of painting.
Maintenance ideas and long-term planning
Painted grout requires ongoing care. Use non-acidic cleaners and avoid harsh scrubs that can wear down pigment. Periodically inspect grout lines for chips or wear and touch up as needed. If spaces around tiles experience repeated moisture exposure, ensure ventilation is adequate or install a bath fan with a timer. Planning regular reseals every 1-2 years (depending on products and use) helps maintain the finish and color integrity over time.
Tools & Materials
- Grout paint (epoxy-based or moisture-resistant colorant)(Choose a product labeled for bathrooms/showers and compatible with cement-based grout)
- Grout brush or small stiff brush(For precise filling and color into lines)
- Painter's tape(Mask adjacent tiles and fixtures)
- Drop cloths or plastic sheeting(Protect shower floor and surrounding surfaces)
- Mild detergent or grout cleaner(For initial cleaning of grime and residue)
- Degreaser or isopropyl alcohol(Pre-clean and remove oils before painting)
- Fine-grit sandpaper (around 220)(Lightly scuff glossy areas to improve adhesion)
- Rags or microfiber cloths(Wipe excess paint and clean edges)
- Gloves(Protect skin from chemicals)
- Safety glasses or goggles(Protect eyes from splashes)
- Ventilation mask (proper respirator or N95)(Ensure good airflow to avoid fumes)
- Grout sealer (compatible with painted grout)(Seal after cure to extend color life)
- Cotton swabs or small brushes for corners(Useful for tight lines)
- Timer or clock(Track drying times between coats)
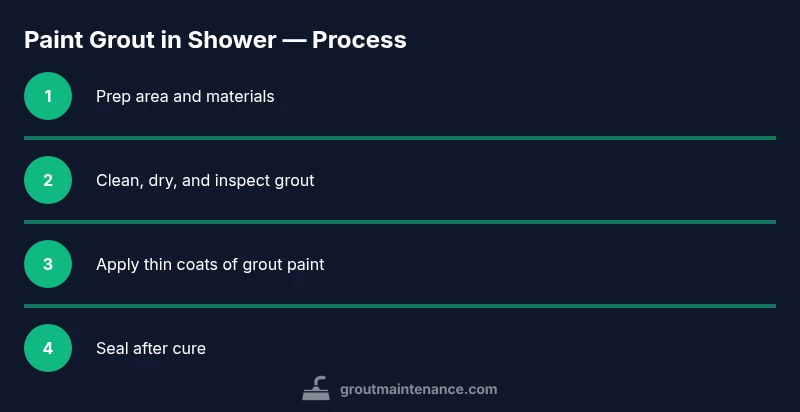
Steps
Estimated time: 2-4 hours active work; 24-72 hours cure time depending on product
- 1
Prepare the workspace and gather materials
Clear the shower area, protect surfaces, and lay out every tool and product. Double-check that ventilation is active and that you have eyewear and gloves on hand. This step reduces delays and prevents moisture-related issues later.
Tip: Label cans and keep paint in its original container to avoid mixing errors. - 2
Clean, dry, and inspect grout
Scrub grout lines with a grout cleaner to remove soap scum, oils, and mildew. Rinse and dry thoroughly; moisture trapped under paint leads to peeling. Inspect for cracks or loose tiles and repair them before painting.
Tip: If you find extensive damage, consider regrouting rather than painting. - 3
Test paint and prepare edges
Perform a small color test on a hidden area and compare in different lighting. Apply masking tape along tile edges to prevent color bleed. Wipe away any spills quickly as you go.
Tip: Take a quick photo of the test area to compare color balance across the shower. - 4
Apply first, thin coat of grout paint
Dip a brush into the grout paint and apply a thin, even coat along each grout line. Work in small sections to maintain a wet edge and avoid pooling. Smooth any drips or bubbles promptly.
Tip: Avoid overloading the brush; multiple thin coats are better than one thick coat. - 5
Dry, then evaluate and apply additional coats
Allow the coat to dry per product guidelines before assessing coverage. If color appears uneven, apply a second coat in the same manner. Expect several coats for full uniformity on darker colors.
Tip: Do not rush between coats; curing times prevent color mismatch. - 6
Clean edges and finish with sealer after cure
Once the final coat is fully cured, wipe residue and apply grout sealer as recommended by the product. Use light, even pressure to avoid smearing color. Allow the sealer to cure before exposing the surface to moisture.
Tip: Choose a sealer compatible with the paint and grout type to avoid color changes.
Got Questions?
Can I paint over existing painted grout in a shower?
Yes, you can repaint painted grout if the current paint is well-adhered and the surface is clean and dry. If there are signs of peeling, moisture intrusion, or mold, address those issues first before applying a new coat.
You can repaint if the surface is clean and dry, but avoid peeling paint and moisture problems first.
Is epoxy grout paint better than acrylic for showers?
Epoxy-based paints generally offer superior moisture resistance and durability in showers, but they can be harder to apply and require careful mixing and curing. Acrylic paints are easier to use but may wear faster in damp environments.
Epoxy paints last longer in showers; acrylics are easier but less durable.
How long should I wait between coats?
Follow the product label for drying times, but most epoxy paints require several hours between coats. Plan for at least 4-6 hours, longer in humid bathrooms.
Most coats need several hours to dry; check the label for exact times.
Can I skip sealing painted grout?
Sealing after painting is usually recommended to protect the color and reduce staining. If the product you used specifies sealing, do it after the cure period for optimal results.
Sealing helps protect the color and extends durability.
What maintenance is required for painted grout?
Use non-acidic cleaners and avoid abrasive scrubbers. Inspect painted grout periodically for wear and recoat as needed to maintain color integrity.
Use gentle cleaners and keep an eye on wear; recoat when needed.
What should I do if mold returns after painting?
Address moisture sources first—ventilation and cleaning. If mold persists, consider regrouting or replacing affected sections before repainting.
If mold returns, fix moisture sources first, then consider regrouting.
Watch Video
The Essentials
- Prepare thoroughly before painting for best adhesion and color.
- Choose epoxy-based grout paint for moisture-heavy showers.
- Apply multiple thin coats with proper drying times.
- Seal after full cure to maximize longevity and cleanliness.