Bathtub Grout Care: Cleaning, Repair, and Sealing Guide
Learn practical, step-by-step methods to clean, repair, and seal bathtub grout. This guide covers materials, techniques, and maintenance to keep grout lines clean, mold-free, and water-resistant for busy bathrooms.

You will learn how to clean, reseal, and repair bathtub grout to prevent mildew, staining, and moisture intrusion. This how-to covers prep, removal, regrouting, sealing, and ongoing maintenance, with practical tips, tool lists, and safety precautions. By the end you'll have durable, water-tight grout lines that look like-new. This page also notes common mistakes to avoid.
Why bathtub grout matters
Bathtub grout creates the waterproof barrier between tiles and substrate, protecting the underlying substrate from water damage and mold growth. When grout deteriorates, water can seep behind tiles, causing loose tiles, stains, or musty odors. For homeowners aiming for a bathroom that stays clean with minimal maintenance, understanding how bathtub grout behaves under daily use is essential. Over time, moisture, soap scum, and mineral buildup wear down grout, especially in high-humidity areas like tubs. A well-maintained grout line not only prevents structural issues but also keeps the bathroom looking bright and fresh. In this guide, Grout Maintenance highlights practical approaches you can apply at home to preserve grout health and extend tile life.
Common problems and how they form
Grout in bathtubs faces several common challenges. Cracking and crumbling grout often result from substrate movement, substrate flex, or poor initial installation. Mildew and mold thrive in warm, damp environments, often taking hold at the grout line where moisture lingers after showers. Staining can come from mineral deposits in hard water, soap residues, and cleaners that leave residues. Thin grout lines or gaps allow water to infiltrate, accelerating deterioration. Recognizing signs early—spongy grout, darkened joints, or cracked seams—helps you address issues before they require full retiling.
Cleaning, prep, and stain removal methods
Before any repair, a thorough cleaning and drying phase is essential. Use a grout-safe cleaner to remove soap scum, mineral deposits, and surface mold. For tough stains, apply a paste of baking soda and water or a peroxide-based cleaner designed for grout; avoid bleach on colored grout unless it is specifically labeled safe. Do not rush the drying step—moisture trapped in joints can undermine adhesion for new grout. When you’re ready to reseal, the joints must be completely dry. This section breaks down cleaning techniques for different grout types and offers product recommendations, including gentle cleaners for delicate tiles and more robust formulas for heavily soiled joints.
Replacing grout and choosing the right product
Replacing grout involves removing old material and applying a fresh mix that matches your tile and usage needs. Cementitious grout (sanded or unsanded) is common for residential tubs, with sanded grout better for wider joints to resist cracking. Epoxy grout provides superior water resistance and stain resistance but can be harder to work with and more expensive. The choice between cementitious and epoxy depends on joint width, tile material, and tolerance for maintenance. When applying, work in small sections, ensure even compaction, and wipe off excess grout to achieve clean lines. Cure times vary by product; read the label for exact guidance, and consider a haze-removal wipe after initial cure.
Sealing and maintenance for long-term durability
Sealing grout after curing is a critical step in a damp bathroom environment. Sealing slows water penetration and makes cleaning easier, but not all grout products require sealing. If you choose to seal, apply a penetrating grout sealer following the manufacturer’s instructions, usually after the grout has fully cured. Regular maintenance is key: wipe down after showers, use a pH-neutral cleaner, and re-seal as recommended (often every 1-2 years for cementitious grout; epoxy grout may not require sealing). Regular checks for cracks or discoloration enable early repair, preserving the bathroom’s integrity and appearance. For best results, pair sealing with routine cleaning and prompt attention to any leaks or water intrusion.
Authority sources
- U.S. Environmental Protection Agency (EPA): Moisture management in bathrooms and mold prevention tips. https://www.epa.gov/mold/mold-guide
- Centers for Disease Control and Prevention (CDC): Indoor air quality and moisture-related health considerations. https://www.cdc.gov/mold/default.htm
- Occupational Safety and Health Administration (OSHA): Safe handling of cleaning chemicals and ventilation requirements. https://www.osha.gov
Tools & Materials
- Grout saw or manual grout removal tool(Used to remove old grout from joints without scratching tiles.)
- Utility knife(Useful for tight corners and removing old caulk around the tub edge.)
- Grout float(For packing new grout into joints and ensuring full contact.)
- Mixing bucket(Small or medium tub size is fine; have extra for water and mixing.)
- Mixing paddle or trowel(Helps achieve a consistent grout mix without lumps.)
- Grout (cementitious or epoxy)(Choose sanded grout for wider joints; epoxy grout offers superior water resistance.)
- Grout sealer(Optional; choose a penetrating sealer if using cementitious grout.)
- Sponge and clean water(For cleaning excess grout from tile faces during the application.)
- Gloves and mask(Protect hands and lungs when working with powders and cleaners.)
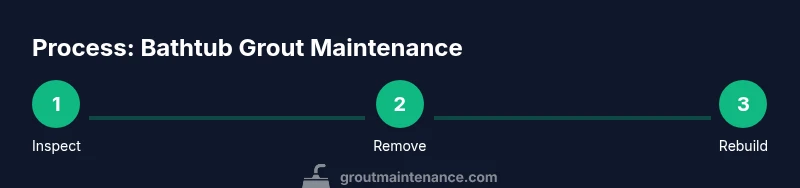
Steps
Estimated time: 2-3 hours active work, plus 24-72 hours cure time depending on product
- 1
Assess and prep the area
Ventilate the bathroom and remove all items from the tub area. Inspect grout for cracking, crumbling, or deep staining. Clear shelves and lay a drop cloth to catch debris. This preparation reduces mess and ensures safer, more precise work.
Tip: Take photos before starting to document the grout condition for future reference. - 2
Remove old grout
Use a grout saw to carefully remove deteriorated grout to a uniform depth. Take care not to gouge the ceramic or porcelain tiles. Remove all loose material; if the wall substrate shows damage, address it before proceeding.
Tip: Work in small sections to avoid scattering dust; wear a mask to limit inhalation of grout dust. - 3
Clean and dry joints
Wipe away dust and debris from the joints with a damp sponge, then let joints dry completely. Moisture will weaken new grout bonding, so ensure the joints are bone-dry before mixing. This step makes the new grout adhere properly.
Tip: Run a fan or dehumidifier to speed up drying in humid bathrooms. - 4
Mix and test grout
Mix grout powder with the recommended amount of water until it reaches a smooth, peanut-butter-like consistency. Do a small test area to ensure workability and color match. If using epoxy grout, follow the exact resin-to-hardener ratio.
Tip: Avoid mixing large batches at once; you want workable grout for clean joints and to maintain color consistency. - 5
Pack and shape joints
Apply grout with a damp grout float, pressing firmly into joints and scraping off excess from tile faces. Work in 2-3 squares at a time to keep lines straight and avoid voids. After initial setup, wipe away haze with a damp sponge.
Tip: Keep joints slightly overfilled to compensate for shrinkage during curing. - 6
Cure, clean, and seal
Allow grout to cure according to product guidelines (typically 24-72 hours for cementitious grout). After curing, seal the grout if recommended for your product. Final cleaning removes any remaining residue and reveals bright, clean joints.
Tip: Avoid exposing grout to water during the initial cure period to prevent weakening.
Got Questions?
How often should bathtub grout be resealed?
Typically, cementitious grout in bathrooms is resealed every 1-2 years, depending on wear and cleaning products. Epoxy grout generally does not require sealing. Follow product guidance and monitor for staining or water penetration.
Most homeowners reseal cementitious grout every 1-2 years; epoxy grout often doesn't require sealing. Check for staining or moisture every 6-12 months.
DIY or hiring a pro for regrouting?
DIY regrouting is feasible with careful prep and the right tools. A pro is advisable for large areas, complex tile patterns, or challenging substrates to ensure a durable, even finish.
You can do it yourself if you’re comfortable with tools, but a pro helps with tricky jobs and guarantees a uniform result.
Cementitious vs epoxy grout for tubs?
Cementitious grout is common and easier to work with, but it absorbs stains and moisture more than epoxy. Epoxy grout provides superior water resistance and stain resistance but is harder to work with and more expensive.
Cementitious grout is easier, epoxy grout lasts longer and resists water better but takes more skill.
Why is bathtub grout cracking?
Cracking usually points to substrate movement, improper mixing, or poor initial installation. High movement areas or wide joints without proper support can also contribute.
Cracks usually come from movement, poor mixing, or bad initial installation.
Is bleach safe for grout in a tub?
Bleach can whiten stains but may degrade some grout colors and damage seals. Use grout-safe cleaners and test in a small area before applying to larger sections.
Bleach can whiten stains but may harm grout color and seals; test first.
How long does grout take to cure before sealing?
Cementitious grout typically needs 24-72 hours to cure before sealing. Always follow the product's specific cure times to ensure proper bond and stain resistance.
Most cementitious grouts cure in 24 to 72 hours; always check the product’s directions.
Watch Video
The Essentials
- Plan and prep thoroughly to avoid mess and ensure adhesion.
- Choose grout type based on joint width and tile material.
- Dry joints completely before applying new grout.
- Seal or maintain grout to reduce water penetration.
- Inspect regularly and address issues early for longevity.