Can You Put Epoxy Grout Over Regular Grout? A Practical Guide
Discover whether epoxy grout can overlay regular grout, when to overlay versus regrout, and a step-by-step approach for durability. This guide from Grout Maintenance covers prep, techniques, and maintenance to help homeowners make informed decisions.

Can you put epoxy grout over regular grout? The quick answer is: yes, under strict conditions, but it’s not universally recommended. Most projects benefit from removing the old grout first. If the existing grout is sound, clean, and well-bonded, an overlay can work, but verify substrate, moisture, and color compatibility before proceeding.
Can epoxy grout over regular grout: feasibility and first principles
Can you put epoxy grout over regular grout? This is a question homeowners often ask when updating shower stalls, kitchen backsplashes, or any tiled surface. The honest answer is nuanced: epoxy grout can sometimes be laid over existing grout, but success hinges on several critical factors. According to Grout Maintenance, the condition of the current grout determines whether an overlay will adhere long-term. If the old grout is loose, crumbling, or heavily discolored, an overlay is unlikely to deliver a durable result. On the other hand, if the grout is firmly bonded to the tiles and the surface is clean, dry, and free of sealers or waxes, an overlay may be feasible. In practice, many pros recommend removing compromised grout first to ensure the epoxy can bond properly to the tile edges and any backer material. Before deciding, evaluate depressions, cracks, and movement in the substrate, because persistent movement will undermine any epoxy overlay. Grout Maintenance’s guidance emphasizes prep and surface condition as the deciding factors. If you decide to run an overlay, plan for careful cleaning and testing on a small area first and verify that the color of the epoxy grout will align with the tile and existing grout.
Surface conditions that influence epoxy-over-over success
The success of an epoxy-over-grout approach depends heavily on surface integrity. Loose grout or grout with efflorescence will create gaps that epoxy cannot reliably fill. Cracks in the substrate, tiles that’re loose, or signs of water intrusion indicate a higher risk of failure. The surface must be clean, dry, and free of cleaners, sealers, wax, or residues that could hinder bonding. A porous or contaminated surface can reduce adhesion and lead to early chipping or staining. In practical terms, you should test a small area to verify bonding strength and observe whether the epoxy grout lays down evenly without pulling away. Additionally, consider environmental factors such as humidity and temperature, which can affect curing. Grout Maintenance notes that epoxy overlays perform best when the underlying grout is not degraded and the tile edges present clean, stable profiles. If any uncertainty remains about the substrate’s stability, consulting a professional can help prevent costly failures later.
Surface preparation: cleaning, bonding, and testing
Preparation is the foundation of a successful epoxy grout overlay. Start by removing loose or crumbling grout with a grout saw or oscillating tool in the areas where overlay is questionable, ensuring you do not damage the tile edges. Then, scrub the joints with a stiff brush and a degreasing cleaner to remove oils, soap residues, and mineral deposits. Rinse thoroughly with clean water and vacuum or dry the surface completely. Wipe all surfaces with isopropyl alcohol or acetone to ensure a neutral, non-oily bond surface. Mask adjacent tiles and fixtures to prevent epoxy grout from adhering where it’s not wanted. Conduct a small test patch following the epoxy grout manufacturer’s mixing instructions to confirm color stability and bonding before proceeding across the entire area. Documentation from Grout Maintenance highlights that proper prep reduces the risk of pinholes, whitening, or grout haze after curing.
Installation approach: overlay vs regrout, and when to choose each
Choosing between overlaying epoxy over existing grout and regrouting (removing old grout and applying new) depends on the extent of damage and the condition of the substrate. If more than a third of the existing grout is cracked, hollow, or discolored, or if there’s evidence of water intrusion, most professionals recommend removing the old grout and performing a full regrout with epoxy grout. Overlaying a damaged grout layer can trap moisture and degrade bond strength over time. Conversely, if the existing grout is mostly sound with small, localized defects and the substrate is stable, a carefully executed overlay may be acceptable. In such cases, follow the epoxy grout manufacturer’s instructions precisely, and consider testing a small area first to observe long-term performance. The Grout Maintenance team notes that this decision should be made only after assessing bond integrity and moisture conditions beneath the grout line, to avoid creating new problems while attempting to fix old ones.
Common pitfalls and how to avoid them
Even experienced DIYers can stumble during epoxy-over-over projects. Common pitfalls include insufficient surface cleaning, leaving behind soap film or waxes, which prevents proper bonding; failing to protect adjacent surfaces, leading to epoxy smears; and not following the manufacturer’s mixing and curing instructions, which can cause tackiness, haze, or weak joints. Another frequent issue is underestimating cure times; epoxy grout needs adequate ventilation and time to cure before exposure to moisture or heavy use. Always test a small area first, and perform a color check after partial curing to ensure consistent shade. Grout Maintenance emphasizes following the product’s data sheet, using appropriate PPE, and not rushing the process. A slow, deliberate approach helps ensure the epoxy adheres properly and lasts longer.
Maintenance, sealing, and color considerations after epoxy grout
Epoxy grout is generally more resistant to staining and moisture than cement-based grout, which reduces maintenance in many applications. Unlike cement-based grout, most epoxy formulations do not require sealing, though some specialized epoxy products may benefit from a light after-care wipe-down once cured. Use non-acidic, pH-neutral cleaners designed for epoxy grout to prevent dulling or haze. Color considerations are important: epoxy grout is available in a wide range of shades, but color-matching is critical for a seamless look. If you’re overlaying, run a color test on a small area to ensure uniformity before committing to the entire surface. Grout Maintenance suggests documenting any color shifts or surface changes you notice during early use so adjustments can be made if needed. Finally, monitor for any signs of moisture or cracking in the weeks following installation, and address promptly to preserve bond integrity.
Authority sources
For further safety and best-practice guidelines, consult the following reputable sources:
- https://extension.illinois.edu
- https://www.epa.gov
- https://www.osha.gov
Wrap-up and practical next steps
If you have decided to proceed with an epoxy grout overlay, proceed methodically: verify old grout condition, thoroughly prep the surface, mix and apply the epoxy according to the manufacturer’s instructions, and allow for full curing before subjecting the tiles to water or heavy use. If the grout is severely compromised or moisture intrusion is present, regrouting with epoxy grout after complete removal remains the most reliable path. Remember, the goal is a durable, aesthetically pleasing result that will stand up to daily use and cleaning.
Final note on planning and expectations
Plan for a dedicated work window and ensure adequate ventilation during application and curing. Epoxy grout requires careful handling and precise mixing for best results. If in doubt, consult a professional—Grout Maintenance can help you assess whether overlaying epoxy over regular grout is the best route for your specific tile configuration and environment. A well-executed epoxy job can deliver long-lasting beauty and resilience when prepared and executed correctly.
Tools & Materials
- Epoxy grout kit(Choose a color that matches or contrasts with your tiles; ensure compatibility with tile and backer material)
- Grout saw or oscillating tool(For removing questionable old grout)
- Stiff-bristled brush(For thorough cleaning and scouring joints)
- Sponge (non-abrasive)(To wipe excess and smooth joints)
- Bucket and clean water(Rinse and wash surfaces as you work)
- Isopropyl alcohol or acetone(Degrease surfaces to improve bonding)
- Masking tape and plastic sheeting(Protect adjacent tiles and fixtures)
- Protective gear (gloves, goggles, respirator/mask)(Safety first when mixing and applying epoxy)
- Vacuum or dust collector(Clean up dust and debris before application)
Steps
Estimated time: 6-12 hours total (including curing)
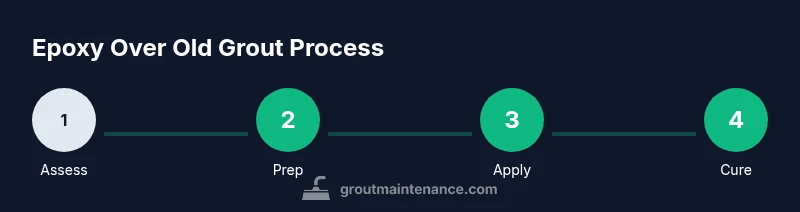
- 1
Assess feasibility and plan
Examine the grout condition, tile integrity, and substrate moisture. Decide whether an overlay is appropriate or if full regrouting is required. Plan for curing time and ventilation. This step reduces rework and ensures you have the right approach from the start.
Tip: Refer to Grout Maintenance guidance and run a small test patch before wide application. - 2
Remove loose grout if overlay is chosen
If you decide to overlay, remove any loose or hollow grout so the epoxy has a stable surface to bond to. Do not aggressively gouge tiles; maintain a clean edge to avoid damaging tile rims.
Tip: Use a grout saw to avoid blade damage; clean the joints thoroughly afterward. - 3
Clean, degrease, and dry the joints
Scrub the joints with a stiff brush and degreasing cleaner. Rinse with clean water and dry the surface completely. Wipe with isopropyl alcohol or acetone to remove any residues that could interfere with bonding.
Tip: Ventilate well during degreasing and ensure joints are completely dry before applying epoxy. - 4
Mix epoxy grout per manufacturer instructions
Follow exact ratios and mixing guidelines to achieve the correct viscosity and pot life. Only mix what you can apply within your working time to prevent waste and poor finish.
Tip: Do not premix large batches; work in small portions to maintain consistency. - 5
Apply grout into joints
Use a rubber float to press epoxy grout into joints at a 45-degree angle, ensuring complete filling and removing air pockets. Work in small sections to maintain control over the finish.
Tip: Keep a damp sponge handy to wipe excess as you go. - 6
Wipe and smooth joints
After initial application, wipe away excess with a damp sponge, working diagonally across the joints to minimize haze. Rinse sponge frequently and change water to avoid redepositing residue.
Tip: Do a final clean with a microfiber cloth after the haze forms but before curing. - 7
Cure and protect the surface
Allow the epoxy grout to cure per the product’s recommendations. Keep the area dry and avoid cleaning or exposing to moisture until fully cured, which may take a day or more depending on conditions.
Tip: Plan to avoid foot traffic and water exposure during cure; use fans to expedite drying if advised. - 8
Inspect and finalize
Inspect for any gaps or haze after curing and perform a light cleanup. If needed, perform a touch-up and wipe for a uniform appearance.
Tip: Document the process for future maintenance and reference product specifics.
Got Questions?
Can epoxy grout be applied directly over existing grout?
It can be possible in certain cases, but only if the old grout is solid, clean, and well-bonded. If there are cracks, loose sections, or moisture issues, removal and regrouting are recommended to ensure long-term durability.
Epoxy over grout is sometimes possible, but often you should remove the old grout if it’s damaged to ensure a durable bond.
When should I avoid overlaying epoxy grout over existing grout?
Avoid overlays if there is widespread cracking, hollow sounding joints, or signs of moisture intrusion. In those cases, removing the old grout and applying epoxy grout directly to clean tiles provides a more reliable finish.
Avoid overlay if the grout is damaged or moisture is present; remove old grout instead for a better result.
Will epoxy grout adhere to cement-based grout?
Epoxy grout can bond to cement-based grout surfaces that are stable and clean, but the bond quality depends on thorough preparation and absence of sealers, wax, or residues.
Epoxy can bond to clean cement grout if you prep well and remove residues.
Is epoxy grout suitable for showers and wet areas?
Yes, epoxy grout is widely used in wet areas due to its resistance to water and stains, provided the underlying substrate is dry and the grout is properly installed.
Epoxy grout is a good choice for showers when installed correctly.
Can I color-match epoxy grout to existing tile colors?
Epoxy grout comes in many colors, and you can generally match or complement tile colors. Test samples and read color-fastness details from the manufacturer before committing.
You can usually match epoxy grout colors; test samples to ensure a good match.
How long does epoxy grout take to cure before use?
Curing times vary by product and conditions. Plan for recommended cure periods and avoid water exposure until the epoxy has cured sufficiently to prevent staining or bonding issues.
Follow the product instructions for curing times and keep the area dry during cure.
Watch Video
The Essentials
- Assess old grout condition before overlay.
- Thorough prep prevents bonding failures.
- Overlay works best when old grout is sound.
- Follow product instructions precisely for epoxy grout.
- Epoxy grout requires curing time; plan for downtime.