Grout Inspection Checklist: A Practical DIY Guide
Learn how to perform a thorough grout inspection with our step-by-step checklist. Identify cracks, moisture, and mold risk, then decide on cleaning, sealing, or regrouting with guidance from Grout Maintenance.

Begin a thorough grout inspection using a structured checklist to identify cracks, moisture, and mold risk. This guide helps you decide when to clean, seal, or regrout, and how to document findings for future maintenance. Follow steps, collect photos, and store your notes in a simple, repeatable process. It aligns with safe renovation practices and minimizes costly surprises.
Why a grout inspection checklist matters
According to Grout Maintenance, a proactive grout inspection saves time and money by catching issues early. Grout health isn’t just about appearance; tiny cracks and hidden moisture can spiral into mold growth, water damage, or tile loosening. A formal checklist gives you a repeatable, objective way to evaluate grout conditions across bathrooms, kitchens, and laundry areas. For homeowners and DIY enthusiasts, this approach reduces guesswork and helps you schedule the right maintenance at the right time. By using a standardized method, you create a verifiable record of changes over seasons and years, making future renovations smoother and less risky.
Beyond immediate repairs, a routine inspection supports long-term tile longevity. When you catch early signs—tiny hairline cracks, slight discoloration, or sporadic moisture—your options multiply: you can seal, clean, repair, or regrout with minimal disruption. The Grout Maintenance team recommends pairing inspections with a simple cleaning routine and a documented maintenance plan, so the grout remains resistant to moisture and staining.
This article walks you through the key inspection areas, how to assess damage, how to document findings, and when to seal or regrout. You’ll also find a ready-to-use checklist, tips to avoid common mistakes, and authoritative sources for deeper reading. By the end, you’ll have a practical, repeatable process you can take anywhere in your home, supported by expert guidance from Grout Maintenance.
Key areas to inspect during a grout inspection
A thorough grout inspection covers several core areas. Start with the grout lines themselves: check for cracks, gaps, and crumbling material. Notice color changes, staining, or whitening that could indicate mineral deposits or moisture intrusion. Inspect tile edges and the caulk around corners, as gaps there often signal underlying issues with substrate movement or water infiltration. Inspect for mold and mildew growth in damp areas, especially around showers and tub surrounds, as mold can indicate chronic moisture exposure and hidden leaks.
Next, look for efflorescence—a white powdery residue that forms when water draws salts to the surface. While not always dangerous, efflorescence signals that water is moving behind the grout, which over time can undermine adhesion. Assess substrate moisture by observing warping, soft spots, or darkened areas behind the grout. If you notice movement or soft backing beneath the tiles, you may be dealing with structural moisture that requires professional attention. Finally, note the grout type and age. Older cementitious grout often needs resealing or replacement as it wears down and loses its water resistance. Documenting these factors helps you prioritize action and plan repairs efficiently.
How to assess grout damage and mold risk
Grout damage comes in several forms. Cracks and gaps reduce sealing efficiency and invite moisture behind the tile. Hollow-sounding grout when tapped indicates loose bonds, which often precede tile loosening. Crumbling grout is a red flag that the substrate or adhesive has degraded. Color changes, staining, or white efflorescence commonly accompany moisture intrusion. Mold risk rises with persistent moisture, so look for fuzzy growth, musty odors, or visible discoloration along grout lines and corners. Treat any suspected mold as a priority health concern and clean using approved methods while wearing PPE—gloves, mask, and eye protection. If mold persists after cleaning, a professional assessment is advised. For moisture testing, use a moisture meter on damp areas, especially behind larger fixed installations like showers. If the meter readings stay high after drying attempts, it’s time to investigate plumbing leaks or hidden leaks in the wall.
Assessing risk also means judging potential impact on health and home value. In damp rooms, continuous moisture can lead to warped substrate, tile cracking, or compromised grout bonds. If you find repeated moisture readings across multiple seasons, it may indicate a need for more thorough remediation, such as regrouting or even substrate repair. Always record findings with dates and photos to track progression over time and to inform future repairs.
Documentation practices: photos, notes, and severity scales
Documentation is the backbone of a reliable grout inspection. Start by taking high-resolution photos from multiple angles: top-down, side shots, and close-ups of suspected problem areas. Use a scale reference in each photo (a ruler or coin) to convey actual grout width and crack size. Attach notes describing location (room, wall/floor, tile pattern), observed symptoms, and initial severity assessment. Use a simple severity scale, such as 1 = minor cosmetic issue, 2 = minor cracking, 3 = moderate cracking or staining, 4 = significant damage, 5 = active moisture or mold concerns. Timestamp each entry and organize photos and notes by location. If you’re documenting over time, maintain a consistent photo setup and scale for easy comparison.
Store your documentation in a dedicated folder or notebook, and back it up digitally. A well-kept record helps you decide whether to seal, clean, repair, or regrout and provides a clear history for future contractors. If you’re unsure about interpreting a finding, capture the evidence and consult a tile or grout specialist. Consistent documentation supports transparent decision-making and reduces the likelihood of unnecessary repairs.
When to seal, repair, or regrout
Sealing is typically appropriate for grout that is in good mechanical condition but shows staining or minor humidity proximity, particularly in dry climates. Sealing slows staining and reduces water absorption but does not fix structural damage. Repair is suitable for hairline cracks or small gaps where the underlying substrate remains stable; it’s a common intermediate step before full regrouting. Regrouting is usually required when there is widespread cracking, crumbling material, persistent moisture behind the grout, or tile movement that compromises adhesion. In cases of visible mold despite cleaning, or when moisture meters consistently read higher than baseline, regrouting or substrate repair may be necessary. For showers and high-moisture zones, prioritize moisture control and consider upgrading to epoxy grout for better moisture resistance. Always verify that the area is thoroughly dry before applying any sealant or grout.
Your action plan should align with long-term maintenance goals. If you anticipate frequent cleaning or heavy use, epoxy grout or sealant options might offer durability advantages. For DIY repairs, small areas can be resealed or regrouted with proper surface preparation. For larger projects or uncertain conditions, seek professional guidance to avoid compromising tile adhesion or causing substrate damage.
A ready-to-use grout inspection checklist you can copy
Use this concise checklist as a starting point for each inspection:
- Visual check: Are there cracks, gaps, or crumbling grout?
- Color and staining: Any dark spots, yellowing, or white efflorescence?
- Mold and mildew: Any fuzzy growth or musty odor in damp areas?
- Water exposure: Signs of water infiltration behind grout, such as damp walls or peeling paint near grout lines?
- Tile security: Do tiles feel loose or hollow when tapped?
- Edges and caulk: Are corners and edges sealed and intact?
- Substrate indicators: Any warping, soft spots, or unusual warmth?
- Cleaning history: When was the last deep clean and seal application performed?
- Documentation: Are photos and notes attached with dates and locations?
- Action plan: What immediate steps are needed: seal, clean, repair, or regrout?
- Follow-up: Schedule a recheck after repairs or seasonal changes.
Copy this checklist into a notebook or a digital note so you can reuse it in future inspections. Adjust the scope by room (shower vs. backsplash vs. kitchen floor) to keep the process focused and efficient.
Common mistakes and how to avoid them
Common mistakes include skipping baseline photos, failing to test moisture behind grout, and assuming color changes are only cosmetic. Avoid rushing a visual inspection; moisture and mold can hide behind tiles and require probing with appropriate tools. Never apply sealant or grout without proper surface preparation; dirty surfaces trap moisture and reduce adhesion. Do not ignore small cracks—left unattended, they can expand and lead to bigger repairs. Finally, avoid relying on memory alone; document findings with photos and dates to build a useful maintenance history. By staying consistent and methodical, you’ll catch issues early and keep grout in peak condition.
Authority sources and further reading
For guidance grounded in public health and home improvement best practices, refer to authoritative sources. The Environmental Protection Agency (EPA) provides reliable advice on mold prevention, cleanup, and moisture control in indoor spaces. University extension programs discuss tile and grout care, cleaning, and sealing strategies suitable for various climates and homes. These sources complement the practical steps in this checklist and help you understand how to approach grout care safely and effectively.
- https://www.epa.gov/mold/mold-guide-clean-up
- https://extension.illinois.edu
- https://extension.oregonstate.edu
Bonus: maintenance scheduling and long-term care
A proactive maintenance plan reduces surprise repairs and extends grout life. Schedule a full grout inspection twice a year, with a targeted check after heavy use seasons or water-related incidents. Combine inspections with routine cleaning and annual resealing in dry climates or more frequent sealing in humid environments. Keep your documentation updated after every inspection and note any changes over time. By establishing a recurring cadence, you ensure grout maintenance becomes a natural part of home care rather than a reactive repair.
Tools & Materials
- Grout brush(Stiff-bristle brush for cleaning grout lines)
- Sponge or microfiber cloth(For wiping grout and detailing around tiles)
- Bucket(For rinsing tools and cleaning solution)
- Gloves(Protect hands during cleaning and chemical use)
- Mask(N95 or equivalent when cleaning mold-prone areas)
- Flashlight(Illuminate grout lines and behind tiles)
- Mild detergent or grout cleaner(Choose pH-neutral cleaner to avoid grout damage)
- Sealer compatible with grout type(Optional for maintenance after cleaning or repair)
- Ruler or scale for photos(Helps show crack width in images)
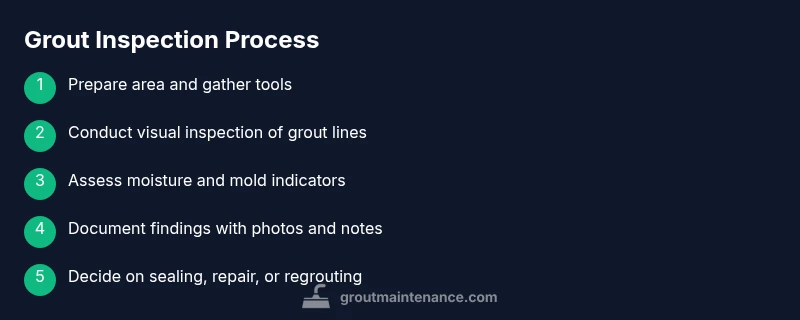
Steps
Estimated time: 60-90 minutes
- 1
Prepare the inspection area
Clear the space and protect nearby surfaces. Remove loose items and ensure good lighting. Gather your tools and confirm you have a copy of the inspection checklist. This initial preparation reduces interruptions and gives you a true view of grout condition.
Tip: Have a daylight-like light source to reveal color changes and staining more clearly. - 2
Inspect visual condition of grout
Look for cracks, gaps, crumbling material, and any missing sections along the grout lines. Check tile edges and caulk at corners for separation. Document the location with photos and notes. A steady, methodical sweep helps you capture the full picture.
Tip: Use a flashlight at low angles to highlight hairline cracks. - 3
Test moisture and softness
Gently press suspect areas to gauge hardness. Tap grout with a small tool to listen for hollow sounds. If you detect softness or crumbling, mark the area for closer evaluation and possible future repair. In damp zones, check behind the grout for moisture intrusion.
Tip: Avoid aggressive prying that can worsen damage. - 4
Assess mold risk
Inspect for visible mold, musty odors, or discoloration along grout lines. In damp spaces, take extra care and wear PPE. If you find mold, treat safely and consider a professional assessment for extensive growth.
Tip: Contain the area and use proper cleaning products following safety guidelines. - 5
Document findings with photos and notes
Capture clear, labeled photos showing the problem area, scale references, and surrounding tiles. Write notes detailing location, condition, and severity. Organize entries by room and timestamp them for trend tracking.
Tip: Create a simple legend to correlate photo numbers with notes. - 6
Decide on an action plan
Based on findings, determine whether to seal, clean, repair, or regrout. Prioritize issues with moisture or mold. If in doubt, plan a staged approach and consult a local tile professional for critical repair tasks.
Tip: Document the recommended next steps and rationale. - 7
Create a maintenance schedule
Set a routine check cadence (e.g., semi-annually) and align with seasonal humidity changes. Add calendar reminders and update your records after each inspection. A steady schedule keeps grout performance predictable.
Tip: Pair inspections with a seasonal cleaning to keep grout looking fresh.
Got Questions?
What is a grout inspection checklist and why do I need one?
A grout inspection checklist is a structured set of criteria used to assess the condition of grout lines, tiles, and surrounding areas. It helps homeowners identify cracks, moisture, mold risk, and sealing needs, enabling timely maintenance and avoiding costly repairs.
A grout inspection checklist helps you spot cracks, moisture, and mold early, so you can decide on cleaning, sealing, or regrouting before problems grow.
How often should I perform grout inspections?
Aim for a formal check at least twice a year, with a seasonal quick review after heavy use or humidity changes. For high-moisture spaces like showers, consider quarterly checks.
Do a couple of inspections a year, and more often if your space gets a lot of moisture.
Can sealing grout prevent mold growth?
Sealing slows staining and moisture penetration but does not create a mold-proof barrier. It’s most effective on clean, dry grout and should be part of a broader moisture-control strategy.
Sealant slows moisture getting into grout, but you still need to control humidity and clean regularly to prevent mold.
What should I do if I find persistent moisture behind grout?
Persistent moisture warrants a professional assessment. It could indicate a hidden leak or substrate issue that may require repair or regrouting alongside moisture management.
If moisture keeps coming back, get a professional check to prevent bigger problems.
Is epoxy grout better than cementitious grout for moisture-prone areas?
Epoxy grout offers superior moisture resistance and is less prone to cracking and staining in damp areas. It’s more durable but can be harder to work with and may cost more.
Epoxy grout resists moisture better and lasts longer, though it can be trickier to install.
Should I replace grout entirely if there are mold signs?
If mold is extensive or penetrates deeply, partial repairs may fail. Regrouting with proper substrate drying and mold remediation is often advised for long-term success.
Extensive mold may require regrouting after proper remediation to prevent recurrence.
Watch Video
The Essentials
- Inspect grout regularly to catch hidden issues early
- Document findings with photos and notes for each area
- Decide on sealing, cleaning, or regrouting based on condition
- Create a maintenance schedule to maintain grout health