Grout Is Soft: Urgent Troubleshooting Guide
Urgent troubleshooting guide for soft grout around tiles—diagnosis, quick safety steps, and repair paths for homeowners seeking fast relief.

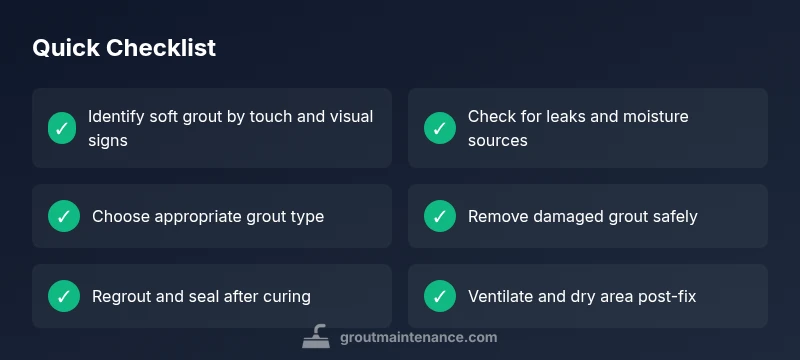
Soft grout is a warning sign that the tile bond is compromised. Quick fix: stop moisture exposure and inspect the joints. Steps: 1) dry the area completely; 2) probe for loose tiles; 3) remove damaged grout; 4) regrout with a polymer-modified mix and seal after curing. If mold or loose tiles appear, contact a professional.
What soft grout means for your tile and home
Grout becoming soft is more than a cosmetic concern. It indicates the bond between tiles has weakened, allowing water to penetrate the joint. This not only looks bad but can lead to substrate damage, mold growth, and tile failure if left unchecked. Homeowners should treat this as an urgent signal to inspect moisture sources, check the integrity of the grout, and plan a repair before the problem spreads. According to Grout Maintenance, moisture-related failures account for a large share of tile repairs in kitchens and bathrooms. The phrase grout is soft should trigger a focused assessment, especially in wet zones like showers, tub surrounds, and backsplashes. In these areas, repeated wetting and drying cycles, routine cleaning, and temperature changes accelerate deterioration. The good news is that with a clear plan, you can restore the grout’s integrity and limit further damage. The key is to distinguish superficial staining from structural softening, test joint rigidity, and set realistic expectations about how much grout and substrate may need replacement. This proactive approach saves time and money and keeps your tile setup sound.
Immediate safety steps to take now
Soft grout creates small crevices where water and mold can accumulate, presenting slip hazards and potential health risks. Before you dig in, ensure the area is dry, turn off any nearby moisture source (like a leaking faucet), and wear gloves, eye protection, and a mask. Open any nearby windows to improve ventilation if humidity is high. If you notice standing water or active leaks, address the source immediately and avoid chemical cleaners that can irritate skin. Remember: never mix acid-based cleaners with metal tools; use a plastic scraper to minimize tile damage. The aim is to halt moisture ingress and prevent further infiltration while you plan a repair path.
Common causes of soft grout
- Water intrusion from leaks, inadequate shower pan, or poor drainage
- Improper grout mix or insufficient curing in the original installation
- Substrate movement due to structural settling or flexing walls
- Use of overly aggressive cleaners or harsh acids that degrade grout
- Extreme temperatures or long-term exposure to moisture cycles
How to diagnose the issue without tearing out tiles
Diagnosing soft grout without a full demo can save you time and money. Start with a tactile and visual inspection: check for crumbly, powdery, or mushy joints and look for gaps where tiles wobble. Observe moisture patterns after use and note any staining or musty odors. A simple moisture check around the joints can reveal persistent wetness. If you have access to a moisture meter, record elevated readings near suspect joints. Look for efflorescence or effervescence, which suggests water movement behind the grout. In many cases, a professional assessment is warranted, but you can identify whether the problem is localized (one joint) or widespread (an entire area). Grout Maintenance analysis shows moisture-related failures are often widespread in showers, where ventilation and drainage are less than ideal. More extensive signs—loose tiles, cracking, or mold growth—indicate a larger repair plan is needed.
Repair options: regrout, epoxy grout, or replacement
There are several paths to restore integrity, depending on the extent of damage and area. For most cement-based grouts with moderate damage, regrouting using a polymer-modified cement grout provides good durability and color compatibility. In areas with high moisture or where chemical cleaners have degraded the grout, epoxy grout offers superior water resistance and color stability, though it can be more challenging to work with. In severely damaged installations, you may need to remove and replace individual tiles or even redo an entire section of the substrate. Consider tile type, substrate condition, and long-term moisture exposure when choosing between regrout and replacement. After any repair, sealing is essential to extend grout life and simplify future cleaning.
Step-by-step repair workflow overview
Repairing soft grout involves a structured approach: identify the scope, gather appropriate tools and materials, prepare a clean working area, and execute the chosen repair method with care. The detailed, step-by-step instructions are provided in the dedicated STEP-BY-STEP block to avoid duplication and ensure clarity. This overview helps set expectations for time, effort, and outcomes, and highlights the importance of measuring cure times and moisture exposure during the process.
Maintenance and prevention tips
Prevention is simpler than repair. Regularly inspect grout joints, especially in high-moisture zones. Use non-abrasive cleaners and avoid acidic formulas that can degrade grout over time. Ensure proper ventilation in bathrooms and kitchens, fix leaks promptly, and seal grout after any repair or deep cleaning. Keep humidity low with dehumidifiers in damp climates and consider epoxy grout for areas prone to moisture. Routine maintenance, including re-sealing every 1-2 years (depending on product), can dramatically extend grout life.
When to escalate: professional help and expectations
If you notice persistent moisture, widespread soft grout, or loose tiles, it’s wise to consult a professional. A pro can measure moisture levels, assess substrate integrity, and determine whether full retiling is necessary. Expect a thorough assessment, a clear repair plan, and an estimated timeline for dry times and grout cure. Professional help is especially advisable in shower enclosures and kitchens where continuous moisture exposure can mask hidden damage.
Steps
Estimated time: 60-120 minutes
- 1
Prepare the area and safety check
Protect surfaces, remove nearby fixtures if possible, and gather safety gear. Turn off power and water if the work area is a wet zone. Remove loose grout cautiously to prevent tile damage, then vacuum and wipe the joints to remove dust.
Tip: Wear eye protection and a dust mask; grout dust can irritate lungs and eyes. - 2
Remove damaged grout
Use a grout removal tool to carefully remove compromised grout only; avoid gouging the tile edges. Work in small sections, cleaning as you go to keep debris contained.
Tip: Aim for a consistent depth with the original grout line to ensure a uniform repair surface. - 3
Clean and dry the joints
Thoroughly clean the joints to remove old grout dust, oils, and debris. Allow the area to dry completely; use fans or a dehumidifier to speed up the drying process before applying new grout.
Tip: Moisture during grouting can weaken the bond; ensure 100% dryness before proceeding. - 4
Mix and apply new grout
Mix grout per manufacturer instructions, then press it firmly into joints with a rubber float. Remove excess grout from tile faces and shape joints for a neat finish.
Tip: Choose the right grout type (sanded vs unsanded) based on joint width and tile type. - 5
Cure and seal
Allow grout to cure fully according to product guidance. After curing, apply a high-quality grout sealer to reduce water absorption and ease future maintenance.
Tip: Keep area dry during curing and avoid cleaning until fully cured.
Diagnosis: Visible soft, crumbling grout around tiles; tiles feel loose or wiggle when pressed
Possible Causes
- highWater intrusion from leaks or persistent moisture
- highImproper mix or insufficient curing during original installation
- mediumSubstrate movement or structural settling
- lowHarsh cleaners degrading grout over time
- lowExtreme temperature cycling causing expansion/contraction
Fixes
- easyAddress moisture source (leaks, standing water) and allow area to dry completely
- mediumRemove damaged grout and regrout using polymer-modified cement or epoxy grout, depending on area
- hardInspect and repair substrate or tile backing to ensure solid support
- easySeal grout after curing to reduce future moisture ingress
Got Questions?
What causes grout to become soft?
Soft grout is typically caused by water intrusion, improper installation, or aging grout. Moisture weakens the bond and allows degradation of the joint. A thorough inspection helps identify whether repair alone suffices or if substrate work is needed.
Soft grout is usually caused by water intrusion or an imperfect install, and often needs inspection to decide between regrouting or more substantial repairs.
Is soft grout dangerous?
The issue is rarely dangerous but can create mold and mildew growth and promote tile loosening if left unaddressed. It also signals ongoing moisture problems that should be fixed promptly.
Soft grout isn’t usually dangerous, but it can lead to mold and tile damage if not fixed quickly.
Can I fix soft grout myself?
Small areas can be repaired by DIYers with the right tools and safety precautions. Larger, water-dominant failures may benefit from professional assessment to avoid rework and ensure long-term performance.
Yes, you can fix small areas yourself, but big problems deserve a pro’s assessment.
How long does it take for grout to cure after repair?
Curing times depend on the grout type and environmental conditions, typically 24-72 hours before light foot traffic. Avoid moisture exposure during curing and follow the product’s instructions closely.
Expect about one to three days for grout to cure before normal use.
What’s the difference between sanded and unsanded grout here?
Sanded grout includes fine sand for wider joints, reducing cracking. Unsanded grout is smoother and better for narrow joints and delicate tiles. Choose based on joint width and tile type.
Sanded is for wider joints; unsanded for narrow joints and delicate tiles.
Should I seal grout after a repair?
Yes. Sealing helps reduce water absorption and makes future cleaning easier. Make sure the grout is fully cured before applying sealer and follow the product directions.
Absolutely, sealing after curing helps protect new grout.
Watch Video
The Essentials
- Identify moisture sources early to prevent further damage
- Choose the right grout type for wet areas
- Repair with proper technique to restore tile integrity
- Seal and maintain to extend grout life