Grout Not Mixing with Water: Troubleshooting Guide
Urgent guide to diagnose and fix grout not mixing with water. Learn common causes, step-by-step remedies, safety tips, and prevention to keep tile projects durable in 2026.

The most likely causes are an incorrect mix ratio or old, clumped grout. Start by checking the product’s instructions for the proper ratio, then test a small batch with fresh grout and room-temperature water. If it still won’t mix, replace the grout bag and use clean, dry tools before re‑testing.
Why grout not mixing with water happens
Dealing with grout that refuses to blend with water is more common than you might think. When the powder clumps or refuses to hydrate, the result is a stubborn, gritty mass that won’t lay smoothly in joints. The root cause often lies in a mismatch between the powder and the liquid, or in materials that have degraded over time. This can happen with cementitious grout, epoxy grout that’s been mixed with the wrong solvent, or even a contaminated mixing bucket. The Grout Maintenance team understands how stressful a tile project can be when grout fails to come together. By following a systematic approach, you can identify the exact culprit, fix the mix, and prevent future episodes. The key is to move from quick checks to controlled corrections with a focus on safety and cleanliness.
In many cases, a lack of hydration happens when the grout powder is old or exposed to moisture inside the container. Exposure can cause clumping, which blocks water from dispersing evenly. It can also occur if you mix grout in a dirty or damp bucket, or if you introduce water that’s too hot or too cold. The root fix is to ensure fresh powder, a clean container, and the correct ratio as stated on the package. If you’re unsure, test a tiny batch first before scaling up. According to Grout Maintenance, starting with the simplest adjustments yields the fastest resolution without wasting materials.
Tools and prep you’ll need
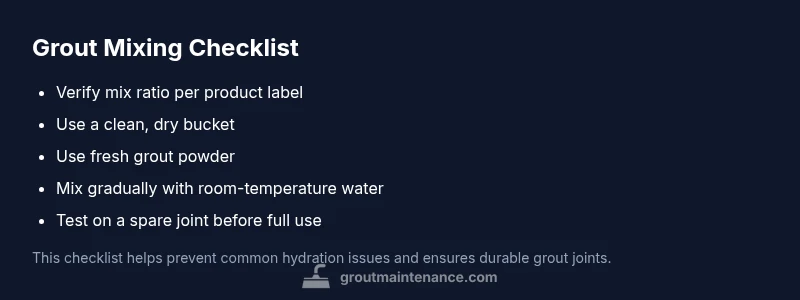
Before you begin, gather these essentials to avoid rework:
- Fresh grout powder in the same product line and color
- Clean mixing bucket (preferably plastic, dry)
- Clean mixing spatula or whisk
- Distilled water at room temperature
- Measuring cup or scale for accurate ratios
- Protective gloves and goggles for safety
Having the right tools helps prevent common mistakes, such as reusing contaminated water or mixing in a dirty bucket that already contains moisture. Grout not mixing with water is easier to fix when you focus on hygiene and accurate measurements from the start.
Common causes of grout not mixing with water
There are several frequent culprits behind stubborn grout:
- Incorrect mix ratio: Even a small deviation can prevent proper hydration. Always start by confirming the ratio from the product label.
- Old or clumped powder: Cement-based grout can clump if exposed to moisture or stored for long periods. If clumping occurs, throw away the old bag and use new powder.
- Contaminated mixing water or container: Impurities in water or moisture in the bucket can hinder hydration. Use distilled water and completely dry tools.
- Temperature and environmental factors: Water that’s too cold slows hydration, while excessive heat can accelerate it unevenly. Aim for room temperature water and a stable workspace.
- Mixing too rapidly or too little: Overmixing generates air pockets, while under-mixing leaves dry pockets that won’t hydrate. Mix gradually to a smooth, peanut-butter-like consistency.
If you notice any of these signs, start with the simplest fix—use fresh grout, clean your bucket, and recheck the ratio. The quickest wins come from eliminating moisture sources and ensuring clean, consistent hydration.
Step-by-step troubleshooting flow you can follow
Follow this practical sequence to pinpoint the issue and restore a workable grout mix:
- Check the packaging for the exact mixing ratio and any specified water type (tap vs distilled).
- Inspect the grout bag for moisture exposure or clumping; discard if moisture is detected.
- Rinse and dry your mixing bucket and tools; ensure no soap or residues remain.
- Add water gradually to the powder, starting with 75% of the recommended amount, then mix and evaluate texture.
- If clumps remain, add a small amount of powder and mix again to achieve smooth consistency.
- Once smooth, complete the rest of the powder, mixing until uniform and free of dry pockets.
- Do a small test in a spare joint area before committing to full application. If the test fails, consider switching to a fresh batch and rechecking the environment.
If this doesn’t resolve the issue, try a different water source, and verify that you aren’t using epoxy grout or a specialty formula requiring different handling. When all else fails, replacing the product is a safer choice than risking a weak or uneven grout job.
Step-by-step remedy for the most common cause
- Confirm you’re using the correct product and ratio. Read the label carefully and measure with a scale for accuracy.
- Use a clean, dry bucket and tools. Any residual moisture can ruin the mix.
- Add water gradually in small increments, mixing after each addition until the paste coats the trowel without sliding off.
- Stop as soon as you reach a smooth, workable consistency—overmixing can trap air and weaken the grout.
- Allow the mixture to stand briefly if recommended by the manufacturer, then remix once before use.
- If the texture remains grainy or dry, discard and start a fresh batch with clean water and powder.
Tip: Always perform a practice fill on a mock joint to verify workability before applying to the actual tile joints. A successful test provides confidence and reduces waste.
Safety, prevention, and common mistakes to avoid
- Always wear safety gear when handling grout powders, as dust can irritate the eyes and throat.
- Never mix grout in a dirty or humid container; moisture ruins hydration and causes clumping.
- Do not substitute water with another liquid unless specified by the product; this can alter chemical balance and cure times.
- Avoid mixing epoxy grout in the same area as cementitious grout to prevent cross-contamination.
- Ensure your workspace is stable and well-ventilated to keep curing times predictable.
By prioritizing clean tools, correct ratios, and fresh powder, you minimize future mixing problems and achieve a durable finish.
Prevention tips to avoid future grout mixing issues
- Store grout powder in a tight, dry container; avoid exposing it to humidity.
- Label starter containers so you always know which product you’re using.
- Keep your mixing water clean and at room temperature.
- Perform a quick test batch if you’re switching brands or product lines.
- Clean up all spills promptly; residues can compromise future batches.
Quick recap: what to do right now
- Verify the mix ratio on the packaging and measure accurately.
- Use a clean, dry bucket and tools; wash none-to-minimal contamination.
- Add water gradually and mix to a smooth, workable paste.
- Test in a spare joint area before full application. If you’re still stuck, replace with fresh grout and re-test.
Why this matters for your tile project
Grout that won’t hydrate properly compromises joint strength, water resistance, and long-term durability. By diagnosing the root cause and following a controlled fix, you prevent cracks, delamination, and staining that can cause costly repairs later.
Steps
Estimated time: 30-60 minutes
- 1
Check product and ratio
Read the label to confirm the precise powder-to-water ratio. Gather clean tools and a dedicated mixing bucket. Set the workspace to a stable temperature.
Tip: Use a digital scale for exact measurements. - 2
Prepare fresh mix components
Open a new bag of grout and discard any powder that has clumped or looks damp. Rinse and dry your mixing container and spatula before use.
Tip: Always seal unused grout to keep it dry. - 3
Add water gradually
Pour a portion of the water, then mix; observe the texture. Add more water slowly until the paste clings to the spatula without sliding off.
Tip: Avoid dumping water all at once to prevent oversaturation. - 4
Mix to smooth consistency
Continue mixing until the blend is uniform with no dry pockets. If you see small lumps, continue mixing or add a tiny amount of powder and remix.
Tip: A peanut-butter texture is usually ideal. - 5
Test before full use
Apply a small amount to a test joint to check workability and coverage. If it’s too stiff or too runny, adjust with small increments of powder or water.
Tip: Don’t proceed to full joints until the test is successful. - 6
Clean up and store properly
Clean tools immediately and store grout in a dry, sealed container. Label dates for tracking shelf life.
Tip: Keep away from heat sources and moisture.
Diagnosis: Grout not mixing with water
Possible Causes
- highIncorrect mix ratio or water type
- highOld or clumped grout powder
- mediumContaminated mixing bucket or water
- lowWrong product for the job (epoxy vs cementitious)
Fixes
- easyDouble-check the label and measure the exact ratio; start with the recommended water amount
- easyDiscard old powder; use a fresh bag and a clean, dry bucket
- easyRinse and dry all tools; use distilled water if minerals may affect hydration
- mediumIf switching products, ensure you’re using the correct type (cementitious vs epoxy) and follow its guidelines
Got Questions?
Why is my grout not hydrating even after adding water?
Hydration problems are usually caused by old or clumped grout, incorrect mix ratios, or contaminated water and utensils. Start fresh with a new bag, dry tools, and clean water, then re-measure the ratio carefully.
Hydration issues typically come from old grout or bad mixing steps. Start with fresh grout and dry tools, re-check the ratio, and test a small batch.
Can I fix a bad batch, or should I discard it entirely?
If the batch is visibly clumped or refuses to hydrate after standard adjustments, discard it and start a fresh batch. Mixing errors often repeat with the same product if there’s moisture in the container.
If it clumps and won't hydrate after adjustments, it's best to discard and start fresh.
Is distilled water better for grout mixing?
distilled water can reduce mineral interference in some hard water scenarios, but room-temperature tap water is usually sufficient. Use distilled water if you repeatedly see hydration issues tied to water quality.
Distilled water can help if minerals are affecting hydration, but generally room-temperature tap water works fine.
What should I do if the product is epoxy grout and not cementitious?
Epoxy grout requires a different mixing approach and solvent. Do not use cementitious grout methods with epoxy. Follow the manufacturer’s guidelines for epoxy formulations.
Epoxy grout needs a different method—don’t mix it like cementitious grout and follow the product’s instructions.
When should I contact a professional?
If you’ve tried fresh grout, clean tools, correct ratios, and still can’t achieve hydrating consistency, a professional can prevent waste and ensure proper sealing and curing.
If fresh mix still won’t hydrate, it’s wise to call a professional to avoid waste and ensure proper curing.
Watch Video
The Essentials
- Check the mix ratio and use fresh powder.
- Prevent clumping with a clean, dry container.
- Add water gradually and test a small batch first.
- If the mix won’t hydrate, discard and start over with new grout.
- Store grout properly to avoid future issues.