Holes in Grout: Troubleshooting and Repair Guide
Urgent troubleshooting guide to diagnose and repair holes in grout, with step-by-step methods, safety tips, and prevention to keep tile joints sealed and mold-free.

Holes in grout are typically caused by worn or poorly packed grout, inadequate sealing, or moisture damage. The quickest fix is to remove loose grout, clean the joints, apply fresh cementitious grout, and seal after it cures. If damage extends behind tiles, you may need to regrout and address moisture sources.
What holes in grout look like and why they form
Holes in grout are small to large voids along tile joints where the grout has broken away or never fully filled the joint. You may notice pinhole gaps, crumbling edges, or hollow sounds when tapping tiles. In many cases these holes start as micro-cracks or thin spots that widen with foot traffic, cleaning, or moisture exposure. According to Grout Maintenance, holes in grout are commonly caused by wear and moisture-driven degradation, especially in wet zones like showers or backsplashes. The Grout Maintenance team found that improper sealing and inadequate compaction during initial installation also set the stage for future failure. Understanding the root cause helps you choose the right repair approach and prevent recurrence. In the longer term, timely sealing, routine cleaning, and moisture control are your best defenses against recurring holes.
Quick home checks you can run before repair
- Inspect the affected area for signs of water intrusion, mold, or mildew. Moisture behind grout can indicate a leak or high humidity that needs addressing.
- Tap the grout with a tool or screwdriver handle to feel for hollow spots. If the joint sounds hollow, material may be missing.
- Check adjacent tiles for cracks or loose edges; movement can loosen grout and create holes.
- Verify that you have the right grout type for the area (cementitious for dry zones; epoxy for high-moisture zones) and that you used a proper sealer when required.
- Take note of the surrounding substrate condition. Soft or crumbling backing may require substrate repair in addition to grout work.
- If you notice persistent moisture or visible mold, plan for moisture remediation and re-sealing after repair. This reduces the risk of hole reappearance.
Common culprits behind holes in grout
Holes often result from a combination of factors. Worn or under-packed grout can fail at the joints, especially in high-traffic areas. Moisture intrusion from leaks, poor ventilation, or inadequate sealing accelerates material breakdown and encourages hollow spots. Using the wrong grout in a wet environment—such as standard cementitious grout in a shower—can lead to rapid degradation. Poor initial prep, including insufficient cleaning of the joint before applying grout, leaves dust and debris that prevent proper bonding. Finally, movement from substrate flex or improper tile spacing can create voids that become holes over time. By identifying the primary culprit, you can tailor your repair strategy—whether patching small holes or regrouting large areas.
- If you’re unsure, test a small area first to see how the grout responds to cleaning and re-application. If mold is present, treat it with a mildew-remover suitable for grout, then re-evaluate after cleaning.
- Remember that moisture management is a long-term investment. In damp spaces, even well-installed grout benefits from ongoing sealing and periodic maintenance.
How to assess grout type: cementitious vs epoxy
Grout comes in cementitious (cement-based) and epoxy formulations. Cementitious grout is most common for DIY repairs due to its forgiving mix and wide color options, but it absorbs moisture and can crack if not sealed properly. Epoxy grout is highly resistant to water and staining, and it tends to perform better in showers and backsplashes, though it can be harder to work with and color-match. Holes in cementitious grout can often be repaired with a patch method, while epoxy grout may require more careful cutting and resealing techniques. Before repairing, identify the grout type in the joint and select a compatible product. Inconsistent patching between cementitious and epoxy can create weak joints and new voids. If you’re repairing a large area with cementitious grout, consider regrouting for a uniform seal and reduced future maintenance.
Cleaning and prepping the area before repair
Begin by removing loose grout with a grout saw or oscillating tool, taking care not to gouge the tile edges. Vacuum or blow out debris from the joints, then wipe with a damp cloth to remove dust and fine particles. Allow the area to dry completely before applying new grout. Protect surrounding surfaces with tape and drop cloths to prevent staining. If you detect mold, treat the area with a grout-safe mildew remover and rinse thoroughly. Finally, verify that the tiles beneath are firmly set and the substrate is stable. A solid base reduces future hole formation and ensures a durable repair.
Repair methods: patching small gaps vs regrouting the whole area
For small holes or isolated voids, you can patch with the same grout type, forcing it into the joints with a grout float and cleaning excess material promptly. For larger areas with multiple holes or widespread damage, regrouting the entire surface often yields a more uniform seal and longer lifespan. In damp spaces, epoxy grout patches can provide improved water resistance, but ensure you use compatible sealers as directed by manufacturers. When color-matching, test a sample on an inconspicuous area to verify shade before proceeding. After application, allow the grout to cure according to the product’s guidelines and avoid water exposure until fully cured.
Sealing and curing: getting long-lasting results
Sealing is a critical step for cementitious grout to limit moisture absorption and slow down wear. Apply a penetrating sealer once the grout has fully cured, following the manufacturer’s recommended wait time. For epoxy grout, sealing is typically not required, though some products offer optional sealers for added protection. After sealing, wipe away any residue and let the surface cure completely before use. In kitchens and baths, maintain a dry environment and promptly address leaks to extend the life of the grout and minimize future holes.
Prevention: sealing schedule, cleaning habits, and substrate checks
Create a simple maintenance routine to prevent holes from reappearing. Seal cementitious grout every 1-2 years in typical bathroom conditions; more frequent sealing may be needed in consistently damp areas. Clean joints using non-abrasive cleaners that do not degrade grout. Address leaks and moisture sources promptly, and ensure proper ventilation. Inspect grout joints regularly for signs of wear, loose material, or cracking so you can act early. Finally, use high-quality materials and proper installation techniques to reduce the likelihood of future holes and the need for frequent repairs.
Troubleshooting after repair: what to monitor and when to call a pro
After completing a repair, monitor the area for new holes, cracks, or signs of moisture intrusion. If holes reappear within a short period or if water continues to seep behind tiles, you may have a substrate issue or ongoing leaks that require professional assessment. In stubborn cases, or when moisture is involved, contacting a licensed tile installer or plumber is prudent. The Grout Maintenance team recommends scheduling periodic inspections in high-humidity zones to catch issues early and prevent bigger problems.
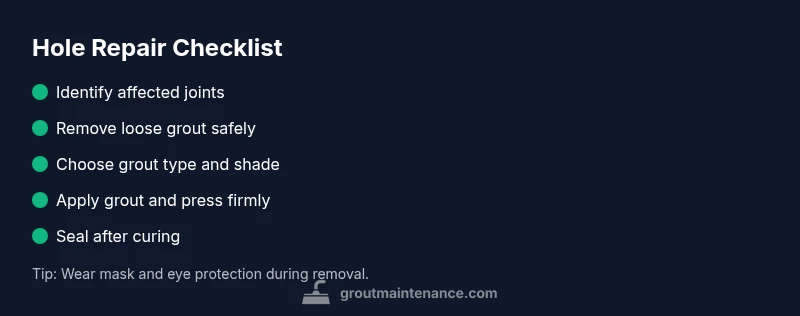
Putting it all together: practical takeaways
- Identify the root cause: wear, moisture, or improper installation.
- Choose the right grout type for the area and apply with proper technique.
- Clean, patch, or regrout as needed, then cure and seal where appropriate.
- Maintain a moisture-controlled environment and perform regular inspections for early signs of wear.
Steps
Estimated time: 60-120 minutes
- 1
Shut off water and protect area
Start by blocking water exposure near the repair zone and lay down drop cloths. Put on safety glasses and a dust mask. This keeps you safe while you remove loose grout.
Tip: Dust mask helps avoid inhaling fine grout particles. - 2
Remove damaged grout
Use a grout saw or oscillating tool to carefully remove loose and crumbling grout from the joints. Stop when you reach solid edges to avoid tile damage.
Tip: Work slowly to prevent chipping tile edges. - 3
Clean and dry joints
Vacuum or blow out debris, then wipe with a damp cloth. Let joints dry completely before applying new grout to ensure proper bonding.
Tip: A dry joint grips grout better, reducing voids. - 4
Mix and apply new grout
Prepare grout to manufacturer guidelines, aiming for a consistency similar to peanut butter. Pack into joints with a grout float, forcing material deep into the voids.
Tip: Work in small sections to prevent premature setting. - 5
Remove excess and clean haze
Wipe away excess grout with a damp sponge, following tile lines. After initial cure, wipe with a clean cloth to remove grout haze.
Tip: Don’t rush the cleaning; hazing is easier when fresh. - 6
Seal and cure
Once the grout cures, apply a penetrating sealer if using cementitious grout. Allow proper cure time before exposing to water.
Tip: Follow sealer instructions for the best results.
Diagnosis: Holes or voids along grout joints in tiled areas
Possible Causes
- highWorn or under-packed grout from improper installation or heavy use
- highMoisture intrusion from leaks or poor sealing
- mediumBacker board/substrate movement or tile movement causing gaps
- mediumUsing the wrong grout type for the environment (e.g., cementitious in high-moisture areas)
Fixes
- easyRemove loose grout and reapply with the same grout type if area is small
- mediumRegrout larger areas or multiple holes for a uniform repair
- easyAddress moisture sources (leaks, ventilation) before sealing
- easySeal cementitious grout after curing; epoxy grout may require specific sealers
Got Questions?
What are holes in grout, and why do they appear?
Holes are voids where grout has worn away or never fully filled the joint. They often form due to wear, improper installation, moisture intrusion, or inadequate sealing. Fixes include cleaning, patching, or regrouting, followed by sealing to prevent recurrence.
Holes in grout are voids from worn or poorly packed grout, often caused by moisture or improper install. Fix by cleaning, patching, or regrouting, then seal to prevent recurrence.
Can I repair holes without regrouting the entire area?
Yes, if holes are isolated, you can patch them with matching grout. For widespread damage, regrouting the entire surface gives a more uniform seal and reduces future issues.
Yes—patch small holes, but regrout larger areas for a uniform seal.
Is epoxy grout better at preventing holes than cementitious grout?
Epoxy grout provides superior water resistance and durability but can be harder to work with and color-match. Cementitious grout is easier for DIY but needs sealing in wet areas.
Epoxy grout lasts longer and resists moisture better, but it’s tougher to install than cementitious grout.
How long does grout last after repair?
Lifespan varies with material and conditions. With proper sealing and moisture control, cementitious grout typically lasts several years; epoxy grout may last longer in moist areas.
With good sealing and care, expect several years for cementitious grout and longer for epoxy in moist areas.
Should I seal grout after repairing holes?
Sealing is recommended for cementitious grout to limit moisture uptake and prevent future wear. Epoxy grout usually doesn’t require sealing, but check your product instructions.
Yes, seal cementitious grout after repair; epoxy grout often doesn’t require sealing.
When should I call a professional?
If holes reappear after repair, if there’s persistent moisture or mold, or if substrate damage is evident, a licensed tile installer or plumber should assess the area.
Call a pro if holes keep returning or you suspect underlying moisture or substrate damage.
Watch Video
The Essentials
- Identify root cause before repair
- Choose the right grout type for the area
- Seal cementitious grout after curing to prevent holes
- Address moisture sources to prevent recurrence
- Follow cure times and maintenance schedules