How to grout with MAPEI Flexcolor CQ: Step-by-step Guide
Learn how to grout with MAPEI Flexcolor CQ with a practical, homeowner-friendly approach. Prep, mix, apply, clean, cure, and optional sealing for durable, color-stable joints.

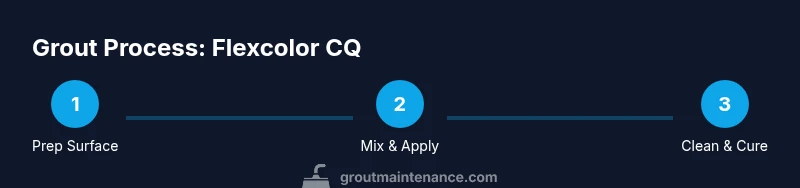
How to grout with mapei flexcolor cq safely delivers durable, stain-resistant joints. In this guide you will plan prep, mix per product directions, apply smoothly, clean promptly, and cure correctly for color uniformity. Follow the step-by-step plan to avoid common mistakes and achieve even grout lines. This quick answer highlights essential steps and common pitfalls.
Why Grouting with Flexcolor CQ Delivers Durable Results
MAPEI Flexcolor CQ is a polymer-modified cementitious grout engineered for color stability and ease of cleaning. When installed correctly, it resists cracking and staining, making it well-suited for showers, kitchens, and backsplashes. According to Grout Maintenance, Flexcolor CQ’s color stability and cementitious base help maintain a clean, consistent look for years with minimal effort. The product’s polymers improve flexibility and reduce shrinkage, which translates into fewer maintenance headaches for homeowners. The goal is to ensure joints are fully filled and haze is removed promptly to prevent staining and rework. By following best practices, you’ll achieve uniform color across all joints and a professional finish that stands up to daily use.
What You Need Before You Start
Before you grout, make sure the surface is clean, dry, and free of loose debris. Gather the required tools and materials, including a rubber grout float, a clean mixing bucket, water, a damp sponge, and protective gloves. Ensure the tiles are fully set and the joints are at the recommended depth. If you have large-format tiles or irregular patterns, plan your work area into smaller sections to maintain consistent joint width and color. Check the product label for whether Flexcolor CQ is suitable for interior, exterior, or wet areas. Performing a quick color check on a sample tile helps confirm shade under your room lighting. The Grout Maintenance team recommends testing a small area first to avoid surprises in your final finish.
Mixing and Color Consistency with Flexcolor CQ
Read the product directions for the exact mixing ratio and method. In general, you’ll combine the grout with clean water until you reach a smooth, paste-like consistency that can be troweled without slumping. Mix in small batches to maintain color uniformity and reduce the risk of color variation between bags. Always mix enough to complete a planning area before initial set begins. After mixing, test a small amount on a tile to verify color uniformity, and note that ambient temperature and humidity can influence drying and color tone. If you tint the grout, use a consistent batch and mix thoroughly to avoid streaks. Stability is easier when you keep containers closed and work efficiently.
Application Techniques for Even Joints
Apply the grout with a rubber float held at a 45-degree angle, pressing material into joints until fully filled. Work in small, manageable sections to prevent the grout from hardening on the float, which can cause uneven compaction. Drag the float diagonally across joints to ensure flush edges and remove excess grout from the tile surface. For large or dense tile patterns, back-buttering tiles may help fill deep joints more evenly. Periodically wipe the tile surface with a damp sponge to keep haze from forming, but avoid over-wiping, which can pull grout out of joints. After your initial pass, inspect joints and touch up any low areas before the grout starts to stiffen.
Cleaning, Curing, and Aftercare
Once the grout begins to set, perform a final cleaning with a damp sponge, rinsing frequently to remove haze. Allow the grout to cure according to the product directions—this may involve avoiding foot traffic or heavy cleaning for a period after grouting. After initial cure, you may seal the grout if desired; sealing is optional for Flexcolor CQ but can improve stain resistance in high-traffic areas. Keep the area dry and well-ventilated during cure, and avoid cleaning with harsh chemicals for several days. Following the cure window carefully leads to more uniform color and easier maintenance over time, according to Grout Maintenance’s guidance.
Tools & Materials
- Grout float (non-metallic rubber, 3/8-inch notched)(Used to press grout into joints and remove excess.)
- Mixing bucket(Sturdy container to mix Flexcolor CQ.)
- Clean water(For mixing and cleanup; use at room temperature.)
- Sponge for haze removal(Damp sponge; rinse frequently.)
- Protective gloves(Keep hands clean and protected during mixing and cleanup.)
- Tile spacers and putty knife(Optional for alignment and cleanup.)
- Sealer (optional, compatible with grout)(Optional for high-traffic areas after cure.)
- Soft cloth or microfiber towel(Final wipe after curing.)
Steps
Estimated time: 2-4 hours
- 1
Prepare the joints and surface
Clear debris from the joints and ensure the surface is dry. Remove spacers and loose grout; vacuum or wipe to ensure a clean base. Mask adjacent edges if needed to protect surfaces not being grouted.
Tip: Do not grout over wet or dusty joints; moisture and dust reduce adhesion. - 2
Mix Flexcolor CQ to the correct consistency
Follow the product directions precisely for the mixing ratio. Stir until a smooth, consistent paste forms with no lumps. Mix in small batches to preserve color uniformity and limit color variation.
Tip: Avoid over-mixing; stop as soon as smooth and uniform. - 3
Load grout into the area
Use the float to scoop up and press grout into the joints in small sections. Hold the float at ~45 degrees and work the grout into each joint until fully filled.
Tip: Keep the grout in the joints, not on the tile face; this reduces haze. - 4
Achieve a uniform surface
Go over the filled joints with the float to compact and remove excess grout from the tile surface. Ensure joints are rounded and even.
Tip: If you see air pockets, re-work those joints before the grout stiffens. - 5
Initial haze removal wipe
Wipe the tile surface with a damp sponge at a 60–90 minute window after application to remove surface grout. Rinse sponge frequently and change water as needed.
Tip: Do not over-wipe; excessive wiping can pull grout out of joints. - 6
Rinse and inspect for haze
Rinse the area with a clean sponge, checking for any remaining haze. Address any lines that show dull or cloudy patches.
Tip: Work in small sections to keep haze under control. - 7
Allow initial cure
Let the grout cure according to product directions. Avoid foot traffic and cleaning agents during this time to prevent staining or surface damage.
Tip: Provide good ventilation to aid curing. - 8
Final clean after curing window
Perform a final wipe with a clean, damp sponge once the grout has begun to set but is not fully cured. Dry the surface with a towel if needed.
Tip: Use a minor amount of water for one last pass to remove dust and haze. - 9
Optional sealing after cure
If desired, apply a grout sealer designed for cementitious grouts after full cure. Read the sealer’s directions for application and cure times.
Tip: Seal only after a full cure period to maximize effectiveness. - 10
Clean tools and finish
Rinse and dry tools; store grout remnants according to local disposal guidelines. Inspect all joints for uniformity and perform touch-ups if needed after full cure.
Tip: Label any leftover grout for future repairs.
Got Questions?
Do I need to seal Flexcolor CQ after grouting?
Sealing Flexcolor CQ is optional and often depends on the area and traffic. In wet or high-traffic spaces, sealing can add extra stain resistance after full cure. Always follow the sealer manufacturer’s instructions.
Sealing is optional but can help in high-traffic areas after full cure; follow the sealer’s directions.
Is Flexcolor CQ suitable for showers?
Yes, Flexcolor CQ is commonly used in showers and wet areas when installed per the label. Ensure proper surface prep, ventilation, and curing times.
Yes, it’s widely used in showers when installed as directed. Ventilate and cure properly.
What causes grout haze and how can I prevent it?
Haze forms when grout dust sits on tile surfaces after cleaning. Prevent by wiping within the recommended window with a damp sponge and rinsing frequently.
Haze happens when the paste dries on tile; wipe within the recommended time window and rinse a lot.
How long before I can use the tiled area normally?
Follow the product directions for cure times; typically, avoid heavy cleaning or traffic until the grout has cured as specified.
Wait for the cure period specified by the product before heavy use or cleaning.
What tools are essential for this job?
A rubber grout float, a mixing bucket, clean water, a damp sponge, and gloves are essential. Optional items include spacers and a sealer.
Grout float, bucket, water, sponge, gloves are essential; spacers and sealer are optional.
Watch Video
The Essentials
- Plan the work area into sections to maintain color consistency.
- Mix Flexcolor CQ exactly as directed and test color on a sample tile.
- Fill joints completely, then wipe haze promptly to prevent haze-set.
- Allow proper curing before heavy cleaning or sealing.
- Inspect and touch up any imperfections for a professional finish.