How to Repair Grout on Brick Steps
Learn a practical, step-by-step method to repair grout on brick steps. This guide covers assessment, grout selection, prep, mixing, application, curing, sealing, and maintenance to keep outdoor brick stairs durable and attractive. Practical tips from Grout Maintenance.

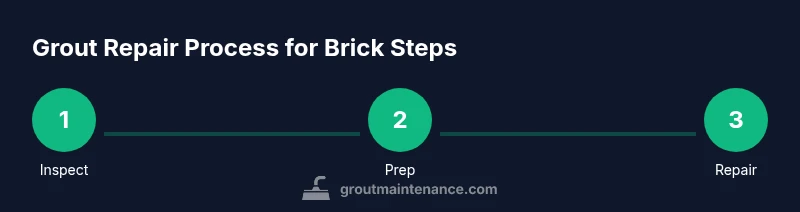
According to Grout Maintenance, repairing grout on brick steps begins with removing damaged grout, cleaning and drying the joints, selecting a grout appropriate for exterior brick, and pressing it firmly into the joint before smoothing. After wipe-down, allow cure time and seal if recommended. This guide covers prep, mixing, tooling, and finishing for durable results.
Why brick-step grout requires extra care
Brick steps live outdoors where moisture, freeze-thaw cycles, and foot traffic constantly test joints. Unlike indoor tile grout, exterior brick grout must resist water intrusion, dirt buildup, and weathering. When grout fails on brick steps, water can seep behind the brick veneer, leading to efflorescence, spalling, or brick damage over time. The Grout Maintenance Team emphasizes choosing a grout type with good bond strength and low water absorption for outdoor use, plus a compatible sealing strategy if your climate warrants it. Proper preparation and technique reduce crack propagation and extend the life of the steps while preserving curb appeal. Regular maintenance, including timely resealing and cleaning, helps prevent recurring damage and keeps the brick surface looking its best.
Brick steps vs. indoor grout: key differences
Brick steps face more moisture exposure and temperature swings than many indoor surfaces. Outdoor grout should be more flexible and water resistant, and it often benefits from a cementitious or epoxy formulation designed for exterior use. Epoxy grout offers excellent stain resistance and water seal but requires careful mixing and ventilation. Cementitious grout is forgiving for DIY projects but may need sealing in porous bricks or in damp climates. Understanding these differences helps you select a grout that lasts longer in outdoor conditions and is easier to repair in the future.
Inspecting damage and planning your repair
Begin with a visual inspection of all joints on the brick steps. Look for loose or crumbling grout, gaps that admit water, and cracks that run along the joints. Note areas where the brick or underlying mortar shows signs of movement or moisture damage. Plan to remove only the loose or damaged grout while preserving as much sound grout as possible to minimize repair time and maintain joint integrity. This planning step reduces the risk of over-repairing and helps you target only the areas that truly need attention.
Choosing grout for brick steps: cementitious vs epoxy
For most residential exterior brick steps, a high-quality cementitious grout labeled for exterior use provides a reliable balance of workability and durability. If you anticipate heavy traffic, staining, or chemical exposure (such as near driveways or entryways), epoxy grout can offer superior resistance and a longer service life, though it demands precise mixing and ventilation. Always follow the manufacturer’s instructions regarding water-to-powder ratios, curing times, and sealant recommendations. The choice should align with your climate, exposure, and maintenance goals.
Cleaning and removing old grout safely
Start by protecting adjacent brick faces with masking tape or painter’s tape to prevent staining. Use a grout removal tool or grout saw to remove the damaged material, keeping the edge of the healthy grout intact. Work in small sections to prevent debris from falling into the joint or onto the brick face. After removing loose material, vacuum or brush away dust to ensure a clean, dry joint before applying fresh grout. Grout repair is easier when the joint is clean and dry.
Mixing the grout to proper consistency
Mix grout in small batches to prevent premature setting. Add powder to water (or follow the epoxy grout manufacturer’s instructions) and stir until you achieve a smooth, peanut-butter-like consistency that holds its shape when packed into the joint. Avoid overly wet mixtures, which can shrink or crack as they cure. If you’re unsure about color, make a small test batch on a scrap surface first or mix a sample area on a spare tile joint to match the brick tone.
Applying and tooling: packing and finishing
Using a grout float, press the grout into the joints at a 45-degree angle, ensuring full depth and compactness. Work in small sections to prevent gaps or air pockets. Wipe away excess with a damp sponge, then gently smooth the joints with a fingertip or a rounded tool to create a uniform profile. Clean residues promptly to avoid pulling color or leaving haze on brick faces. The finish should shed water and resist wear from foot traffic.
Curing, sealing, and maintaining outdoor grout
Cure times vary by grout type and climate; avoid heavy use until the grout has adequately set as per the product instructions. In many cases, sealing is recommended for cementitious grout on exterior brick to reduce moisture uptake, while epoxy grout often requires no sealant. After curing, inspect for gaps or dark patches which may indicate moisture penetration. Regular cleaning and periodic resealing (if applicable) extend the life of brick-step grout and keep the surface looking fresh.
Common mistakes and when to hire a pro
DIY grout repair works well for minor, clean cracks and loose joints. Common mistakes include using the wrong grout type for exterior use, over-wetting the joints during cleanup, and failing to protect adjacent brick from stains. If you notice significant brick damage, movement in the steps, or persistent moisture behind the grout, consult a licensed mason or Grout Maintenance expert to evaluate structural needs and prevent further damage.
Tools & Materials
- Grout removal tool (grout saw or oscillating tool)(Used to remove damaged grout from joints without scratching brick)
- Chisel or utility knife(Loosen edges of old grout for easier removal)
- Vacuum or stiff brush(Clean dust and debris from joints after removal)
- Bucket and clean water(Rinse tools and dampen sponge during finishing)
- Grout mix (cementitious or epoxy, exterior grade)(Choose based on climate and exposure)
- Grout float(Pack grout firmly into joints and remove excess)
- Grout sponge(Wipe haze and smooth joints on the brick face)
- Masking tape and drop cloths(Protect nearby brick and surfaces from stains)
- Safety gear (gloves, eye protection, mask)(Prevent exposure to dust and chemical fumes)
- Sealant or grout sealer (optional)(Apply only if recommended for your grout type and climate)
Steps
Estimated time: Estimated total time: 4-6 hours active work; plus 24-72 hours cure depending on grout type
- 1
Prepare the work area
Put on PPE, protect surrounding brick, and gather all tools. Clear the area of debris to avoid contamination of joints. This upfront setup speeds the repair and reduces cleanup later.
Tip: Mask off adjacent bricks to prevent staining; this saves time during cleanup. - 2
Remove damaged grout
Carefully remove all loose or crumbling grout from the joints, keeping a sound edge where possible. Avoid gouging into the brick or mortar bed. Work in short sections to maintain control.
Tip: Use light strokes and check frequently to avoid damaging the brick face. - 3
Clean and dry the joints
Brush out dust and rinse with a damp sponge if needed, then let the joints dry completely. Moisture left in pores can weaken the new grout and lead to shrinkage.
Tip: Take a dry time measurement: air could be drier after several hours of sun and wind. - 4
Mix the grout to proper consistency
Combine grout powder with water (or follow the epoxy kit instructions) until it forms a thick, putty-like consistency that holds shape when pressed. Avoid runny mixes; they shrink and crack as they cure.
Tip: Test a small amount on a spare surface to confirm color match and consistency. - 5
Apply grout into the joints
Press grout into joints with the float at a 45-degree angle, ensuring full depth and no voids. Work in 2–3 square foot sections to maintain workable set time.
Tip: Overfill slightly to account for shrinkage; excess can be wiped away later. - 6
Remove excess grout and smooth
Wipe joints with a damp sponge in a circular motion to remove surface residue and create clean edges. Rinse sponge frequently to avoid leaving gritty haze on brick surfaces.
Tip: Do not over-wipe; you want a compact, even joint with a consistent profile. - 7
Cure and seal (if recommended)
Let grout cure according to product guidelines before exposing to traffic or moisture. Apply sealer if the manufacturer recommends it for cementitious grout in outdoor conditions.
Tip: Avoid foot traffic until curing is well underway to prevent shifting the grout. - 8
Final inspection and cleanup
Inspect for gaps or hazy spots, re-touch any missing grout if needed, and perform a final clean-up of tools and area. A neat, sealed finish improves longevity and appearance.
Tip: Take photos of the repaired joints for future maintenance references.
Got Questions?
Do I need to remove all old grout or only the damaged areas?
Only the damaged or loose grout should be removed; sound grout can be left in place to save time and preserve the overall joint.
Remove the damaged grout and leave the solid portions intact to save time and reduce work.
Can I use indoor grout on exterior brick steps?
Outdoor grout should be rated for exterior use; indoor grout may not resist weather, moisture, or staining as well outdoors.
Outdoor grout needs exterior ratings; indoor grout is not ideal for exterior brick steps.
How long should grout cure before using the steps?
Cure times vary by grout type; follow the product instructions and avoid heavy traffic until cured.
Follow the product’s cure time and avoid heavy use until the grout has cured.
Is sealing necessary after repairing cementitious grout?
Sealing is often recommended for cementitious grout in porous brick, but not always needed if epoxy grout is used.
Sealing is usually recommended for cementitious grout on brick, but epoxy grout may not need it.
What if the brick steps are damp or windy during repair?
Try to schedule repairs in dry, mild conditions to ensure proper curing and bonding of the grout.
Repair on dry days with moderate temperatures helps the grout cure properly.
How can I match the grout color to existing joints?
Test color on a hidden area or mix a small batch to compare with the existing joints before full application.
Test color first on a hidden spot to ensure a good match.
Watch Video
The Essentials
- Assess damage before repair to target only affected joints
- Choose exterior-grade grout suited for climate and exposure
- Prepare, clean, and dry joints thoroughly for best adhesion
- Work in small sections and cure fully before heavy use
- Seal if recommended to maximize durability