My Grout Is Too White: Fixes, Causes, and Prevention
A practical, urgent guide to why grout goes too white, how to safely restore color, and preventative steps for long-lasting grout color.

The most common reason my grout is too white is mineral efflorescence or over-bleaching from aggressive cleaners. Start with a gentle rinse and a pH-neutral grout cleaner, then scrub with a soft brush. Rinse thoroughly and dry completely before re-sealing. If whitening returns, it may be moisture-driven efflorescence—address moisture sources and use a compatible, breathable sealer.
Why grout looks too white
If you say my grout is too white, you’re not alone. The whiteness is often a sign something in your environment or routine is striping away the grout’s color or depositing minerals that reflect light. According to Grout Maintenance, two main culprits sit behind this problem: mineral efflorescence that forms when water carries salts to the surface, and aggressive cleaning that bleaches or oversaturates cement-based grout. In bathrooms and kitchens, where moisture is frequent, excess moisture and poorly sealed substrates worsen whitening. Addressing the root cause is essential before attempting cosmetic fixes, or you risk chasing a temporary result that returns after a few weeks.
Quick distinctions to watch for
- Efflorescence appears as a powdery white bloom on the grout surface, often near the grout line edges where water sits.
- Uniform, bright whiteness across both new and old grout may indicate a cleaning residue or improper sealing.
- Colored grout that suddenly looks lighter might be a sign of sealant incompatibility or moisture intrusion, not actual color loss.
This quick diagnostic helps you choose the right approach, avoiding unnecessary scrubbing that can erode grout and tiles. Remember: persistent whitening usually ties back to moisture and salt deposits rather than a single cleaning mishap.
The role of moisture and cleaners
Water ingress drives efflorescence by dissolving mineral salts in cementitious grout; when water evaporates, salts crystallize on the surface, creating a chalky white layer. Likewise, using strong chlorine-based bleaches or repeated, vigorous scrubbing can strip color from grout that isn’t sealed well. If you’re wondering how to stop this in the future, start with moisture control and a compatible sealing strategy. This is particularly important for shower surrounds and backsplash areas where steam condenses on grout lines.
Quick win: safe cleaning first
Begin with a gentle, non-acid cleaner and a soft-bristled brush. Avoid abrasive pads that can grind away the grout’s surface. Rinse thoroughly with clean water and dry the area completely—moisture on grout can set white residues back into the pores. After drying, test a small area with a breathable sealer to see if the whiteness reduces or stabilizes. If you still see white after cleaning and drying, it’s time to test for efflorescence and moisture sources more comprehensively.
When whitening persists: plan B
If simple cleaning doesn’t fix the issue, you may need to consider rehydration strategies around the grout, color-restoration methods, or even regrouting in severe cases. A color-safe grout stain or tinted sealer can restore consistent color, but we strongly recommend testing on an inconspicuous area first. In persistent cases, regrouting might be the most durable solution to restore a uniform color across the tile surface.
Safety and care basics
Always ventilate the area when cleaning and wear gloves to protect skin. Use eye protection if splashes may occur. Keep cleaners out of reach of children and pets, and never mix cleaners. Quick, careful steps now can prevent future whitening and preserve the life of your grout.
Extra note for porcelain and ceramic tiles
Some tile substrates respond differently to cleaners and sealers. Porous cementitious grout soaks up finishes more readily than epoxy grout, so adjustment of products and timing matters. If you’re unsure about your grout type, consult a professional or start with a small test area before applying any sealers or stains across the full installation.
Steps
Estimated time: 60-120 minutes
- 1
Assess the whitening cause
Observe whether the whiteness is localized (around seams, near water sources) or widespread. Look for a powdery surface that can indicate efflorescence. Note if whiteness returns after moisture events.
Tip: Document areas that whiten consistently to guide moisture remediation. - 2
Prepare the workspace
Clear the area, cover nearby surfaces, and gather non-abrasive cleaners, soft brushes, clean rags, and a breathable sealer. Ventilate the room well to reduce chemical fumes.
Tip: Wear gloves and eye protection during cleaning. - 3
Rinse and test a small area
Rinse the grout with clean water, then apply a pH-neutral cleaner to a small, inconspicuous patch. Scrub gently with a soft brush and rinse again. Dry the area with a towel to assess immediate color change.
Tip: Do not use acid-based cleaners on porous grout. - 4
Clean with a gentler cleaner
If the test patch looks better but not perfect, repeat with a non-bleach, non-acid cleaner. Avoid chlorine bleach on colored grout. Rinse thoroughly and dry completely.
Tip: Never mix cleaners; read labels for compatibility with grout type. - 5
Address moisture and cure time
Check for leaks, improve ventilation, and reduce humidity around the tile. Allow ample drying time before applying any sealers.
Tip: Short dry times can trap moisture and worsen whitening. - 6
Seal if appropriate
After the grout is fully dry, apply a breathable grout sealer designed for cementitious grout. Sealers help prevent mineral deposits from seeping back in but should be compatible with your grout.
Tip: Test sealer on a small area first to ensure no color change. - 7
Consider color restoration if needed
If whiteness returns or color loss persists, explore color-safe grout stains or tinted sealers to even out the color. Always test on a hidden area first.
Tip: Color restoration is often more durable than repeated cleaning. - 8
Evaluate longer-term maintenance
Establish a routine using gentle cleaners and timely sealing, and monitor moisture sources to prevent future whitening.
Tip: Regular upkeep prevents gradual color loss and keeps grout looking consistent.
Diagnosis: Grout appears whiter than expected after cleaning or as a uniform brightening across grout lines
Possible Causes
- highEfflorescence from mineral salts due to moisture infiltration
- mediumOver-cleaning or residue from cleaners or chlorine bleach
- lowSealer mismatch or failure causing whitening effect
- lowNew grout color washing out due to improper curing or sealing
Fixes
- easyRinse, use a pH-neutral cleaner, scrub with a soft brush, rinse, and dry completely
- easyAddress moisture sources (leaks, ventilation, humidity control) and re-seal with a breathable grout sealer
- easyTest for efflorescence with a moisture-free sample and consider an oxygen-based cleaner if residues persist
- mediumIf whitening remains, consider color-restoration options or professional regrouting
Got Questions?
What is causing my grout to turn white after cleaning?
Whitening after cleaning is commonly due to efflorescence from mineral salts or residues from cleaners. Moisture transport brings salts to the surface where they crystallize once the area dries. Identifying the moisture source helps determine the right fix.
Whitening after cleaning is usually mineral salts or cleaner residue; find the moisture source to fix it.
Can I fix white grout without regrouting?
Yes, many whitening issues can be addressed with careful cleaning, moisture control, and sealing. If whitening persists in most joints, color restoration or regrouting may be the durable option.
You can often fix it with cleaning and sealing, but persistent whitening may require regrouting.
Is hydrogen peroxide safe for grout whitening?
Hydrogen peroxide is commonly used to brighten grout but should be used with caution on colored grout and in well-ventilated areas. Always test on a small area first and rinse thoroughly.
Hydrogen peroxide can help, but test first and use in a ventilated area.
Should I use bleach on grout to whiten it?
Bleach can lighten grout but may damage some sealers and grouts over time. Prefer oxygen-based cleaners and only use chlorine bleach on solid, unpainted grout areas after confirming compatibility.
Bleach lightens grout but can cause damage; use with caution and test first.
How long should grout dry before sealing?
Allow grout to dry fully—usually 48 hours or longer depending on humidity and tile porosity—before applying sealer. Follow the sealer’s manufacturer guidance for best results.
Let grout dry completely, then seal as per product directions.
When should I call a professional?
If whitening persists after multiple cleaning attempts, moisture problems remain, or you’re considering regrouting, a grout professional can assess substrate health and advise on durable restoration options.
If whitening keeps coming back or you’re unsure about moisture, consider a pro.
Watch Video
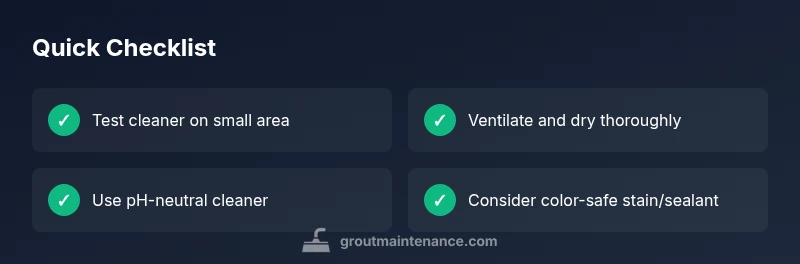
The Essentials
- Identify moisture and mineral deposition as primary causes
- Use gentle, pH-neutral cleaners first
- Dry thoroughly before sealing to avoid rehisting whiteness
- Seal properly to prevent future whitening
- Consider color restoration or regrouting if needed