what's wrong with a groutfit: A practical troubleshooting guide
Urgent, practical troubleshooting for grout problems. Learn what's wrong with a groutfit, how to diagnose mold, cracks, and staining, and fix with cleaning, sealing, or regrouting.

Most grout problems come from moisture, improper sealing, or dirt buildup. The quick fix is to start with a thorough dry-clean and deep-clean, then reseal the grout with a quality sealer, fix any leaks, and replace damaged tiles if needed. This prevents future staining and mildew. If damage is widespread, plan a regrout.
what's wrong with a groutfit: Why grout issues happen in wet areas
Grout is a porous barrier that keeps tile joints protected from moisture. When it's compromised, you get staining, cracking, and mildew — what many homeowners cheekily call a groutfit, a playful nod to a tile lineup gone bad. According to Grout Maintenance, the biggest culprits are moisture intrusion, delayed cleaning, and skipped sealing, especially in showers, tubs, and backsplashes. The Grout Maintenance team found that in most kitchens and bathrooms, moisture sources such as leaks, poor ventilation, or high humidity are the root causes rather than a single faulty product. Understanding what's wrong with a groutfit begins with recognizing how water travels through grout and how grout age accelerates wear. With this knowledge, you can stop the problem before it spreads, saving time, money, and the health of your tile project. This article focuses on practical, proven steps you can take today to fix and prevent grout problems.
In short, what's wrong with a groutfit is often moisture and neglect. Recognizing these patterns now helps you act decisively and prevent minor issues from becoming costly repairs.
Common symptoms and their meaning
- Discoloration or dark grout after showering indicates moisture retention and possible mildew growth.
- Crumbling or powdery grout points to structural wear and separation between tile and substrate.
- Persistent mildew smell suggests hidden moisture behind the grout and tile.
- Efflorescence shows mineral deposits driven by moisture leaking through grout.
- Sticky, tacky grout can signal sealer failure or dirty pores that failed to seal properly.
- Cracks along joints may reflect tile movement or installation errors; these often require regrouting or replacement.
- Grout haze on tile surfaces after cleaning can mean improper rinsing or overly aggressive cleaners.
If multiple signs appear, prepare for a deeper inspection and a targeted repair plan. This quick symptom guide helps you decide whether you can DIY or need a pro.
Root causes: moisture, cleaning neglect, sealing failure
Most grout failures are not a single defect but a combination of factors. Chronic moisture intrusion from leaks, poor bathroom ventilation, or high humidity creates a persistent moisture environment that weakens grout. Skipping or failing to apply a proper sealer allows water and cleaners to penetrate, accelerating staining, mold growth, and breakdown. Regular cleaning that leaves residue can clog pores and trap moisture, while aging grout loses its texture and binding strength. In addition, using the wrong type of grout for a wet area (sanded vs unsanded, cementitious vs epoxy) or improper installation can set the stage for early failure. Understanding these root causes helps homeowners plan effective interventions and prevent future grout problems.
Grout wear is also influenced by traffic and use patterns; kitchen backsplashes and shower benches experience more movement and moisture exchange, which hastens deterioration. The key is to match grout selection to environment, maintain a robust cleaning routine, and monitor for signs of water intrusion.
Diagnostic approach: quick checks you can do now
Start with simple, non-destructive checks to gauge severity. Look for visible cracks, softened edges, and loose tiles. Tap test: gently tap grout lines with a screwdriver handle or tool; hollow sounds indicate voids beneath grout. Check moisture in adjacent walls or behind tiles by feeling for dampness or using a moisture meter if you have one. Observe ventilation: is the exhaust fan functioning and is the room adequately dried after use? Run a clean water test in a small area to see if water beads on the grout or soaks in. Finally, assess whether grout sealer remains intact; if water no longer beads on the surface, resealing is likely due. If you detect mold growth, or if moisture persists after cleaning, take action sooner rather than later.
Step-by-step fix path: seal vs regrout
If grout is generally intact with no significant cracks, sealing and maintenance may suffice. For surface-level dirt and minor staining, a thorough cleaning followed by a quality grout sealer often restores appearance and moisture resistance. If you notice cracks, deep crumbling, or gaps, regrouting or even tile replacement may be necessary to restore a watertight seal. In areas with persistent moisture or suspected leaks, address the moisture source first (leaks, ventilation) before sealing or regrouting. Finally, test the area after curing to ensure water beads and grout remains solid.
If you’re unsure, step back and call a professional—reacting quickly to moisture problems prevents bigger failures later.
Prevention plan and maintenance routine
Create a simple, repeatable maintenance routine that includes regular cleaning with a non-acidic, pH-neutral cleaner, drying after showers, and prompt drying of any spills. Seal grout every time you clean or reseal when you notice water penetration or when beading no longer occurs. Use grout that suits the exposure (epoxy grout for high-moisture zones) and ensure proper ventilation with an active bathroom exhaust fan. Document repairs with photos to track wear and schedule preventive maintenance. A proactive approach reduces recurrence and extends the life of your tile installation.
When to call a pro and what to expect
Some grout problems require professional assessment, especially when there are signs of mold behind tiles, structural movement, or extensive water intrusion. A pro can perform moisture testing, determine whether regrouting or tile replacement is needed, and ensure proper substrate drying and ventilation. Expect a thorough inspection, an estimate for materials and labor, and a clear repair plan with curing times. If you’re unsure about safety or the extent of damage, seek professional help promptly to avoid containment and health risks.
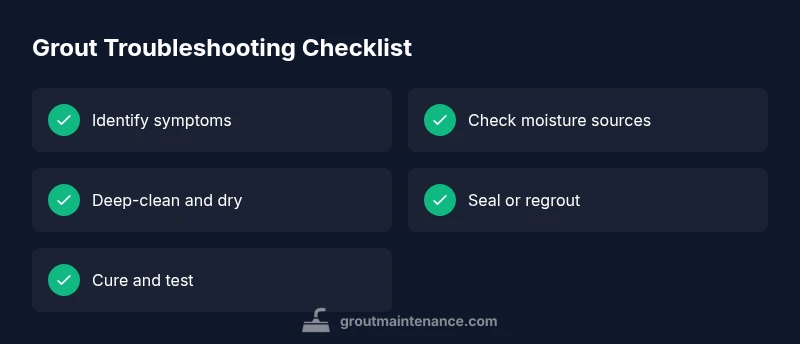
Steps
Estimated time: 2-3 hours
- 1
Assess scope and safety
Survey the affected area, photograph the grout condition, and check for visible leaks. Wear safety goggles and gloves to protect yourself from dust and cleaners. If mold is active, consider postponing work until you address moisture.
Tip: Document the area with photos to reference during later repairs. - 2
Prepare the workspace and tools
Clear surrounding tiles, tape off adjacent surfaces, and lay down plastic or drop cloths. Gather a grout removal tool, scrub brushes, a vacuum, a stiff brush, a pH-neutral cleaner, and sealant or grout material as needed.
Tip: Don’t mix cleaners; use one cleaner per job to avoid chemical reactions. - 3
Deep-clean and dry the grout
Use a grout-safe cleaner and a stiff brush to scrub lines. Rinse thoroughly and dry the area completely, ideally with a fan or dehumidifier to speed evaporation.
Tip: Avoid saturating joints; moisture left behind can promote mold. - 4
Decide between sealing or regrouting
If grout is intact and sound, sealing may suffice. If you see cracks, crumbling, or gaps, plan for regrouting and possibly tile replacement.
Tip: Check tile movement; excessive movement means you may need professional help. - 5
Apply sealer or perform regrouting
Apply sealer evenly to grout lines and wipe off excess. If regrouting, remove old grout to a consistent depth, mix new grout, and fill joints strictly to avoid air pockets.
Tip: Follow manufacturer cure times; avoid wet conditions during curing. - 6
Cure, test, and verify
Allow grout or sealer to cure per product instructions. Test by gently splashing water; beading indicates good sealing, while penetration confirms the need for further sealing.
Tip: Keep area ventilated until fully cured.
Diagnosis: Visible grout discoloration, cracking, or mildew in a tiled area.
Possible Causes
- highMoisture intrusion from leaks or poor ventilation
- highMissing or failed grout sealer causing moisture penetration
- mediumAging grout or improper grout type causing wear
Fixes
- easyAddress moisture sources and dry the area thoroughly before repair
- easyDeep-clean grout and apply a high-quality sealer after the area is completely dry
- hardRegrout damaged sections or replace affected tiles for a solid repair
- mediumRepair surface cracking and ensure proper ventilation to prevent recurrence
Got Questions?
What does 'what's wrong with a groutfit' mean?
Groutfit is a playful term for grout problems caused by moisture, mold, or wear in tiled areas. It highlights typical failure modes and preventive steps.
Groutfit is a playful name for grout problems caused by moisture and wear in tiled areas.
Should I seal or regrout first?
If the grout is intact and not cracking, sealing helps protect it. If you see cracks or crumbling, plan for regrouting.
Seal if the grout is intact; if you see cracks, regrout first.
Can I remove grout myself?
Yes, you can remove grout with a grout removal tool and protective gear, but be careful around existing tiles to avoid damage.
You can remove grout yourself with the right tool, but proceed slowly to protect nearby tiles.
Is mildew dangerous?
Mildew can trigger allergies and respiratory irritation. Remove it promptly and improve ventilation to prevent recurrence.
Mildew can be irritating to breathe, so clean it up and improve airflow.
How often should I reseal grout?
Resealing depends on area and use; check for moisture penetration or water beading to decide when to reseal. Follow sealant guidelines.
Reseal when you notice moisture getting in or water no longer beads, following the product’s directions.
Watch Video
The Essentials
- Identify moisture sources before repairing.
- Choose sealing vs regrouting based on grout integrity.
- Dry thoroughly to prevent mold growth.
- Follow cure times for sealers and grouts.
- When in doubt, consult Grout Maintenance for guidance.