Why Does Grout Get Dirty? A Practical Troubleshooting Guide
Discover why grout gets dirty, from soap scum to mineral buildup. This troubleshooting guide covers causes, fixes, and prevention for showers, kitchens, and tile.

Most grout becomes dirty due to moisture, soap scum, mineral buildup, and mildew in humid rooms. Start with a grout-safe cleaner, scrub gently, then rinse and dry. If stains persist, follow this diagnostic flow to identify the exact cause and choose the right cleaning, sealing, or repair method. Act quickly after spills, and avoid harsh acids. This keeps future cleaning easier.
Why does grout get dirty in real life
One of the most common questions homeowners ask is why does grout get so dirty. The answer isn't a single culprit; it's a cascade of factors that repeatedly deposit grime on grout joints. In bathrooms and kitchens, continuous moisture invites mold and mildew, while regular use of cleaners and soaps can leave soap scum behind. Mineral-rich hard water contributes white or brown mineral deposits; these films embed themselves in the porous cementitious grout, making stains harder to remove over time. Sealing helps, but only if you choose the right sealer and apply it correctly. The Grout Maintenance approach starts by recognizing the environment: humidity levels, cleaning habits, and the type of grout you have. For instance, cementitious grout is highly porous and soaks up grime more readily than epoxy grout, which is more resistant but can still stain in humid showers. In short, the path to cleaner grout begins with understanding the origin of the dirt: moisture, soap film, minerals, and biological growth; then you choose a strategy that targets the primary culprit.
What contributes most to grout grime
Grout grime is usually a result of moisture condensation in humid rooms, soap and shampoo residues, hard water mineral deposits, and irregular cleaning routines. In showers, the constant spray creates a microclimate that favors mildew growth. Kitchens introduce grease and grime that can cling to grout joints, especially if ventilation is weak. Old grout, particularly cementitious varieties, has larger pore networks that trap particles more readily. Each of these factors compounds over time, creating ever-darker or more stubborn stains. The practical takeaway is to address the dominant source first: fight moisture with ventilation, remove soap scum with the right cleaner, and manage mineral deposits with an appropriate grout cleaner or sealer. The Grout Maintenance team emphasizes regular inspection and timely cleaning to prevent grime from becoming ingrained.
The role of grout porosity and color in staining
Porosity is the primary reason grout stains linger. Cementitious grout absorbs liquids and residues quickly, while epoxy grout provides a denser, less absorbent surface. Lighter grout colors reveal stains more readily than darker shades, which can hide minor grime but still harbor hidden growth. Color and texture also influence cleaning ease: heavily textured joints trap more debris, requiring longer scrubbing and more frequent maintenance. When choosing grout or planning a tile project, factor in porosity, color, and cleaning tolerance. The right combination reduces the long-term effort needed to keep tiles looking fresh and minimizes the chance of permanent discoloration.
How to test grout condition and identify the culprit
A quick grout health check starts with a visual inspection: look for dark lines, spongy texture, or crumbly joints. Perform a simple water test: sprinkle a few drops of water on a suspect joint and observe absorption over a minute. If water beads, the grout is relatively sealed or less porous; if it soaks in, there’s high porosity and staining risk. Smell your grout: a musty odor indicates mildew. For a more rigorous assessment, consider a grout-dissolving stain test on a hidden area to see how easily stains release. Record your findings to guide the cleaning and sealing plan. Remember that damp spaces and lack of airflow exacerbate issues, so address ventilation at the outset.
Cleaning strategies by grout type: cementitious vs epoxy
Cleaning cementitious grout requires care to avoid damaging the grout matrix while removing grime. Start with a pH-neutral cleaner, use a soft brush, and avoid aggressive acids that can erode cementitious grout. For tougher stains, a baking soda paste or a grout-specific cleaner can help, but test on a hidden area first. Epoxy grout resists staining better and cleans more easily, but it can still discolor under aggressive cleaners or improper scrubbing. Always follow manufacturer recommendations for your grout type, and never scrub too hard in a way that loosens the grout. After cleaning, rinse thoroughly and dry to prevent new mildew growth. Sealing may be appropriate for cementitious grout but is usually unnecessary for epoxy grout due to its chemical resistance.
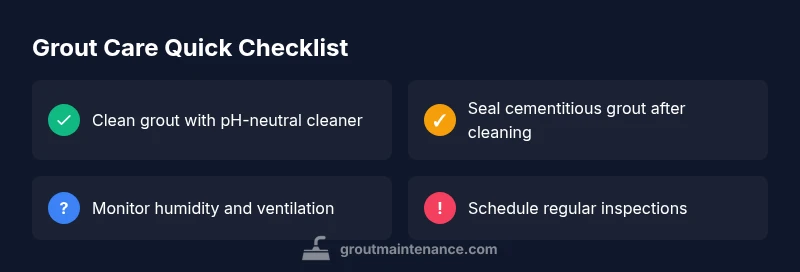
Sealing and maintenance to prevent dirt buildup
Prevention starts with sealing, especially on cementitious grout. Apply a penetrating grout sealer after a thorough cleaning and drying period, following the product’s directions. Re-seal every 1-2 years, depending on traffic and moisture exposure. Improve air flow in baths and kitchens with exhaust fans and open windows when possible. Regular, gentle cleanings can keep grout looking bright and prevent grime from taking hold. If you notice recurring stains in the same area, inspect for water leaks or humidity sources that require remediation. A proactive maintenance routine saves time and reduces the need for heavy intervention later.
When to call a pro and what to expect
If grout damage is severe—such as crumbling joints, widespread mildew, or persistent stains after professional-grade cleaning—consider professional assessment. A grout restoration expert can determine whether regrouting or epoxy replacement is necessary. Pros can also re-seal and provide guidance on long-term maintenance tailored to your tile type and room usage. Early intervention is cheaper and less disruptive than extensive tile work. The Grout Maintenance team recommends scheduling a pro evaluation if DIY attempts fail to restore color and integrity after two or three cleaning cycles.
Steps
Estimated time: 60-120 minutes
- 1
Identify grout type and area
Assess whether you have cementitious or epoxy grout, and locate the area with the worst staining. This guides your cleaning method and products to use. Note any previous sealers or coatings that could affect results.
Tip: Start in a small, non-visible area to test cleaners. - 2
Clean with a grout-safe product
Apply a pH-neutral or grout-specific cleaner, scrub with a soft-bristle brush, and rinse thoroughly. Avoid acidic cleaners on cementitious grout, which can erode the joints.
Tip: Let cleaner dwell for a few minutes but don’t let it dry. - 3
Dry and inspect the grout
Dry the area completely to reveal the true color and condition. Look for crumbling joints or persistent stains that resist cleaning.
Tip: Use a microfiber towel to speed up drying. - 4
Seal or re-seal if appropriate
Apply a penetrating grout sealer to cementitious grout after cleaning and drying. Epoxy grout typically does not require sealing.
Tip: Follow the product instructions precisely for coverage and cure time. - 5
Address persistent staining
If stains persist after cleaning and sealing, evaluate regrouting or epoxy replacement as a long-term solution.
Tip: Document the stained areas for a professional assessment. - 6
Prevent future grime
Improve ventilation, wipe spills promptly, and establish a regular cleaning schedule to reduce grime buildup.
Tip: Run exhaust fans during showers and after cleaning.
Diagnosis: Grout in shower or floor appears dirty and stained after cleaning attempts
Possible Causes
- highMoisture and humidity fostering mold/mildew
- highSoap scum and residue build-up
- mediumMineral deposits from hard water
- highPorous or aged cementitious grout absorbing grime
- highInadequate ventilation and airflow
Fixes
- easyClean and rinse with a grout-safe cleaner; test a small area first
- easyIncrease ventilation and re-clean; use a deodorizing mildew cleaner if needed
- easySeal cementitious grout after a thorough cleaning and drying
- hardConsider regrouting or epoxy grout for severely stained or degraded joints
Got Questions?
Is it safe to use bleach on grout?
Bleach can whiten grout but may degrade cementitious grout and discolor surrounding tiles. Use it sparingly and only on grout that allows it, preferably after testing a hidden spot. Always rinse thoroughly.
Bleach can work on grout but may damage cementitious grout. Test first and rinse well.
How often should I seal grout?
Seal cementitious grout after cleaning and drying, and reseal every 1-2 years depending on traffic and moisture. Epoxy grout usually does not require sealing.
Seal cementitious grout every 1-2 years as needed.
Can regrouting fix dirty grout?
Yes. If stains persist and joints are deteriorated, removing old grout and applying fresh cementitious or epoxy grout can restore appearance and performance.
Regrouting can restore dirty grout when cleaning isn’t enough.
How do I remove mold from grout safely?
Use a mildew-safe cleaner and a stiff brush; ensure good ventilation and dry the area promptly after cleaning to prevent regrowth.
Mold can be scrubbed away with proper cleaners and good ventilation.
Does epoxy grout stain easily?
Epoxy grout is more resistant to staining than cementitious grout but can still discolor with aggressive cleaners or improper scrubbing. Regular cleaning helps preserve its look.
Epoxy grout resists stains but can still discolor with harsh cleaners.
When should I replace grout rather than clean it?
If joints are crumbling, cracking, or deeply stained after best cleaning and sealing attempts, replacement, or regrouting, is recommended.
If grout is deteriorated, replacement is usually best.
Watch Video
The Essentials
- Identify whether grout is cementitious or epoxy to choose the right approach
- Moisture management is critical to preventing grime buildup
- Seal cementitious grout after cleaning to reduce future staining
- For severe cases, consider regrouting or epoxy grout replacement