Why Does Grout Turn Black? Practical Diagnosis and Fixes
Discover why grout turns black and learn fast diagnostic steps, safe cleaning, and sealing methods for homeowners. Practical guidance from Grout Maintenance.

Most often, black grout results from mold or mildew thriving in damp bathrooms or showers, triggered by persistent moisture, insufficient ventilation, and organic debris feeding growth. In other cases, mineral deposits, soap scum, or old, failed sealants darken grout. Start with improving ventilation, then clean with an appropriate cleaner and reseal after the area is dry.
why does grout turn black: common causes and quick clarifications
Black grout is usually not just a cosmetic issue—it signals moisture and organic buildup. According to Grout Maintenance, mold and mildew thrive where humidity stays high and surfaces stay damp for long periods. Poor bathroom ventilation, seasonal leaks, or shower doors that don’t seal properly create the environment mold needs to grow. In other cases, mineral deposits from hard water or soap scum can darken grout, especially on porous grout. Recognizing the root cause (mold, minerals, or sealant failure) helps you pick the right cleaning approach without damaging tile or grout. This section lays the groundwork for a practical, safe plan you can implement today.
Common environments that foster black grout and why
Bathrooms are the most common stage for this problem, but kitchens, laundry rooms, and outdoor showers can also experience it. The main actors are moisture and organic material: steam from hot showers carries water vapor that condenses on grout, while soap, body oils, and dirt provide a food source for mold. If you notice a musty smell or visible dark lines at grout joints, treat it as moisture-related. Ventilation fans, open windows, and dehumidifiers help, but you also need to clean and, if needed, reseal or regrout. The Grout Maintenance team recommends addressing both the moisture source and the stain itself for best long-term results.
Quick home checks you can perform now to narrow down the cause
Take a staged approach: look for obvious leaks around sinks or shower pans, test ventilation by running a fan for 15 minutes with the area humid, and inspect for water pooling near grout lines. If mold grows on the grout surface, it’s typically a sign of moisture persistence rather than merely staining. If the grout darkens after cleaning with basic cleaners, it could be mineral staining or deeper mold growth. Keep a note of areas with persistent moisture, as these are the spots that most often need sealing or regrouting.
Cleaning approaches by identified cause: mold, mineral staining, or soap scum
- Mold or mildew: Use a cleaner labeled for mold and mildew in grout, or a safe hydrogen peroxide solution. Do a spot test first, then apply, let sit, scrub with a stiff brush, and rinse thoroughly. - Mineral staining: Acids or descaling formulas can help, but avoid acids on natural stone or delicate tiles. Rinse well and dry completely to prevent rebound staining. - Soap scum and grime: Regular tile and grout cleaner, followed by a thorough rinse, is often sufficient; for stubborn soap scum, re-apply and scrub with a bristle brush.
Safety-first cleaning: how to tackle mold without harming yourself or surfaces
Wear gloves, eye protection, and a mask when dealing with mold. Never mix cleaners—bleach and ammonia, for example, release hazardous gases. Work in a well-ventilated space and keep pets away. If you choose to use bleach, dilute it properly and rinse away residue completely. For porous grout, aggressive cleaners can wear away cementuous material, so test on a hidden area first. Grout Maintenance emphasizes patience: effective whitening may require several passes, and drying between steps helps prevent damage.
Sealing grout and preventing future darkening: timing and product choices
Sealing is most effective after the grout is completely dry and clean. Choose a penetrating grout sealer compatible with your tile and grout type (sand or unsanded). Apply with a lint-free pad or brush, following label directions, and let it cure fully. Re-seal high-moisture zones annually or as recommended. Keep air moving after sealing and avoid moisture-prone activities for at least 24 hours. Routine cleaning and ventilation are essential; sealing slows moisture ingress, but it won’t remove existing mold.
When to consider regrouting versus spot cleaning
If grout lines are badly cracked, crumbled, or permanently stained despite cleaning and sealing, regrouting may be the better long-term fix. Damaged grout allows moisture to penetrates joints, feeding more mold growth. A pro can regrout more efficiently and may apply color-grout to hide staining if matching is challenging. However, most homeowners can achieve satisfactory results with deep cleaning, proper drying, and sealing.
Common mistakes and safety reminders you don’t want to repeat
Avoid mixing cleaners, using abrasive tools on delicate grout, or skipping ventilation. Don’t use strong acids on marble or limestone tiles. Never ignore a slow leak or a persistent musty odor—that’s a sign moisture is continuing to intrude. Finally, avoid rushing the drying process after cleaning or sealing; moisture trapped in grout escalates the risk of mold recurrence.
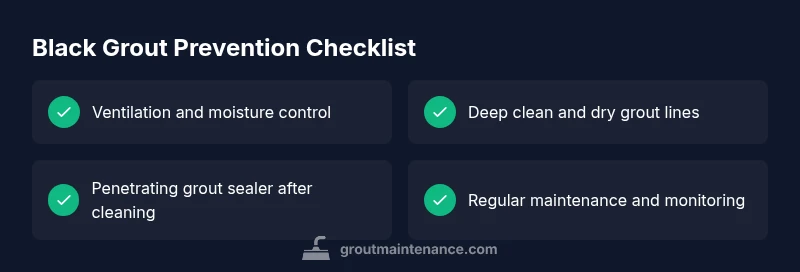
Maintenance routine to keep grout clean and prevent darkening in the future
Institute a regular cleaning schedule using a grout-safe cleaner and a stiff-bristled brush. Dry the grout after showers or spills, and run a dehumidifier in high-humidity spaces if needed. Keep shower doors sealed and ensure there are no leaks at the faucet or plumbing. This proactive approach, combined with periodic sealing, minimizes blackening and extends grout life.
Steps
Estimated time: 60-120 minutes (excluding drying and sealing times)
- 1
Assess the extent of staining and moisture
Survey all affected grout lines in the room and note if staining extends to nearby tiles or the substrate. Look for signs of leaks, mold smell, and persistent moisture. This helps determine whether cleaning alone will fix the issue or if sealing/regrouting is needed.
Tip: Take photos for comparison to track improvement after cleaning. - 2
Gather cleaning and safety supplies
Assemble mold-safe grout cleaner, a stiff brush, gloves, eye protection, a mask, and a dehumidifier if possible. Ensure you have a sealant compatible with your grout type. Prepare a water source and a well-ventilated area.
Tip: Test cleaner on a small patch to avoid discoloration. - 3
Pre-clean and dry the area
Wipe surfaces with a dry cloth to remove loose debris. Ventilate the area to reduce humidity. Use a fan or open window to drive moisture out before applying cleaner.
Tip: Never apply cleaner to a damp surface; moisture reduces cleaning efficacy. - 4
Apply cleaner and scrub thoroughly
Apply the cleaner per label directions, let sit if required, then scrub with a stiff-bristled brush along grout lines. Rinse thoroughly and repeat for stubborn areas.
Tip: Work in small sections to prevent cleaner from drying before you scrub. - 5
Rinse, dry, and inspect
Rinse completely and dry with towels or a fan. Inspect for remaining stains and re-clean if needed. Ensure the area is completely dry before sealing.
Tip: Pay special attention to corners and inside joints. - 6
Seal grout after complete dryness
Apply a penetrating grout sealer evenly; avoid pooling. Allow curing as directed by the product, then recheck after a day. Schedule annual resealing in high-moisture zones.
Tip: Follow label directions for cure time; if unsure, consult a pro. - 7
Decide if regrouting is necessary
If staining recurs quickly or grout is cracked, consider regrouting or using color grout. This locks in moisture barriers and can improve long-term aesthetics.
Tip: Ask a pro to confirm if regrouting is needed.
Diagnosis: Persistent black grout in a bathroom after cleaning attempts
Possible Causes
- highHigh moisture and poor ventilation allowing mold growth
- mediumMineral deposits from hard water staining porous grout
- mediumSoap scum buildup contributing to darkening
- lowSealer failure or absence leading to moisture intrusion
Fixes
- easyImprove ventilation (bathroom fan, open window, dehumidifier) and fix any leaks
- easyClean with mold/mildew-specific grout cleaner, scrub, rinse, and dry thoroughly
- mediumIf stains persist, use mineral-deposit removers or re-evaluate mold presence; test in a small area first
- easySeal grout after it is completely dry; replace or repair sealant if it shows wear
Got Questions?
Can bleach be used on grout to whiten black stains?
Bleach can whiten some mildew stains but can damage colored grout and certain tile types. Always dilute and use in a well-ventilated area, testing first on a hidden spot.
Bleach can help some stains, but test first and avoid colored grout; ventilate well.
Is black grout always mold or mildew?
Not always. Black grout can also result from mineral deposits or deep staining from soap scum. Proper diagnosis guides the right cleaning approach.
Not every black grout stain is mold—mineral deposits and soap scum can look similar.
Will sealing grout prevent blackening?
Sealing helps reduce moisture penetration and makes cleaning easier, but it does not replace mold remediation or fix underlying leaks.
Sealing helps prevent future staining but won’t solve moisture problems alone.
How long does sealing take to cure?
Cure time varies by product, but most sealers need 24 hours to dry and several days to fully cure before contact with water.
Most sealers dry in about a day, but full cure may take several days.
Should I regrout or can I clean and seal?
If grout is cracked, crumbly, or deeply stained despite cleaning, regrouting can be the best long-term fix. For minor staining, cleaning and sealing may suffice.
If grout is crumbly or deeply stained, consider regrouting; otherwise clean and seal.
What if mold returns after cleaning?
If mold returns, re-evaluate moisture levels, check for hidden leaks, improve ventilation, and consider professional remediation if needed.
If mold comes back, check moisture sources and ventilation, and consider a pro if persistent.
Watch Video
The Essentials
- Identify moisture sources and fix leaks first
- Clean with mold/mildew-specific products and dry thoroughly
- Seal grout after each clean and monitor humidity
- Regrout when cracking or staining recurs