Will grout cover tile chips? A practical DIY guide
Learn whether grout can hide tile chips, when tile replacement is necessary, and practical patching and sealing steps for durable grout lines.

In most cases, grout will not cover or repair a chipped tile surface. Grout fills joints between tiles, not the tile face. If tiles are chipped, replacement or professional repair is usually required; however, in some situations thin epoxy patches along grout lines can help visually reduce chip exposure when the damage is minor.
Will grout cover tile chips?
According to Grout Maintenance, grout cannot cover or restore a chipped tile surface. Grout is designed to seal and fill the joints between tiles, providing a stable, water-resistant seam. Chips on the tile face are a sign that the tile itself may be damaged, and grout alone cannot repair the damaged glaze or ceramic. In some edge cases, a very small chip adjacent to a grout line might be visually softened by careful patching or surrounding grout work, but this is not a substitute for tile repair. For most homeowners, chipped tiles should be evaluated for replacement or professional resurfacing rather than relying on grout to hide or fix the problem. The best long-term result comes from addressing the tile itself rather than the grout lines.
Why tiles chip in the first place
Tile chips typically occur from impact, heavy traffic, or sharp objects striking the surface. Improper installation or substrate movement can create stress cracks that propagate to the tile surface over time. Repeated exposure to temperature changes or moisture can also weaken glaze and edge protection, making chips more likely in kitchens, bathrooms, or high-traffic areas. Understanding the cause helps you decide between a simple grout refresh and a full tile replacement. Grout does not reinforce the tile’s surface; its purpose is to provide a consistent joint and prevent water infiltration around the tile edges.
What grout can and cannot fix
Grout can help reduce the visual impact of minor edge imperfections near the grout line, but it cannot repair a chipped tile face. If a chip exposes the substrate or creates a sharp edge, grout will not fill that damaged surface. Cementitious grout is porous and can stain, which may highlight imperfections rather than hide them. Epoxy grout or specially formulated patch products may be used near the damaged area to create a smoother transition at the joint, but these fixes won’t restore the tile’s glaze. For chips that affect the tile core, replacing the tile or retiling is usually the only durable solution. Assess whether the chip is superficial or structural before deciding on grout-based fixes.
Visual cues: chips near grout lines
Chips that occur at or near grout joints are common in high-traffic zones and can sometimes be concealed with targeted maintenance. Look for chips along the edge where the tile meets the grout, especially on perimeter or corner tiles. If the chip is shallow and does not compromise the tile’s bond to the substrate, you may be able to minimize its appearance by re-floating grout in the adjacent joints and sealing properly. However, if the chip creates a hollow edge, loose tile, or the glaze is compromised, replacement is the wiser course.
Evaluation checklist: when to repair vs replace
Start by inspecting the chip size, depth, and location. If the chip is small and the tile remains firmly anchored, a patch or grout-based cosmetic fix might be acceptable as a temporary measure. If there is any tile looseness, visible fracture lines, or water intrusion behind the tile, replacement is recommended. Consider the tile material and pattern: solid color or busy patterns may hide minor chips better, but a large chip or multiple chips in a single tile will often necessitate replacement to avoid further damage. Document damaged areas to plan a cost-effective repair strategy.
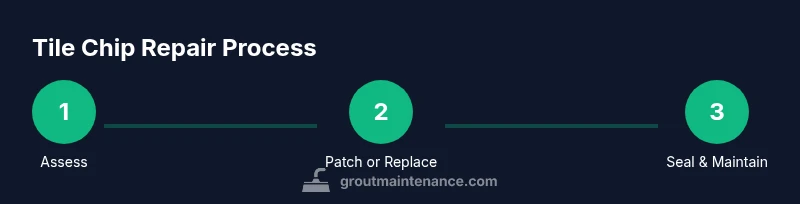
Repair options: patching, grout resurfacing, or tile replacement
Repair options range from cosmetic patches to full tile replacement. For minor edge chips, an epoxy patch or color-matched grout can help smooth the transition along the grout line, but it should be clearly understood that this is a cosmetic fix. Grout resurfacing may refresh the entire grout line and slightly alter color to blend with chips, yet it won’t restore a damaged tile face. In cases of significant chipping or weakened tile bonding, removing and replacing the affected tile or retiling a section is often the most durable solution. Always prioritize tile integrity and moisture barriers when deciding how to proceed.
Patchwork techniques: epoxy vs cementitious patching
If a cosmetic patch is feasible, epoxy-based patching compounds tend to bond well to glazed surfaces and resist moisture, making them suitable near wet areas. Cementitious patches are simpler and more color-matching friendly but may require sealing to prevent staining. When patching, ensure the patch is level with the surrounding tile surface and shaped to align with the glaze. Test a small area first to confirm adhesion and color match, and avoid patching deep into the tile’s body. Patching is most effective for minor chips at the edge rather than large surface chips.
Color and texture considerations to hide chips
Color matching is crucial when patching near a grout line. Choose grout color that closely resembles the surrounding joints and tile color to minimize the chip’s visibility. Texture differences between patched areas and glazed surfaces can still reveal the repair, so testing on a small, inconspicuous area is advisable. If color matching proves impractical, consider replacing the tile or retiling a broader area to achieve a more seamless look. Remember that even the best patch can’t perfectly replicate a tile’s original glaze or finish.
Safety, timing, and long-term results
Repairing tile chips with patches or grout-friendly fixes should be done with care to avoid injuries from sharp edges. Turn off water supply in wet areas when working around plumbing and sealants. Allow patching materials to cure fully according to manufacturer guidelines before exposing the area to moisture. Realistic expectations are essential: while cosmetic patches can extend the life of a tiled surface, they do not restore the tile to its original integrity. Plan for future maintenance and consider periodic inspections to catch emerging issues early.
Maintenance and prevention to extend tile life
Preventive steps include using protective mats or spacers in areas with heavy foot traffic, using soft cleaning tools, and avoiding harsh cleaners that can degrade tile glaze. Inspect grout lines regularly for gaps that may worsen edge chips by allowing water or debris to reach the tile edge. When regrouting or resealing, choose products specifically designed for your tile type. A proactive maintenance routine reduces the likelihood of chips and keeps grout lines visually cohesive over time.
Tools & Materials
- Safety goggles(Protect eyes during grinding or chipping work)
- Utility knife(Create clean grout removal around damaged area)
- Putty knife or plastic scraper(Smooth patch material and remove excess)
- Epoxy patch kit(Color-matching epoxy for small edge chips)
- Cementitious patch compound(Alternative to epoxy for some surfaces)
- Grout (epoxy or cementitious)(Choose color to match surrounding grout)
- Grout float(Apply and smooth grout evenly)
- Tile sealer or grout sealer(Seal repaired area to protect from moisture)
- Alcohol or acetone for cleanup(Clean residue before grout curing)
- Soft cloths and sponge(Wipe excess material and polish edges)
Steps
Estimated time: 2-4 hours
- 1
Inspect the damage
Assess chip size, location, and tile stability. Confirm whether the tile is secured to the substrate and whether adjacent grout is intact. Decide if a cosmetic patch is feasible or if tile replacement is needed.
Tip: Document the area with photos before removing any grout or tile. - 2
Prepare the area
Clear the surrounding space, cover adjacent surfaces, and clean the joint area. Remove loose glaze and dust to ensure patch adheres properly.
Tip: Use a light touch to avoid widening the chip during cleaning. - 3
Remove loose material
Gently remove loose grout and any flaky glaze around the chip with a utility knife or scraper. Create clean edges for patch adhesion.
Tip: Do not gouge the tile more than necessary; keep edges smooth. - 4
Mix and apply patch material
Prepare epoxy patch or cementitious compound according to product instructions. Apply a thin layer to the chip or along the edge, smoothing to align with tile surface.
Tip: Test color match on a hidden area first. - 5
Level and cure
Ensure the patch is flush with surrounding tile. Allow curing time as specified by the product. Avoid moisture exposure during cure.
Tip: Use painter’s tape to create clean grout edges during cure. - 6
Rejoin with grout
Rebuild the surrounding grout joints in the repaired area. Choose a grout color that blends with the existing lines.
Tip: Damp sponge gently to remove grout haze before it dries. - 7
Seal and finalize
Seal the repaired grout if using cementitious grout. This helps prevent staining and moisture infiltration near the patch.
Tip: Wait until grout fully cures before cleaning the area again. - 8
Evaluate durability
Check the repaired area after a few days of use. If cracks reappear or the tile loosens, replacement may be required.
Tip: Set a reminder to inspect for changes every 6–12 months.
Got Questions?
Can grout entirely hide a chipped tile?
Grout cannot completely hide a chipped tile; it can mask small edge chips near joints but will not restore the tile surface. For significant chips, tile replacement or resurfacing is usually required.
Grout won't fully hide a chip; for large chips, consider replacing the tile for a lasting fix.
When should I patch a tile instead of replacing it?
Patching is reasonable for tiny chips where the tile remains secure and the damage is limited to the edge. If the chip is large, affects glaze, or tile is loose, replacement is the better option.
Patch if the tile is secure and the chip is small; replace if the damage is large or tile is loose.
What type of grout is best for repairing around chipped tiles?
Epoxy grout offers superior stain resistance and durability in moist areas, but color-matching is critical for a seamless look. Cementitious grout can work if properly sealed and cured.
Epoxy grout lasts longer near moisture; pair with color-matched grout for best results.
Will replacing grout fix a tile chip?
Replacing grout around a chipped tile may improve appearance, but it will not repair the tile itself. If the tile is damaged, replacement is often necessary for a lasting solution.
Re-grouting helps appearance but won’t fix a damaged tile—replacement may be needed.
How long does a patch repair typically take?
Patch repairs typically take a couple of hours, including curing time for patch materials and grout. Allow extra time for sealing if you use cementitious grout.
Most patch jobs are finished in a few hours; factor in curing time for patches.
Should I call a professional for tile chips near a shower or tub?
Chips in wet areas like showers or tubs can trap moisture. If the area shows any signs of movement, seepage, or crafting changes, a professional assessment is advisable to prevent further damage.
In wet areas, it’s wise to get a pro to assess moisture and structural concerns.
Watch Video
The Essentials
- Grout cannot replace tile surfaces.
- Small chips near grout lines may be cosmetically softened, not cured.
- For major chips, tile replacement is the durable solution.
- Patch materials can help, but color matching is crucial.
- Preventive maintenance saves future tile problems.