Protecting Grout in Shower: A Practical Guide
Learn practical, step-by-step techniques to protect shower grout from moisture, mold, and staining with cleaning, sealing, and maintenance strategies.

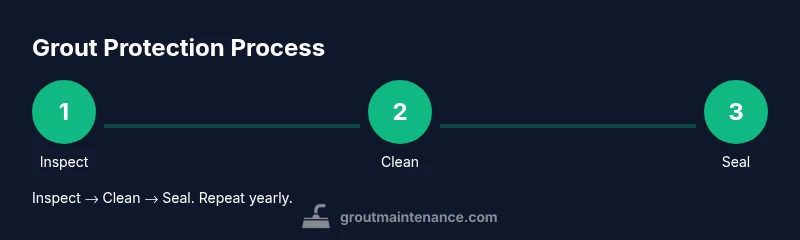
Protecting grout in the shower starts with thorough cleaning, drying, and applying a penetrating grout sealer. Use a pH-neutral cleaner, work in small sections, and ventilate well during application. Maintain by regular cleaning and re-sealing every 1-2 years, and address cracks or mold promptly. Preparation, technique, and timing are the keys.
Why protecting grout in shower matters
According to Grout Maintenance, the shower is one of the most moisture-prone rooms in a home, and protecting grout is essential to prevent mold, odor, and costly repairs. Grout serves as a porous barrier between tiles, and constant exposure to water accelerates wear. When grout becomes permeable, moisture can wick behind tiles, leading to efflorescence, cracking, and tile loosening. A well-protected grout line resists staining, dries faster, and reduces the chance of mildew growth in damp corners. Investing in sealing, routine cleaning, and timely repairs now saves time and money later, because grout damage compounds quickly in wet environments. Homeowners who make grout protection a routine often enjoy a shower that stays cleaner longer and requires fewer major repairs over the years.
Key takeaway: moisture management is the foundation of long-lasting grout performance in showers, so start with a solid cleaning and sealing plan.
Common threats to shower grout
Shower grout faces several predictable adversaries. Constant moisture creates a humid microclimate where mold can thrive if ventilation is poor. Soap scum, body oils, and mineral deposits from hard water cling to grout, forming a film that attracts dirt and bacteria. Abrasive scrubbing, acidic cleaners, and improper sealing accelerate wear and can erode cementitious grout. Temperature swings cause tiny cracks, which become pathways for moisture. Also, improper or uneven sealing leaves some grout pores exposed, undermining protection. Understanding these threats helps homeowners tailor a maintenance plan that minimizes moisture intrusion and keeps grout looking fresh.
Practical takeaway: tailor cleaning methods to the grout’s porosity and the shower’s water chemistry, and seal after verifying the grout is fully dry.
Prepping your shower for grout protection
Before any sealing, the shower must be clean, dry, and structurally sound. Begin by removing soap scum and mineral films with a gentle, pH-neutral cleaner and a soft-bristle brush. Rinse thoroughly to remove all cleaner residues, then dry surfaces completely with microfiber cloths or a squeegee. Inspect for cracks or loose tiles; repair these issues before sealing, because sealer won’t fill gaps and moisture will still penetrate. Test grout porosity in a hidden corner by applying a few drops of water; if the water beads up, the grout is well-sealed and ready for a formal test. If it absorbs water, allow two more days of drying and re-test. Finally, choose the right sealer type for your grout (penetrating vs topical) and decide whether you want a color-enhancing or standard sealant.
Tip: Always work in small sections so you can monitor absorption and avoid over-sealing areas that aren’t ready.
Cleaning routines that extend grout life
A sustainable grout-protection plan combines regular cleaning with mindful routine habits. Daily, wipe down surfaces after showers to remove standing water, and use a squeegee to reduce water pooling in corners. Weekly cleaning should use a neutral, pH-balanced cleaner that won’t attack grout cementitious bonds; avoid acid-based cleaners that can degrade grout and sealers. For stubborn mildew, apply a dedicated grout cleaner following label directions, but rinse thoroughly and dry completely. Periodic deep cleaning—every 4-6 weeks for high-use showers—helps prevent soap scum buildup and mineral deposits. Finally, maintain humidity control with ventilation fans or a dehumidifier, especially in small bathrooms without obvious airflow. Consistent cleaning, drying, and ventilation are the trifecta for grout longevity.
Pro-tip: wipe grout lines after every use in a busy shower to slow down staining and mold formation.
Sealing grout: when and how
Sealing is one of the most impactful steps in grout protection. Start only after grout is completely dry, typically 24-48 hours post-cleaning, and test porosity in an inconspicuous area. Select a penetrating grout sealer for cementitious grout; avoid overly glossy topical sealers that can peel with cleaning. Apply with a clean brush or applicator, working in small, uniform sections. Seal from the top of the grout line downward, ensuring thin, even coverage without pooling. Wipe away any excess sealer from tile surfaces to prevent hazing. Allow the sealer to cure per product instructions—often 2-4 hours between coats and 24-48 hours for full cure. Re-seal according to manufacturer guidance, typically every 6-12 months for high-traffic showers, or sooner if water no longer beads.
Note: Never seal damp grout; moisture trapped under a seal can trap odors and promote mildew.
Maintenance plan and troubleshooting
A proactive maintenance plan keeps grout protected over time. Schedule a quarterly visual inspection to catch hairline cracks, loose tiles, or darkening grout that signals moisture. If you notice persistent staining or mold, address the root cause (mold requires moisture control and cleaning, not just sealing). When grout wears thin, re-grouting or applying epoxy colorant to match existing grout can be a practical solution. If you’re unsure about your grout type (sanded vs unsanded), consult product guidelines because wrong sealing can alter color and texture. Finally, keep a record of sealant products used, the date of application, and any observed issues to help with future maintenance decisions.
Caution: Do not mix sealers or cleaners unless the manufacturer approves, as chemical incompatibilities can nullify protection and damage tiles.
Quick checks and DIY fixes
If grout lines darken after a shower, it’s a sign that moisture remains or the grout is nearing the end of its life. Dry the area and re-test; if absorption remains, consider re-sealing or repairing damaged sections. For small cracks or hairline fissures, a color-matched epoxy grout repair kit is often sufficient to restore integrity without replacing entire sections. If mildew recurs, escalate to a moisture-management approach: improve ventilation, reduce humidity, and re-clean with a mold-safe product designed for bathrooms. In most cases, sticking to a routine cleaning schedule and annual sealing refresh eliminates most common issues.
Tip: Use a color-matching epoxy grout for repairs to minimize aesthetics disruption.
Professional help: when to call a pro
Not every grout issue warrants a full DIY overhaul. If you notice large cracks, loose tiles, widespread mold beyond routine cleaning, or suspect underlying water damage, call a professional. A grout specialist can assess tile substrate integrity, re-point or regrout as needed, and recommend a long-term moisture-control plan. In high-traffic showers or homes with piped humidity challenges, a pro can audit ventilation and perform a comprehensive resealing schedule tailored to your bathroom. Professionals also offer advice on best sealant products for your grout type and can ensure proper cure times for lasting protection.
Tools & Materials
- penetrating grout sealer(Choose water-based or solvent-based based on grout type; ensure compatibility with cementitious grout)
- pH-neutral grout cleaner(Avoid acidic cleaners that can degrade grout and sealers)
- soft-bristle brush(Non-scratch nylon or natural-bristle brush works best on grout lines)
- grout sponge(For applying sealer and wiping away excess without scratching tiles)
- microfiber cloths(Use for buffing and drying; helps prevent streaks)
- spray bottle(For even cleaner and sealer application)
- nitrile gloves(Protect hands from cleaners and sealants)
- face mask or respirator(Ventilate area; protect lungs from fumes during sealing)
- dehumidifier or portable fan(Speed up drying in humid bathrooms)
- bucket(For rinsing and mixing cleaners if needed)
- caulk remover/utility knife(Optional for removing old silicone or faulty caulk before resealing)
Steps
Estimated time: 2-4 hours active time; plus 24-48 hours cure time depending on sealer used
- 1
Inspect grout and plan
Begin by visually inspecting all grout lines for cracks, chips, or loose tiles. Create a simple plan to address any problem areas before applying sealer. Document edges that require extra attention so you don’t miss areas during cleaning and sealing.
Tip: Address structural issues first—sealing won’t fix cracks or looseness. - 2
Clear the area and gather materials
Remove bath mats, bottles, and any obstacles from the shower. Gather cleaning agents, sealers, tools, and protective gear so you can work in a few focused passes. Having everything ready reduces mistakes and ensures even coverage.
Tip: Pre-measure products to avoid mid-session running out. - 3
Clean and degrease grout
Apply a pH-neutral cleaner to grout lines and scrub with a soft-bristle brush. Rinse thoroughly to remove all cleaner residues. Repeat if needed until the grout looks clean and pale, not discolored from buildup.
Tip: Rinse multiple times to ensure no cleaner remains that could interfere with sealing. - 4
Dry grout completely
Use microfiber cloths and a squeegee to remove all moisture from grout lines. Run a dehumidifier or fan for at least 30 minutes to ensure surface and interior grout pores are dry before sealing.
Tip: Sealer adheres best to dry surfaces; moisture can cause hazing. - 5
Test grout porosity
Dimple a few drops of water on a sample grout area. If water beads up, porosity is sufficient; if it soaks in, allow more drying time before sealing and consider a two-step seal approach.
Tip: Test additional areas if the shower has mixed grout types. - 6
Choose and apply sealer
Apply sealer in small sections using a foam brush or sponge, following the grout line and wiping any excess from tile faces. Use light, even coats and avoid pooling at tile edges. Do not re-seal over damp grout.
Tip: Apply second coat only if product instructions specify; this often improves coverage in porous grout. - 7
Wipe and cure
Wipe away any sealer that got onto tile surfaces promptly. Allow recommended cure time in a well-ventilated area, typically several hours. Avoid using the shower during cure time until the product is fully cured.
Tip: Cure times vary by product; check label and plan for a dry window. - 8
Reassess and repeat if needed
Check for even water beading after curing. If beads are absent, re-seal as directed by the manufacturer and repeat cleaning steps to maintain moisture control.
Tip: Document the date and product used for future maintenance. - 9
Establish ongoing maintenance
Set a schedule for routine cleaning, quick wipe-downs, and periodic re-sealing (usually every 6-12 months depending on use). This keeps grout protected and tile surfaces pristine.
Tip: Consistency is more important than perfect technique. - 10
Document issues and plan next steps
Keep notes on any cracking, mold, or discoloration. If problems persist, consider professional assessment for deeper moisture issues or resealing strategies.
Tip: A simple record helps you spot trends and time future maintenance.
Got Questions?
How often should shower grout be sealed?
Most cementitious shower grout should be sealed every 6-12 months depending on usage and porosity. Some areas may benefit from more frequent resealing if water tends to bead poorly or if mildew persists. Always follow the sealer manufacturer's guidelines and inspect yearly to adjust the schedule.
For most showers, reseal every 6 to 12 months, depending on use and porosity. Check the product guidelines and inspect grout yearly.
Can sealing grout prevent mold?
Sealing grout helps reduce water absorption, which lowers the moisture available for mold growth. However, sealing is not a substitute for ventilation, cleaning, or addressing existing mold growth. Combine sealing with regular cleaning and humidity control for best results.
Sealing helps but is not a substitute for ventilation and cleaning. Keep up with regular cleaning and humidity control for mold prevention.
What cleaners are safe for sealed grout?
Use a pH-neutral cleaner that is labeled safe for sealed grout. Avoid acidic or highly alkaline cleaners, which can degrade sealants and grout over time. Always test on a small area first and rinse thoroughly.
Choose a pH-neutral cleaner and avoid acids or strong bases. Test first and rinse well.
Is sealing necessary for all grout types?
Porous cementitious grouts benefit most from sealing. Sanded and unsanded cementitious grouts can be sealed, but epoxy grout usually doesn’t require sealing because of its inherent moisture resistance. Check your grout type and follow product guidance.
Most cementitious grouts benefit from sealing; epoxy grout often doesn't require it.
How long does sealer cure?
Cure times vary by product; most penetrating sealers require 2-4 hours between coats and up to 24-48 hours for full cure. Do not expose the area to moisture during the cure window.
Cure time usually ranges from a few hours between coats to a day for full cure.
What should I do about cracked grout?
Cracked grout should be repaired before sealing. Small hairline cracks can sometimes be filled with a matching epoxy grout, while larger cracks may require patching or regrouting to restore moisture barriers.
Repair cracks before sealing. Patch or regrout as needed for a solid moisture barrier.
Watch Video
The Essentials
- Inspect and repair before sealing.
- Use pH-neutral cleaners and proper ventilation.
- Seal only dry grout; allow full cure between coats.
- Maintain with regular cleaning and scheduled resealing.
- Document maintenance history for long-term protection.