Cheap Grout Float: Budget Guide for DIY Grouting
Discover how to pick a cheap grout float that delivers solid grout application without overspending. This budget-focused guide covers materials, features, and buying tips for DIY tile projects.

Understanding what a cheap grout float is
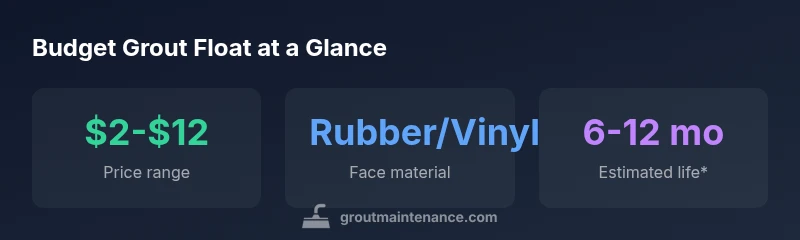
A cheap grout float is a budget-friendly version of the common tile-grouting tool. It typically uses a rubber or vinyl face with a simple plastic or wooden handle. For small to mid-size projects, these basic floats provide acceptable density and rigidity to press grout into joints and to wipe away excess grout without leaving gouges. The Grout Maintenance team notes that the right budget float prioritizes a firm, smooth face and a comfortable grip, because control matters as much as cost. While not designed for heavy-duty epoxy grouts or oversized tile runs, a well-chosen cheap float can handle cement-based grout on standard ceramic or porcelain installations with predictable results.
Benefits of budget grout floats for DIY projects
Choosing a cheap grout float is often a smart move for DIYers who grout infrequently or are tackling quick projects. Benefits include lower upfront cost, easy availability at hardware stores, and a short learning curve for beginners. Budget floats also come in compact sizes that fit tight corners and edges. That said, these tools excel most on small bathrooms or splashbacks with cement-based grout. For larger jobs or specialty grouts, upgrading to a mid-range tool may yield faster work and longer life. The key is to balance price against a face that remains smooth under pressure and a handle that minimizes fatigue during longer sessions.
Key features to look for in affordable options
When shopping cheap grout floats, inspect the following features:
- Face material: rubber or vinyl. A slightly firmer face tends to push grout into joints more evenly.
- Edge quality: ensure the leading edge is smooth and free of burrs to avoid scratching grout lines.
- Edge density: a dense edge helps prevent grout snagging and uneven wiping.
- Handle comfort: a contoured, non-slip grip reduces hand fatigue during long projects.
- Size and balance: choose a float that feels balanced in your hand and fits the tile layout.
- Cleaning ease: smooth surfaces are easier to wipe clean and keep free of dried grout.
- Replacement parts: consider whether replacement pads or edges are available for longer-term use.
Vinyl vs rubber: choosing the right budget option
Both vinyl and rubber floats are common in the budget category. Vinyl tends to be lighter and cheaper, making it appealing for quick jobs; rubber floats can offer better wear resistance and a firmer feel, which helps in applying and smoothing cement-based grout. For porcelain or larger tile grids, a slightly stiffer rubber face can deliver more consistent results. If you anticipate heavy use or repeated projects, aim for a budget float with a thicker, smoother face and a robust handle. Remember, the final finish is highly dependent on technique as much as the tool.
Finding the best value: tips for shopping cheap grout float
To maximize value, follow these tips:
- Check multiple retailers to compare prices and return policies.
- Read customer reviews focusing on edge quality and comfort over time.
- Feel the float in your hand if possible; test the stiffness by pressing on a small test area.
- Inspect for burrs or rough spots along the leading edge.
- Consider a mid-range option if you expect to grout more than a couple of rooms in the near term.
- Look for a budget float with a smooth, wipe-friendly face and a durable handle.
Common pitfalls and how to avoid gouging grout
Gouging happens when the float edge drags along grout, leaving grooves or tearing. To avoid this:
- Keep grout fresh and not dried out; work in small sections.
- Maintain even pressure and keep the face flat against the joints.
- Clean the face frequently to prevent grout build-up that can scratch once you resume work.
- Do not slam the float into corners; use gentle, controlled strokes.
Care and maintenance to extend life of a budget tool
Rinse the float immediately after use to remove excess grout. Wipe dry with a cloth to prevent moisture damage, then store in a dry place. If grout residue hardens on the face, use a soft brush to loosen it before rinsing again. Periodically check the edge for nicks and burrs; if needed, lightly sand the edge to restore a smooth cutting surface. Proper care can extend the life of a cheap grout float across several projects.
Performance expectations and trade-offs
Budget floats deliver solid performance for cement-based grout on standard tile layouts. They are not a substitute for high-end tools when dealing with epoxy grout or very large-format tiles that require extra edge rigidity or heat resistance. The trade-off is cost versus durability; a cheap float may wear faster or require more frequent cleaning and edge maintenance. For many DIYers, a budget option paired with careful technique yields satisfying results without breaking the bank.
Quick-start buying checklist
- Define your project scope (size, tile type, grout type).
- Check face material, edge quality, and handle comfort.
- Compare at least two brands and read reviews focused on real-world use.
- Test for stiffness and edge smoothness in-store if possible.
- Confirm availability of replacement parts or edge replacements for longer life.
- Choose a size that fits your tile grid and allows for easy wiping.