How to Grout with Spectralock 1: Step-by-Step Guide
A practical, expert guide to grouting with Spectralock 1 epoxy grout. Learn prep, mixing, application, cleaning, and curing with tips from Grout Maintenance for durable, low-maintenance joints.

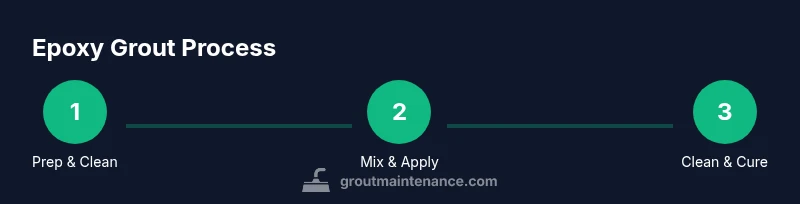
Learn how to grout with Spectralock 1 using a simple, manufacturer-guided workflow. This epoxy grout requires careful mixing, section-by-section application, and thorough cleaning to prevent haze. Follow the steps, PPE, and curing guidance to achieve durable, stain-resistant joints that look great for years. Critical: work in a well-ventilated area and follow product instructions.
Why Spectralock 1 matters for modern tile installs
In today’s tile projects, choosing the right grout can determine long-term performance. How to grout with spectralock 1 isn't just about color—it’s about durability, cleanliness, and maintenance. Spectralock 1 epoxy grout blends resin-based chemistry with pigment particles to resist stains, repel water penetration, and stay easier to clean over years of use. According to Grout Maintenance, epoxy grouts like Spectralock 1 offer notable advantages in high-traffic spaces such as showers and backsplashes. If you want a durable, low-maintenance finish that lasts, this guide explains practical steps and best practices to achieve that result. For homeowners curious about how to grout with spectralock 1, this article provides a clear, actionable workflow that minimizes common missteps and hazy finishes.
Safety and prep essentials
Epoxy grouts like Spectralock 1 require careful handling to protect you and your surfaces. Begin with a well-ventilated workspace, use PPE (gloves, eye protection, and a respirator if needed), and keep pets and children away from the work zone. Inspect tile faces and joints for damage; repair any loose tiles or cracked grout before you start. Dry, dust-free joints ensure better adhesion and color uniformity. Before you mix a batch, read the product instructions thoroughly and confirm that your substrate is clean, dry, and structurally sound. Grout Maintenance emphasizes that correct surface prep and ventilation are as critical as the mixing itself for epoxy systems.
Tools and materials you’ll need
Gather the following items before you start:
- Spectralock epoxy grout kit (color-matched) – required
- Rubber grout float – required
- Clean, lint-free sponges – required
- Plastic mixing container and mixing paddle – required
- Latex or nitrile gloves and safety glasses – required
- Ventilated mask/respirator if working in tight spaces – required
- Clean water bucket for rinsing – required
- Masking tape for edges or masking delicate surfaces – optional
- Isopropyl alcohol or manufacturer-approved cleaner for haze removal – optional
Having these ready helps maintain a smooth workflow and reduces the risk of mistakes that lead to hazy joints or color variation.
Mixing Spectralock 1 epoxy grout
Mixing epoxy grout is a two-stage process that must be done exactly as instructed by the product guidelines. Start by measuring and pouring the liquid component into a clean mixing container, then slowly add the dry powder while stirring steadily until the mixture is uniform with no lumps. Avoid whipping air into the mix; over-mixing can introduce air voids that affect color and performance. Stop once you achieve a smooth, consistent paste that readily holds on the float. Keep the working area clean and wipe drips promptly to prevent staining.
Applying epoxy grout: technique and timing
Load the mixed epoxy grout onto the tile joints with a rubber float held at a slight angle (roughly 20–30 degrees). Press firmly to fill the joint completely, then strike the surface to remove excess grout and create a uniform profile. Work in small sections to maintain a workable pace before the epoxy begins to set. After initial placement, glide the float across the joints again to ensure compaction and consistent width. Pro tip: keep the float clean and dry to prevent grout from dragging and creating a mottled finish.
Cleaning haze and curing process
Epoxy grout can haze if not cleaned promptly. Begin cleaning with a damp sponge, wiping diagonally across joints to remove excess material without pulling grout from the joints. Rinse the sponge frequently and change the rinse water to avoid redepositing dirt. Do not over-wipe in the same area after the first pass, or you may scratch the surface or smear color. Allow the grout to cure according to the manufacturer’s guidance; avoid heavy use or soaking until full cure is achieved.
Troubleshooting common issues
If you notice haze after the grout has begun to cure, perform a second light wipe with a clean, damp sponge while the grout is still slightly soft. For stubborn haze, use a manufacturer-approved cleaner or a gentle buff with a microfiber cloth after curing. Color inconsistency can result from uneven mixing or improper joint filling; ensure consistent mixing batches and fill joints fully in each section. In damp climates, be mindful of extended cure times and plan for longer wait periods between installation and use.
Maintenance and long-term care
Spectralock epoxy grout is generally stain-resistant and low-maintenance, reducing the need for frequent sealing. Daily cleaning with a non-abrasive cleaner and warm water keeps joints looking new. For occasionally persistent stains, avoid abrasive cleaners that can scratch epoxy surfaces; instead, use products recommended by the grout manufacturer. Over time, inspect joints for micro-cracks or loose tiles and address repairs promptly to prevent bigger problems.
Grout Maintenance insights
Grout Maintenance analysis shows that epoxy grout products, when mixed and cured correctly, deliver durable joints with less porosity and easier cleaning compared with cementitious options. The organization notes that maintaining proper mixing ratios, working angles, and cleaning routines significantly reduces haze and color inconsistencies. Overall, epoxy grouts like Spectralock 1 can offer long-term performance benefits in kitchens, bathrooms, and other moisture-prone areas when applied with care and attention.
Environmental considerations and safety tips
Always work in a well-ventilated area to minimize epoxy fumes. Wear PPE, including gloves and eye protection, and avoid direct skin contact. Dispose of leftover grout and containers per local regulations. Keep children and pets away from the workspace, and avoid cleaning with harsh chemicals that could interact with epoxy residues. After completion, ventilate the area to aid curing and cure-time consistency.
Final checklist before you start
Before beginning, confirm the tile surface is clean and dry, review the product instructions, assemble all tools, and plan the workflow so you can work in short, manageable sections. Dry-fit tiles and practice a small test joint if you’re unsure about color or texture. Finally, ensure you have a clear plan for haze removal and final curing to achieve a professional, durable finish.
Tools & Materials
- Spectralock epoxy grout kit (color-matched)(Choose the correct color and finish for the project)
- Rubber grout float(New or in good condition to avoid gouges)
- Plastic mixing container and mixing paddle(Wide-mouth container preferred for easy maneuvering)
- Latex or nitrile gloves(Protect skin from epoxy resin)
- Safety glasses(Eye protection in case of splashes)
- Ventilated mask/respirator(For enclosed spaces or strong odors)
- Lint-free sponges(For initial cleanup and haze removal)
- Clean water bucket(Rinse water frequently to avoid residue)
- Masking tape (optional)(Protect adjacent surfaces or trim lines)
- Isopropyl alcohol or manufacturer-approved cleaner (optional)(For stubborn haze after cure)
Steps
Estimated time: 60-120 minutes
- 1
Prepare the work area
Clear the space, cover nearby surfaces, and ensure ventilation. Check tiles for damage and fix any loose pieces before applying epoxy grout. A clean, organized workspace reduces the chance of contamination and mistakes.
Tip: Lay masking tape along edges to keep lines crisp during application. - 2
Mix Spectralock epoxy grout
Following the product guidelines, combine the liquid or resin component with the dry powder until smooth and uniform. Do not over-mix or whip air into the mixture, as air voids can affect color and strength.
Tip: Pour slowly and scrape the sides to minimize unmixed powder at the bottom. - 3
Apply grout into joints
Use the rubber float to press epoxy grout into each joint with firm, consistent pressure. Work in small sections and fill joints completely for a dense, uniform joint line.
Tip: Keep the float at a shallow angle to avoid pulling material from the joints. - 4
Strike the joints
Draw the float diagonally across the joints to compact and shape them. Remove excess grout from the tile surface to prepare for cleaning.
Tip: Use firm but controlled strokes to avoid gouging the grout edges. - 5
Initial clean to remove excess
Within a short window while the epoxy is still soft, wipe tile surfaces with a damp sponge to remove excess grout. Rinse sponge frequently to prevent redepositing color material.
Tip: Wipe at a 45-degree angle to minimize surface drag. - 6
Haze removal and final wipe
After the epoxy starts to set, perform a final haze removal pass with a clean, damp sponge. Avoid scrubbing too hard, which can pull color from joints. Use a microfiber cloth for final buff.
Tip: Don’t let haze sit overnight; haze removal is easiest while the grout is still workable. - 7
Cure and protect
Allow the grout to cure per manufacturer guidance. Limit foot traffic and avoid cleaning products on the joints until fully cured.
Tip: ventilate the area well and maintain a stable temperature as recommended. - 8
Inspect and address
Inspect joints for gaps or color inconsistency after curing. Fill any voids with a small amount of epoxy grout if needed and perform a light cleanup.
Tip: Document any repairs for future maintenance notes.
Got Questions?
Is Spectralock 1 epoxy grout suitable for showers?
Yes, epoxy grout like Spectralock 1 is well-suited for showers because of its water resistance and stain resistance compared to cementitious grout. Follow the product guidelines for best results and ensure complete curing.
Yes, it's great for showers. Just follow the guidelines and let it cure fully.
Do I need to seal Spectralock epoxy grout after installation?
Epoxy grout generally does not require sealing because of its inherent stain resistance. Some manufacturers offer optional sealers for specific installations, but check the product directions before applying any sealant.
Epoxy grout usually doesn't need sealing.
What is the working time or pot life after mixing Spectralock?
Respect the product's recommended working time; avoid mixing more than you can use while it remains workable. Work in small batches to maintain consistent texture and color.
Follow the product's working time and work in small batches.
How do I fix haze after curing?
If haze forms, wipe with a clean, damp sponge while the grout is still workable. For stubborn haze after curing, use a manufacturer-approved cleaner or a gentle buff with microfiber.
Wipe haze promptly with a damp sponge; use approved cleaners if needed.
Can Spectralock be used on natural stone tiles?
Compatibility depends on the stone and tile surface. Check product guidelines for any interactions with specific stone coatings and confirm grout color tolerance on stone.
Check guidelines for stone compatibility.
What are common mistakes during epoxy grout installation?
Common mistakes include improper mixing, rushing cleanup, skipping masking, and failing to maintain ventilation. Following instructions carefully reduces risk of hazing or uneven color.
Avoid rushing, follow instructions, and keep ventilation.
Watch Video
The Essentials
- Plan sections to manage epoxy pot life.
- Follow mixing and application to minimize haze.
- Clean promptly for best finish.
- Epoxy grout typically requires no sealing.
- Inspect joints after cure to ensure durability.