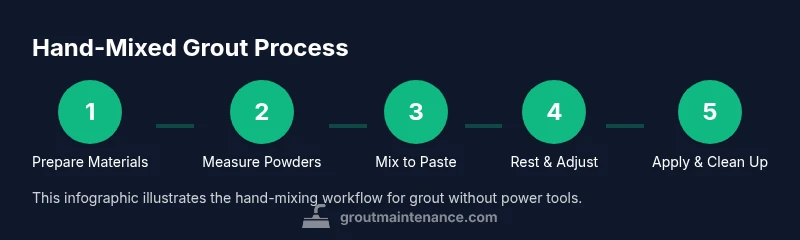
How to Mix Grout Without a Drill: A DIY Guide
A drill-free grout-mixing method using simple tools. This step-by-step guide covers ratios, texture, troubleshooting, and finishing for tile projects.

This guide shows how to mix grout without a drill, using a mixing bowl, margin trowel, and proper water-to-powder balance. Perfect for small tile jobs where a drill or mixer isn’t available or practical. You’ll learn 6 actionable steps, common mistakes to avoid, and how to clean up quickly after finishing.
The Case for Hand-Mixing Grout
Mixing grout without a drill can feel like a throwback, but it remains a reliable method for many tile projects. For DIYers working in tight spaces or repairing small areas, hand-mixing gives you tactile feedback that power mixers can’t reproduce. According to Grout Maintenance, this approach yields better texture control and reduces the risk of air pockets that can occur when over-mixing with a drill. When you mix by hand, you can monitor consistency as you go, adjust the amount of water and powder in real time, and avoid wasting material. This is especially true for non-sanded grout in narrow joints where precision matters. While a drill can speed up large batches, the drill-free method shines on showers, backsplashes, and detail work where you need incremental adjustments and immediate cleanup. The goal is a smooth, paste-like consistency that adheres well to the tile surface without slumping or cracking. In practice, expect a bit more physical effort, but you’ll gain greater control over the final texture and color uniformity. The Grout Maintenance team views hand-mixed grout as a practical skill for homeowners who want reliable results without renting or buying specialized equipment.
What You Need to Succeed (Tools and Materials)
Before you begin, gather the right tools and materials. Having the right setup prevents interruptions and helps you maintain a steady workflow. Hand-mixing grout gives you flexibility for small patches, corner work, and quick repairs where a powered mixer would be excessive. Keep in mind that non-sanded grout and very narrow joints require extra care to avoid lumps and inconsistency. This section outlines exactly what you’ll want on hand and what you can substitute if a tool is not available.
Tools & Materials
- Mixing bowl(Sturdy, wide-mouthed for easy access and thorough mixing)
- Margin trowel(Flat, rigid blade ideal for scraping and folding paste)
- Measuring scoop(For powder portions and even distribution)
- Clean water(Fresh, at room temperature; keep a separate container for mixing water)
- Gloves(Protect skin from drying effects of cementitious grout)
- Dust mask(Optional but recommended to minimize inhalation of powder dust)
- Drop cloth or old tarp(Contain spills and protect surrounding surfaces)
Steps
Estimated time: 60-90 minutes
- 1
Prepare workspace and materials
Clear the area, lay down protection, and set out all tools within easy reach. This reduces interruptions and helps you maintain a steady rhythm throughout the mix.
Tip: Arrange items in the order you’ll use them so you don’t hunt for tools mid-mix. - 2
Pre-measure powder and water
Have your grout powder ready and open your water source. It’s easier to adjust texture if you add water gradually rather than dumping it all at once.
Tip: Avoid adding water too quickly; adding small amounts gradually helps prevent over-wetting. - 3
Add powder to water gradually
Pour the powder into the mixing bowl while slowly stirring to prevent clumps. Aim for an even distribution around the bowl to start with a smooth base.
Tip: Use a circular motion to lift settled powder from the bottom. - 4
Stir to a smooth paste
Continue mixing with the margin trowel until you reach a paste with no lumps. Scrape the sides and bottom to incorporate all material.
Tip: Don’t over-mix; stop as soon as you achieve a uniform paste. - 5
Rest briefly and adjust texture
Let the paste slake for a couple of minutes, then check texture and add small amounts of water or powder as needed to reach a workable consistency.
Tip: A short rest can help hydrate the mix for better adhesion. - 6
Test readiness and use promptly
Check that the paste holds its shape on vertical applications and doesn’t sag. Use the mix within the recommended working time for your grout product.
Tip: If it starts to set in the bowl, start a fresh batch to avoid weak joints.
Got Questions?
Can I mix grout without a drill?
Yes. Hand-mixing grout is practical for small jobs, tight spaces, or when a drill isn’t available. It gives you more control over texture and consistency. Follow a few basic steps and you’ll get solid results.
Yes, you can mix grout by hand for small jobs. You’ll gain control over texture and consistency by following a few simple steps.
What is the best way to measure grout powder and water?
Always start with the manufacturer’s guidelines on the bag or label. Add powder to water gradually, stopping when you reach a smooth, paste-like consistency.
Follow the bag instructions and add powder gradually until you reach a smooth paste.
How long does hand-mixed grout take to cure?
Cure time varies by product and conditions. Follow the product’s guidance and avoid heavy use until the grout has adequately set.
Follow the product’s curing instructions and avoid heavy use until it has set.
Can I reuse leftover grout?
Leftover grout should be discarded if it has started to stiffen or dry. Do not reuse it on new joints as performance will suffer.
Don’t reuse grout that’s started to set; it won’t perform well in joints.
Do I need to seal grout after it cures?
Sealing is often recommended for unsanded grout or grout in porous substrates to improve stain resistance and cleanability. Check product guidelines.
Seal grout if your product recommends it, especially in high-traffic or damp areas.
What if I get lumps in the mix?
If you notice lumps, stop adding powder, whisk or stir more vigorously, then strain or remix a small batch before continuing.
If there are lumps, remix a small batch until smooth.
Watch Video
The Essentials
- Mix grout by hand for precision in small/bordered areas
- Prepare and measure before you start to maintain control
- Add water gradually to avoid lumps and over-wetting
- Work in small batches and clean tools quickly for best results