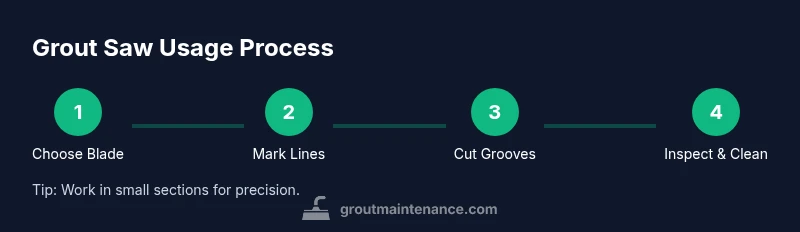
How to Use a Grout Saw: Step-by-Step Guide
Learn how to safely and effectively use a grout saw to remove old grout between tiles. This guide covers tool selection, safety, technique, and finishing tips for durable grout lines.

By the end of this guide, you'll be able to safely select a grout saw, grip it correctly, and remove old grout with precision, minimizing tile damage. Required tools include a grout saw, safety glasses, gloves, a utility knife, a vacuum or brush, and a damp cloth. Follow the step-by-step technique to achieve clean edges ready for sealing.
Why using a grout saw correctly matters
In tile projects, the grout line defines the overall look and structural integrity. A grout saw helps you remove damaged or old grout without chiseling into the surrounding tiles when used with care. According to Grout Maintenance, the right technique reduces dust, lowers the risk of cracks, and yields uniform lines that accept a new grout job evenly. Begin with a plan: identify the lines to target, respect tile edges, and work in short, controlled bursts. The grip, angle, and feedback you feel in your wrist all indicate whether you’re following the grout, not the tile. When used properly, a grout saw preserves the tile’s glaze and keeps grout lines straight, making sealing and finishing subsequent steps much more reliable.
Grout saw types and choosing the right one
Grout saws come in several styles, from simple handheld scrapers to oscillator-driven blades. For most DIY projects, a carbide-grit blade mounted on a small handheld grout saw balances control with cutting speed. Consider blade width and grit: finer grit works well for sanded grout, while coarser blades can speed up removal in thicker joints. Manual tools are cheaper and quieter, but an oscillating multi-tool with a grout blade can help tackle larger jobs or stubborn areas. Always choose a blade width that matches the grout joint you’re removing to minimize tile chatter and edge damage.
Safety first: PPE and prep
Dust is a major byproduct of grout removal, so personal protective equipment (PPE) is essential. Wear safety glasses to shield your eyes, a dust mask or respirator to protect your lungs, and gloves to guard against sharp edges. Ensure good ventilation and keep a vacuum handy to capture debris as you work. Clear the surrounding area of valuables and cover nearby surfaces with a drop cloth to prevent dust settling on cabinets and countertops. Proper PPE reduces health risks and makes the work more comfortable over longer sessions.
Preparing the work area and marking lines
Before you start cutting, clean the joint with a brush or vacuum to remove loose material. Use painter’s tape to mark the grout lines you intend to remove; this helps you stay lined up and prevents accidental edges on the tile. If you’re replacing more than one row, plan your path to maintain consistent grout lines across sections. A dry run without blade can help you visualize the cut line and refine your stance.
Step-by-step technique: grip, angle, and passes
Hold the grout saw with a relaxed grip and keep your wrist straight for better control. Start with shallow passes along the marked line, aiming for a 30–45 degree angle to the tile edge. Let the blade do the cutting—apply light pressure and avoid forcing it through. Move in short, deliberate strokes, pausing to clear dust and check your progress after every few inches. Maintain a steady rhythm to avoid gouging the tile or creating jagged edges.
Edge and corner work: getting clean, tight joints
Edges and corners require special attention because misalignment is most noticeable where tiles meet. Use a narrow blade if available, and approach corners at a slightly different angle to minimize tile chipping. For tight areas, rotate the tool so the blade travels along the line rather than across it. Take your time in these zones; precision here pays off in cleaner, professional-looking joints.
Cleaning dust, inspecting progress, and adjusting
Periodically stop to vacuum the joint and inspect the line for remaining grout. If you see persistent ridges or hard grout, use a few light passes rather than forcing the blade. Cleaning as you go helps you verify that each section is ready for final rinsing and regrouting preparation. A clean, dust-free work area also makes it easier to see true edge alignment.
After removal: sealing, grouting, and curing
Once all excess grout is removed, wipe the joints with a damp cloth to remove remaining dust. Allow the area to dry completely before applying new grout and sealant. When grouting, press the material firmly into the joint and wipe away excess promptly for crisp edges. Follow manufacturer cure times for sealing to ensure maximum durability.
Maintenance and storage of your grout saw
Clean the blade after use to prevent corrosion and store the tool in a dry, protected case. Inspect blades for dullness or damage before future projects and replace as needed. Keeping your grout saw sharp reduces effort and protects tile surfaces over the long term.
Common mistakes and troubleshooting
Common issues include chip damage from heavy pressure, uneven grout lines, and excessive dust. If you see chipping, lighten pressure and double-check your angle. For uneven lines, mark the starting point again and work in small sections to regain control. Regular maintenance and a patient pace prevent these problems from becoming permanent.
Tools & Materials
- Grout saw(Carbide blade recommended; choose blade width to match joint width (usually 1/8)
Steps
Estimated time: 60-90 minutes
- 1
Prepare area
Clear the workspace, remove nearby items and cover surfaces. Use a utility knife to break away loose grout near the joints and vacuum dust before starting. This reduces debris and sharpens your cut line for accuracy.
Tip: Scan the area with your eyes and note any tiles that look loose or fragile before cutting. - 2
Mark grout lines
Apply painter’s tape along the lines you’ll remove to guide the cut and protect adjacent tiles. Mark your starting and ending points for each joint to maintain consistent depth.
Tip: Keep tape close to the grout edge to avoid misalignment. - 3
Position and grip
Hold the grout saw with a relaxed grip and a straight wrist. Position the blade to skim along the top surface of the grout line at about a 30–45 degree angle.
Tip: Avoid twisting your wrist; a straight alignment prevents chipping. - 4
Make shallow passes
Begin with light, short strokes along the line to establish a groove without deep gouges. Let the blade cut rather than forcing it through.
Tip: Dust may clog the blade—pause to wipe and vacuum as needed. - 5
Progress with controlled cuts
Continue along the line in small sections, lifting slightly to clear debris and re-align as needed. Check frequently to ensure the line stays straight and square.
Tip: Keep even pressure; heavy pressure increases tile risk. - 6
Tackle edges and corners
Switch to narrow blades or adjust angle to handle tight corners and edge joints without touching tile faces.
Tip: Work slowly in corners to maintain uniform grout depth. - 7
Inspect and adjust
Pause to inspect a short section; verify the line is clean and the remaining grout is easy to remove. Make any necessary re-cuts in small areas.
Tip: If grout resists, consider a slightly different angle or blade speed. - 8
Final clean-up
Vacuum the joint and wipe with a damp cloth to remove all dust. Ensure joints are dry before regrouting.
Tip: A dry joint prevents moisture from trapping under new grout. - 9
Regrout preparation
Choose the appropriate grout type and mix per manufacturer instructions. Dampen joints lightly to improve adhesion if recommended.
Tip: Do not seal grout too early; follow cure times. - 10
Seal and cure
Apply sealant after grout cures according to product directions. Allow sufficient curing time before exposing to moisture.
Tip: Sealant yields longer-lasting grout and easier cleaning.
Got Questions?
What is a grout saw used for?
A grout saw is used to remove old or damaged grout between tiles. It allows precise cutting along grout lines without scratching the tiles when used properly.
A grout saw helps you remove old grout between tiles without damaging the tiles.
Can I use a regular saw for grout removal?
A regular saw is not recommended for precision grout removal. Use a grout saw with an appropriate blade to minimize tile damage and achieve clean lines.
A regular saw isn’t ideal; use a grout saw with the right blade for clean lines.
How long does grout need to cure before sealing?
Curing times vary by product; follow the manufacturer’s instructions. Typically, grout must cure for at least 24 hours before sealing.
Most grouts need about a day to cure before sealing, but check the label.
Do I need to remove all old grout before sealing?
Yes, you should remove old grout from the joints before resealing to ensure proper adhesion and a uniform finish.
Yes, remove the old grout so the new grout and sealer can bond properly.
What safety gear is essential?
Wear eye protection, a dust mask, and gloves. Ensure good ventilation and keep a vacuum nearby.
Wear eye protection, a dust mask, and gloves, and work in a well-ventilated area.
How do I clean grout dust after removal?
Use a vacuum with a HEPA filter or a damp cloth to remove fine dust before proceeding with regrouting.
Vacuum the dust or wipe with a damp cloth before grouting.
Watch Video
The Essentials
- Choose the right blade and joint width
- Use shallow, controlled passes for clean lines
- Protect surrounding tiles with tape and PPE
- Seal grout after it cures for durability