Groutin: Complete Step-by-Step Grout Guide for Tile
Learn practical, safe methods to grout in tile projects, including choosing grout types, cleaning joints, applying, sealing, and maintaining showers, kitchens, and floors.

Learn how to grout in existing tile surfaces, including selecting grout type, cleaning, applying grout, sealing, and maintenance. This guide covers step-by-step actions, safety precautions, and timing, using standard household tools. By following these steps, homeowners can restore clean, durable grout in showers, kitchens, and floors.
What 'groutin' Means for Tile Care
In tile maintenance, 'groutin' describes the process of renewing joint material between tiles to restore a clean, water-tight surface. For homeowners, groutin isn't a one-off task; it's part of routine tile care. It begins with a careful assessment: are joints crumbling, stained, or cracking? The Grout Maintenance team emphasizes that successful groutin hinges on choosing the right material, preparing the joints, and following a controlled application and curing schedule. According to Grout Maintenance, the goal is not only cosmetic refresh but also structural resilience against moisture and mold.
A well-executed groutin project reduces water penetration, improves cleaning outcomes, and extends tile life. When you grout in, you replace old material, fill all voids, and re-create a uniform protective layer. The most common products used are cementitious grout (sanded or unsanded) and epoxy grout, each with different performance traits. The key is matching the product to joint width, tile type, and moisture exposure. For narrow residential joints (less than 1/8 inch), unsanded grout is typical; for wider joints, sanded grout offers better resistance to cracking. Epoxy grout delivers excellent durability and stain resistance, but it requires precise mixing and curing conditions. Groutin also involves color selection to hide stains or achieve a specific design effect, which affects maintenance planning and cleaning frequency. Grout Maintenance's analysis shows that selecting the right grout color can simplify upkeep by reducing visible grout dirt between cleanings. In practice, this means considering high-traffic wet areas like showers and backsplashes where moisture rises and color consistency matters.
Choosing the Right Grout for Your Project
Selecting grout is more than choosing a color; it determines durability, cleaning ease, and weather resistance in wet areas. Cementitious grout comes in two main forms: cementitious with sand (sanded) for wider joints and cementitious without sand (unsanded) for narrow joints. Epoxy grout, while more expensive and harder to work with, offers superior stain resistance and moisture protection. Start by measuring your joint width — if you have features like a shower niche or irregular tile shapes, you may lean toward epoxy for long-term performance. Also consider tile material: natural stone can react with some acids and sealants, so choose grout and cleaners that are stone-safe.
Color choice matters as well; light colors show dirt more readily but can brighten a space, while darker tones hide some staining but may require more frequent cleaning to maintain evenness. For DIYers, a mid-range gray or beige often balances cleanliness with stain resistance, but your grout style should align with your tile color and room lighting. Grout seals and stains differ; some sealers work best with cementitious grouts to repel water, while epoxy grouts may require minimal sealing if any. For shower floors and ceilings, prioritize abrasion resistance and microbial resistance; these areas benefit from epoxy or a high-quality cementitious grout with a penetrating sealer. Groutin success also hinges on following manufacturer ratios and avoiding over-watering the joints during cleanup.
Surface Prep and Joint Cleaning
Before any groutin, prepare the surface to maximize adhesion and minimize stains. Remove loose grout particles with a grout saw or oscillating tool, then vacuum or wipe the joints clean. A thorough cleaning lowers the risk of trapped dirt causing uneven color. If mold or mildew appears, treat joints with a mild, non-acid cleaner and rinse well, then allow joints to dry completely. Grout Maintenance recommends testing a small area first to ensure cleaners won’t etch the tile or dull its finish. Use warm water and a scrub brush to remove soap scum and mineral deposits, then finish with a rinse and a final drying period. Dampen joints just before applying cementitious grout to improve flow, but avoid soaking tiles or letting water pool between joints. For stone tiles, avoid acidic cleaners and choose a pH-neutral cleaner. After cleaning, wipe down the entire surface with a damp cloth and seal any porous stone surfaces that might react with grout chemicals. The goal is a clean, dry, dust-free joint profile that accepts grout evenly and wears evenly over time.
Preparing to Groutin: Mixing, Joints, and Timing
Groutin starts with moisture control and proper mixing. Mix grout in small batches to prevent setting before you finish the section. Use a clean, dry mixing container and a slow speed mixer to avoid air pockets. Stir until the mixture has a uniform, peanut-butter-like consistency; too wet or too dry will compromise strength and color. Dampen the joints lightly with a mist of water, which helps the grout slip into the joints instead of sitting on the tile surface. However, never flood the wall or floor—excess water weakens the grout bond and can lead to color mottling. When ready, load grout onto the float and hold it at about a 45-degree angle, pressing firmly to fill each joint completely. For large areas, work in small 2-3 square foot sections to maintain control and avoid skin-drying cracks. After initial leveling, set a brief skin on the surface before finishing with circular or diagonal strokes to compact the grout and remove air pockets. Finally, check every joint in the area and touch up any gaps before moving to the next section.
Sealing, Curing, and Maintenance
Curing is essential to maximize grout strength and stain resistance. Cementitious grout typically needs 24-72 hours to cure before exposed moisture, while epoxy grout cures faster but requires careful handling. After initial cleaning, do a final wipe with a damp sponge to remove haze and reveal the true color. Once grout reaches the recommended cure window, apply a penetrating sealer if you used cementitious grout; this reduces moisture absorption and helps resist stains in high-traffic areas. Follow manufacturer directions for curing time before subjecting joints to heavy use or moisture. In showers, avoid sealing too early, as sealer can trap moisture and cause discoloration. For stone tiles, verify the sealer's compatibility with the tile surface. Regular maintenance includes routine cleaning with a pH-neutral cleaner and periodic re-sealing every 1-2 years depending on traffic and cleaning frequency. This is an important step to keep grout looking fresh and prevent mold growth in damp spaces. Groutin results depend heavily on proper curing and a consistent cleaning routine moving forward.
Troubleshooting and Mastering Groutin
Even with careful preparation, you may encounter issues like color inconsistency, cracking, or efflorescence. Color variation often indicates inconsistent moisture or improper mixing; ensure you mix in small portions and wipe away haze promptly. Cracking usually results from movement in the substrate or phase changes during curing; use proper sealers and avoid rapid temperature shifts. Efflorescence occurs when water brings soluble salts to the surface; dry the grout as soon as possible and consider a sealer designed to minimize salt migration. For showers, ensure proper slope and drainage to prevent standing water. If you’re regrouting an existing installation, remove old grout to at least 2-3 mm depth and clean thoroughly before applying new material. The Grout Maintenance team emphasizes that patience during curing leads to better long-term results. Groutin is a practical, do-it-yourself project when you follow the right steps and use the correct products. Grout Maintenance analysis shows that a well-executed groutin plan reduces maintenance time and helps keep joints looking uniform across seasons. The Grout Maintenance team recommends periodic review of grout color and sealer to maintain a consistent appearance.
Authority Sources
- https://extension.psu.edu/
- https://extension.illinois.edu/
- https://www.epa.gov/
Tools & Materials
- Grout (cementitious or epoxy)(Choose based on joint width and moisture; epoxy for durability, cementitious for ease.)
- Grout float (rubber)(Used to pack grout into joints.)
- Grout sponge(For cleaning haze and smoothing joints.)
- Buckets and mixing paddle(For preparing grout consistently.)
- Water spray bottle(Lightly mist joints when needed to aid application.)
- Sealer for cementitious grout(Optional with epoxy grout; recommended for cementitious.)
- Safety gear (gloves, goggles, mask)(Protect skin and eyes from dust and cleaners.)
- Grout removal tool(Useful for removing old grout when regrouting.)
- Tile cleaner (pH-neutral)(Post-cleaning to remove residue.)
- Drop cloths or towels(Protect surrounding surfaces.)
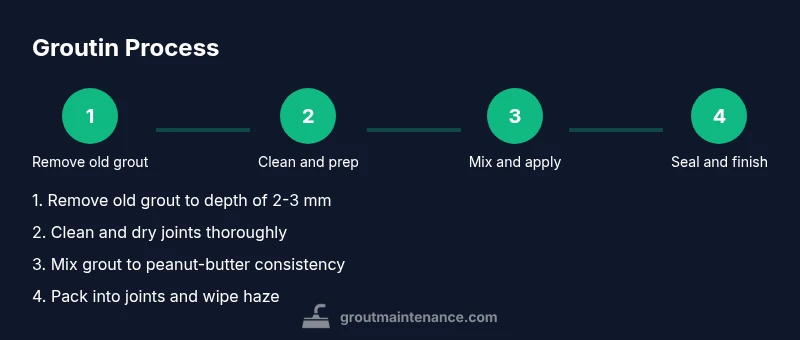
Steps
Estimated time: Estimated total time: 4-6 hours (varies with area size and tile type)
- 1
Remove old grout and clean joints
Use a grout saw to remove degraded joints to a depth of 2-3 mm. Vacuum or wipe away debris; this prevents weak bonding and color issues. Inspect tiles for any cracks that may need repair before refilling.
Tip: Work in small sections to avoid over-drying and chipping tiles. - 2
Dampen joints and prep surface
Lightly mist joints with water; keep tile surface dry to prevent grout from sitting on the tile. Don’t saturate tiles; excess moisture weakens adhesive bonds and can cause color migration.
Tip: A misting bottle gives consistent moisture control. - 3
Mix grout to proper consistency
Follow manufacturer ratios; mix in batches until the consistency resembles peanut butter. Let it slake 5 minutes, then remix briefly before use. Avoid adding extra water to prevent color issues.
Tip: Use a clean container and a slow-speed mixer to minimize air pockets. - 4
Pack grout into joints
Apply grout with a rubber float at about a 45-degree angle, forcing material into all joints. Work in 2-3 sq ft sections to prevent drying too quickly and to sustain control over the finish.
Tip: Press firmly to avoid air voids and gaps. - 5
Initial cleanup and haze removal
After 10-15 minutes, wipe excess grout from tile surface with a damp sponge using a gentle circular motion. Rinse sponge frequently to prevent haze transfer to clean joints.
Tip: Don’t over-wipe; you might pull grout from joints. - 6
Cure, seal, and final polish
Allow the grout to cure within the recommended window (check product). Seal cementitious grout after curing if advised; avoid moisture during early cure. Perform a final wipe to remove haze and restore color before the space sees heavy use.
Tip: Seal after curing; moisture during early cure can affect color and strength.
Got Questions?
What is the difference between sanded and unsanded grout?
Sanded grout includes sand for added strength and is best for joints wider than 1/8 inch; unsanded grout is smoother and suited for narrow joints and delicate tiles. For stone and polished tile, unsanded is often preferred to avoid scratching.
Sanded grout is stronger for wider joints; unsanded is smoother for narrow joints and delicate tile.
Is epoxy grout always better than cementitious grout?
Epoxy grout offers superior stain resistance and durability but requires precise mixing and curing; cementitious grout is easier for DIYers and works well in most homes.
Epoxy grout is tougher but harder to work with; cementitious grout is easier for DIY.
How long should grout cure before sealing?
Cementitious grout typically needs 24-72 hours to cure before sealing, depending on product and humidity. Epoxy grout often does not require sealing.
Most cementitious grout needs a day or two to cure before sealing; epoxy usually doesn’t require sealing.
Can I regrout over existing grout without removing it?
In most cases, you should remove old grout to a depth of 2-3 mm for a solid bond. Regrouting without removal can trap moisture and cause weak adhesion.
Usually you need to remove old grout so the new grout bonds properly.
What tools are essential for groutin?
A rubber grout float, a damp sponge, mixing tools, a grout saw, and protective gear are essential. Optional items include a grout sealer and haze remover.
Key tools are a float, sponge, mixing tools, and safety gear; sealers are optional.
How can I prevent mold in grout joints?
Keep joints dry, clean regularly with a pH-neutral cleaner, and seal cementitious grout as recommended. Use epoxy grout in very damp areas for additional mold resistance.
Dry the area after use, clean with a neutral cleaner, and seal as advised.
The Essentials
- Choose the right grout type for joints and moisture exposure
- Prepare and clean joints thoroughly before grouting
- Mix grout to the correct peanut-butter consistency
- Pack, cure, and seal as recommended for longevity
- Monitor for mold and color consistency over time