Injection Grouting Waterproofing: A Practical Guide
Learn how injection grouting waterproofing seals cracks, stops water intrusion, and protects tile surfaces. This guide covers prep, materials, safety, step-by-step execution, maintenance, and cost considerations for DIY homeowners and DIY enthusiasts.

By the end, you will learn how to perform injection grouting waterproofing to seal cracks and stop water intrusion in tiled surfaces. This quick guide covers substrate assessment, material choice, safe handling, and the key steps to inject resin and seal joints. Ideal for showers, bathrooms, and basement walls. To succeed, ensure a dry, clean workspace and access to appropriate PPE.
Understanding injection grouting waterproofing and its role in modern tile care
Injection grouting waterproofing is a targeted way to fill cracks or joints from within the substrate by introducing resin-based materials through small access points. The approach creates a pressure-assisted seal that minimizes water pathways, helps prevent efflorescence, and reduces future movement in highly porous or cracked substrates. According to Grout Maintenance, effectiveness hinges on substrate condition, appropriate resin selection, and proper access-point placement. This method is especially valuable in wet areas such as showers, bathrooms, and basement walls where surface-applied sealants may fail over time. When done correctly, it offers long-term protection against water intrusion without removing existing tile or grout. It is not a universal fix; some substrates may require alternative solutions like regrouting or reconstruction. In this guide, we’ll explore when to use injection grouting waterproofing, how to choose materials, and how to plan a safe, effective workflow that balances performance with cost, durability, and ease of maintenance.
Key factors that influence success
- Substrate type and porosity: Highly porous materials (like certain cement-based substrates) accept resin more readily but may require longer cure times.
- Crack width and stability: Very wide or continually widening cracks may need alternative repair; small, stable cracks are ideal for injection.
- Resin chemistry: Epoxy resins offer strong bonding and chemical resistance, while polyurethane resins provide flexibility to accommodate movement.
- Access and containment: Ports must be placed to maximize resin penetration while protecting adjacent tiles and grout from overspray.
In practice, planning the injection layout on a dry, clean surface helps ensure the resin travels to all affected areas. Grout Maintenance emphasizes documenting the crack pattern and any active leaks to tailor the injection plan and avoid over- or under-penetration.
Materials and equipment overview
Successful injection grouting waterproofing relies on a coordinated kit of resin, ports, and a controlled injection system. Essential items include an injection resin compatible with the substrate and crack size, ports or injection adapters, a low-pressure injection pump or syringe system, mixing containers, and PPE for safety. Optional tools like a moisture meter can help ensure the substrate is within an acceptable moisture range before injecting. Prepare a clean, dry workspace and protective coverings for surrounding surfaces. Remember to select materials with compatible curing times and thermal resistance for your climate. This section outlines practical choices and considerations to help you assemble a reliable toolkit before you start.
Substrate assessment and preparation
A thorough assessment reduces the risk of failed injection. Start by cleaning and drying the surface, removing loose grout, and ensuring the area is free of standing water. Measure crack widths if possible and note any movement over time. Use a moisture meter where appropriate to verify that substrate moisture levels won’t impede cure. Clear the area of debris and protect adjacent tiles with drop cloths. A stable, dry base improves resin penetration and reduces the chance of trapping air pockets. For bathrooms and showers, address ventilation to expedite cure and limit fumes indoors. Grout Maintenance reminds readers that proper prep often saves time and money by preventing rework later.
Injection strategy: ports, resin choice, and pressure control
The injection strategy centers on aligning ports with crack paths to maximize resin distribution and minimize grout displacement. Choose a resin with appropriate viscosity and cure profile for your substrate; epoxy resins typically offer strong bond and stiffness, while polyurethane resins tolerate substrate movement better. Install ports at planned intervals, ensuring seals are tight to avoid leaks during injection. Use a low-pressure pump or syringe system to push resin gradually, watching for steady flow without pressurizing beyond the substrate’s tolerance. Keep a record of injection pressures and observed penetration depth for future maintenance. After injection, monitor for any resin seepage or surface staining and plan to seal ports with compatible material to prevent ingress of moisture.
Step-by-step execution overview
The following steps provide a framework for the injection process, but always follow your product data sheet for mixing ratios, curing times, and safety precautions. Begin with a small test injection to confirm resin flow and penetration, then scale to larger areas as needed. Maintain controlled, even pressure and avoid rapid injections that could force resin into unintended voids. After injecting, allow the resin to cure under indicated conditions before removing ports and resealing, then perform a leak test to verify performance. Throughout the operation, document locations, cure times, and any anomalies to support ongoing maintenance. This block captures the core workflow you will implement in the dedicated STEP-BY-STEP section.
Safety, ventilation, and regulatory considerations
Working with chemical resins requires appropriate PPE and adequate ventilation. Wear chemical-resistant gloves, safety goggles, and a respirator or air-purifying mask when fumes are present. Ensure proper ventilation by opening doors and using portable fans away from the work area, and avoid ignition sources around solvents or cleaners. Check for local building codes or manufacturer recommendations related to injections in bathrooms or basements, including ventilation and curing times. If you’re uncertain about electrical or plumbing interference, consult a licensed professional. Always store materials per the manufacturer’s instructions and dispose of waste in compliance with local regulations. This emphasis on safety protects you and your home while improving long-term outcomes.
Troubleshooting and common issues
Injection grouting waterproofing can encounter issues such as incomplete resin penetration, air pockets, or surface staining. To mitigate, re-verify all injection paths, apply gentle additional pressure if the flow seems slow, and inspect port seals for leaks. If voids persist, adjust the injection pattern or resin formulation in consultation with the product data sheet and, if needed, supplement with secondary injections. If moisture remains after curing, re-evaluate substrate moisture, port placement, and cure time. Effective troubleshooting usually involves careful observation, documentation, and adherence to safety guidelines to avoid compromising nearby grout or tiles.
Maintenance and long-term care after injection grouting waterproofing
Post-injection maintenance focuses on keeping the treated area clean and monitoring for signs of new cracking or shifting. Use non-abrasive cleaners to avoid disturbing cured resin and periodically test water tightness by applying gentle water pressure in inconspicuous areas. Re-seal adjacent grout lines if you notice changes in color or texture, and consider annual or semi-annual inspections, especially in high-traffic wet areas. Keeping a record of the work, including resin type and port locations, helps future repairs and ensures compatible materials are used for any subsequent maintenance. Grout Maintenance highlights that proactive care protects investment and preserves tile aesthetics.
Cost considerations, ROI, and decision factors for homeowners
Injection grouting waterproofing can be a cost-effective option in the right circumstances, especially when persistent leaks threaten finished spaces or structural integrity. Compare the cost of materials, equipment rental or purchase, and potential professional labor against the extended lifespan of sealed grout and reduced water damage. Homeowners should weigh the complexity of the job, access constraints, and the likelihood of future cracking when deciding whether to DIY or hire a professional. Although costs vary by size and substrate, the long-term benefit is a more water-resistant tile installation with lower maintenance requirements. Grout Maintenance advocates a careful planning phase to estimate time, cost, and expected durability before proceeding.
Tools & Materials
- Injection resin kit (epoxy or polyurethane)(Choose resin compatible with substrate and crack size; confirm cure time and viscosity)
- Injection ports and adapters(Corrosion-resistant ports sized for crack pattern and resin viscosity)
- Low-pressure injection pump or syringe system(Provides controlled flow; avoid high-pressure systems for delicate substrates)
- Mixing container and stir sticks(Mix exactly per resin data sheet; improper ratios impair cure)
- Protective equipment (gloves, goggles, respirator)(Follow safety data sheets; ensure ventilation)
- Caulk or sealant compatible with resin(Seal injection points after treatment to prevent moisture ingress)
- Moisture meter (optional)(Helps verify substrate moisture before injecting)
- Drop cloths, plastic sheeting, and tape(Protect surrounding surfaces and catch spills)
Steps
Estimated time: 2-6 hours total (varies by area size, substrate, and cure times)
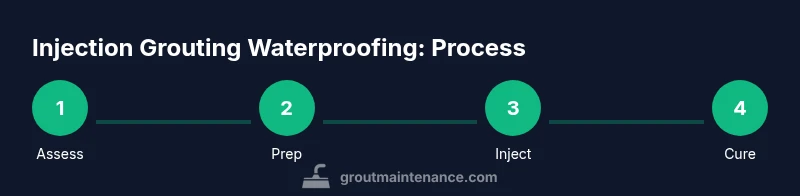
- 1
Assess and prep
Inspect the area, note crack patterns, and clean the surface. Dryness is essential for resin penetration. Set up containment and PPE before starting.
Tip: Document crack locations with photos for reference during the injection plan. - 2
Select resin and mix
Choose a resin based on substrate and crack width. Mix precisely according to the product data sheet using a clean container and stir sticks.
Tip: Weigh components accurately; improper ratios can lead to incomplete cure. - 3
Install ports
Position injection ports along the crack path at planned intervals. Ensure ports seat firmly to avoid leakage during injection.
Tip: Pre-mark port locations to maintain a consistent pattern across the area. - 4
Connect injection system
Attach the ports to the injection pump or syringe setup and prime the line to remove air pockets.
Tip: Prime slowly to prevent air entrapment and to observe initial resin flow. - 5
Inject resin
Begin low-pressure injection, advancing resin along the crack path. Stop when resin begins to appear at the far end or at survey points.
Tip: Avoid rapid bursts; maintain steady flow to minimize void formation. - 6
Seal ports and confirm cure
Seal injection points with compatible material after injection; allow the resin to cure per manufacturer guidelines in a well-ventilated area.
Tip: Protect the cured areas from traffic and moisture until full cure. - 7
Test for leaks
After curing, perform a gentle leak test (spray or light pressure) to ensure water is blocked through the treated path.
Tip: If leaks persist, plan for a follow-up injection in the same region. - 8
Cleanup and documentation
Remove containment, perform surface clean-up, and document resin type, port positions, and cure times for future reference.
Tip: Store product data sheets and photos with the project records.
Got Questions?
What is injection grouting waterproofing and when should I use it?
Injection grouting waterproofing is a method that introduces resin through ports to fill cracks from within the substrate, creating a sealed path that blocks water. It is particularly effective for narrow cracks and porous substrates in wet areas like showers or basements. Use it when surface sealants have failed or when active leaks are present and the cracks are stable enough for injection.
Injection grouting waterproofing fills cracks from inside the substrate using resin, ideal for converging leaks in showers and basements after surface sealing fails.
Can I perform injection grouting waterproofing myself, or should I hire a pro?
It can be a DIY project if you have the right tools, safety gear, and a clear plan. However, complex crack patterns, large areas, or uncertain substrate conditions may warrant professional help to ensure proper access, resin choice, and cure.
DIY is possible with the right kit and safety precautions, but don’t hesitate to hire a pro for complex cases.
What maintenance is required after injection grouting waterproofing?
After treatment, monitor the area for signs of new movement or cracking and perform periodic surface cleaning. Re-seal adjacent grout if staining or moisture movement becomes evident. Keep records of the material type and cure times for future repairs.
Keep an eye on the treated area for new cracking and reseal as needed.
What are common mistakes in injection grouting waterproofing?
Common mistakes include skipping substrate prep, using the wrong resin, over-pressurizing during injection, and failing to seal ports properly. Proper prep and following the resin data sheet are critical to success.
Common mistakes include poor prep and using the wrong resin; follow the product instructions.
How long does curing take, and when can I resume normal use?
Curing times vary by product and conditions; some resins cure within hours, while full cure can take longer in damp or cool environments. Do not expose treated areas to moisture until cure is complete per the product data sheet.
Cure times depend on the product and conditions; wait as directed before exposing to moisture.
Is injection grouting waterproofing suitable for showers?
Yes, showers and other wet areas are common targets for injection grouting waterproofing, especially when active leaks exist or grout is porous. Ensure proper venting and that all electrical hazards are addressed.
Showers are a common application when leaks are present and surfaces are porous.
Watch Video
The Essentials
- Choose resin by substrate and crack width.
- Plan port layout before injecting.
- Maintain controlled, gentle pressure during injection.
- Cure thoroughly and test for leaks.
- Document materials, locations, and cure times for future care.