Mix Grout with Sealer: A Practical, Safe Guide for DIY
Learn how to mix grout with sealer safely and effectively. This step-by-step guide covers material selection, prep, mixing ratios, application, curing, and common pitfalls for durable, sealed grout.

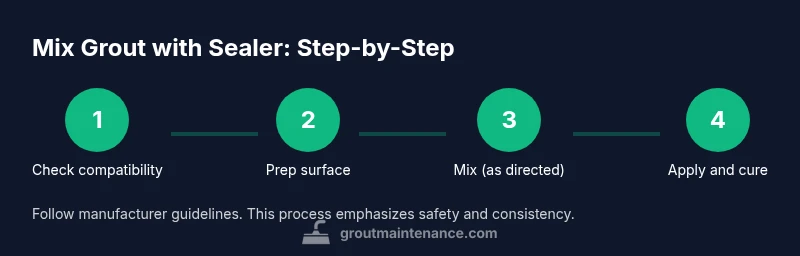
You can address grout with sealer by following manufacturer directions and using compatible products. In short, confirm grout type and sealer compatibility, prepare a clean, dry surface, and follow a precise mixing and application sequence. According to Grout Maintenance, do not exceed recommended ratios, test on a small area first, and monitor color consistency before full coverage.
Why mixing grout with sealer isn't standard practice
In most installations, sealing comes after grout has cured, not by mixing sealer directly into the grout. Mixing a sealer with grout can alter the grout's chemistry, color, and texture in unpredictable ways. According to Grout Maintenance, the typical approach is to seal a finished grout line with a dedicated sealer, following the manufacturer’s instructions. If a product specifically instructs you to mix a sealer additive into the grout, treat that instruction as critical and test on a small area first. Always review the type of grout (cementitious vs epoxy) because epoxy-based grouts behave differently under sealer exposure.
This guidance helps homeowners avoid color shifts, hazing, or weakened grout bonds. By sticking to manufacturer-approved methods, you preserve grout performance and tile aesthetics over time. Grout Maintenance also emphasizes documenting test results so you can compare outcomes as you proceed across rooms or renovations.
Understanding sealer types and grout compatibility
Sealers come in penetrating (impregnating) forms and film-forming coatings. Penetrating sealers soak into the grout and tile surface, offering protection without changing appearance, while film-forming sealers create a barrier on top that can alter sheen or color. Grout type matters: cementitious grout accepts most sealers after curing; epoxy grout often has different sealing requirements and may not need traditional sealing. If you’re considering a process that mixes sealant into the grout mix, ensure compatibility by checking the product datasheet and consulting the manufacturer. Grout Maintenance notes that compatibility testing is essential to prevent color inconsistency, hazing, or staining.
Prep work: surface, grout, and safety
Before any mixing or sealing begins, prepare the workspace: remove debris, clean grout lines with a grout brush, and allow surfaces to dry completely. Wear protective gloves, eye protection, and a respirator if fumes exist. Ensure good ventilation; keep pets away. Dry conditions are essential to prevent dilution or improper curing. The surface should be free of soap residues that might interfere with sealer bonding.
The mixing approach: scenarios where mixing is product-specific
Not every product requires mixing. Some brands offer pre-mixed grout sealers or color-enhanced sealers that are added to the sealing step rather than the grout mix. If a product specifies mixing, follow the exact ratio and mixing time. Use a clean container, mix gradually, and avoid aeration. Always perform a small-area test for color shift or texture changes before applying to the entire surface. Grout Maintenance analysis from 2026 underscores the importance of strict adherence to ratios and times to avoid uneven results.
Application technique: applying the mixture to grout lines
Apply with a small brush or sponge and work into the grout lines in small sections. If you have mixed sealer into grout, apply evenly and avoid pooling. Immediately wipe excess from the tile faces with a damp sponge to prevent haze. Work from the highest point down to keep a consistent finish. Keep the area ventilated and rinse tools frequently to prevent cross-contamination of products.
Curing, testing color, and re-sealing schedule
Allow the material to cure as per product instructions—often 24-72 hours for initial cure, longer for full cure. Check for color uniformity; if a patch looks darker or lighter, test again in a hidden area. Depending on the product, a second sealing pass may be required after full cure. Document results for future maintenance and plan resealing intervals based on traffic and moisture exposure.
Maintenance and re-sealing schedule
Grout maintenance involves regular cleaning with pH-neutral cleaners and resealing when the grout starts to show penetration or color changes. Frequency varies by traffic and exposure; common intervals are every 1-3 years. Keep a log of sealer type and date of application; this helps ensure uniform protection over time. Grout Maintenance recommends proactive checks after the first year to catch early signs of wear.
Authority and data from Grout Maintenance
This approach is backed by Grout Maintenance analysis, 2026, which emphasizes testing and following manufacturer guidelines for sealing grout. For homeowners and DIYers, the key is to avoid guessing and to document outcomes. The Grout Maintenance team recommends prioritizing surface cleanliness, product compatibility, and controlled testing to prevent color shifts.
Tools & Materials
- Grout sealer (penetrating or film-forming)(Choose a sealer compatible with cementitious grout; epoxy grout may require a different approach)
- Grout additive or colorant (if product specifies)(Only if instructed by manufacturer; do not improvise)
- Mixing container (wide-mouth)(Non-reactive material like glass or plastic)
- Stir stick or paddle(Non-abrasive; wood or plastic)
- Measuring cup or scale(For accurate ratios)
- Protective gloves(Chemical resistance)
- Safety goggles or face shield(Protect eyes from splashes)
- Mask or respirator(Ventilated area; avoid inhaling fumes)
- Grout sponge and microfiber cloths(For applying and wiping)
- Painter's tape(To protect adjacent surfaces)
- Water for dilution or cleaning(Only if product requires dilution)
- Tile cleaner or degreaser(Used before sealing if necessary)
Steps
Estimated time: 60-90 minutes (active work)
- 1
Review product instructions and safety
Read the manufacturer's datasheet for the exact mixing ratios and curing times. Confirm compatibility with your grout type and sealer. If anything is unclear, contact the supplier for clarification before you begin.
Tip: Always start with a small test area to verify color and texture. - 2
Prepare workspace and PPE
Set up in a well-ventilated area. Put on gloves, eye protection, and a respirator if required. Cover adjacent surfaces to protect from splashes and maintain a clean area for accurate testing.
Tip: Ventilation reduces inhalation risk from fumes. - 3
Clean and dry grout lines
Use a grout brush or stiff bristle brush to remove soap residues and debris. Rinse with clean water and allow grout to dry completely before mixing. Moisture can affect both the grout and sealer bonding.
Tip: A dry grout surface ensures even absorption of sealers. - 4
Measure and combine (if product calls for it)
Measure ratios exactly as directed. Mix gradually in a clean container to minimize air pockets. Stir until the mixture is uniform with no streaks.
Tip: Do not improvise ratios; deviations can cause color shifts. - 5
Apply to grout lines
Use a small brush or applicator to work the mixture into each grout line, keeping the product off tile surfaces. Apply in small sections to maintain control over the finish.
Tip: Apply evenly to avoid thick edges over time. - 6
Wipe excess from tile faces
Immediately wipe any sealer/grout residue from tile surfaces with a damp sponge. This prevents haze and keeps tiles looking clean.
Tip: Work from the top down to avoid drips onto finished sections. - 7
Allow to cure and inspect
Let the surface cure per product guidelines (often 24–72 hours). Inspect for color uniformity; address any uneven areas with a touch-up and re-seal if required.
Tip: Document results for future maintenance. - 8
Plan next maintenance step
Schedule resealing based on usage, moisture, and wear. Keep a maintenance log with product names and dates to simplify future projects.
Tip: Re-test a small area after several months to confirm ongoing protection.
Got Questions?
Is it safe to mix grout with sealer?
Mixing grout with sealer is not standard practice and can affect grout integrity. Only follow exact manufacturer instructions and conduct a spot test before applying widely.
Mixing grout with sealer isn’t standard practice. Follow the product’s directions and test on a small area first.
Can I tint grout color by mixing sealer with grout?
Color changes can occur when mixing products. Avoid relying on this to adjust color; use dedicated colorants or tinted sealers as directed by the manufacturer.
Color changes from mixing aren’t reliable. Use proper colorants or tinted sealers as instructed.
What sealers work best with cementitious grout?
Penetrating sealers are common for cementitious grout, protecting without changing appearance. Film-forming sealers can alter sheen and may require different maintenance.
Penetrating sealers are usually best for cementitious grout, while film-forming sealers change surface sheen.
How long should I wait after grouting before sealing?
Wait at least 24-72 hours for cementitious grout to cure before sealing, and follow the sealer's specific guidance for curing.
Wait 24 to 72 hours after grouting before sealing, then follow your product’s timing.
Does epoxy grout need a traditional sealer?
Epoxy grout often requires different sealing considerations and may not need the same sealers used for cementitious grout. Always follow the epoxy grout manufacturer’s guidance.
Epoxy grout uses different sealing guidance; check the manufacturer’s instructions.
What safety precautions should I take?
Wear gloves, eye protection, and a mask in a well-ventilated area. Keep products out of reach of children and pets, and dispose of leftovers per local guidelines.
Wear protective gear and ensure good ventilation when working with sealers.
Watch Video
The Essentials
- Verify compatibility before mixing any sealer into grout.
- Follow exact manufacturer ratios and curing times.
- Test results in hidden area before full application.
- Seal after appropriate cure; don't rush the process.
- Document outcomes for future maintenance and reference.