Seal Ceramic Tile and Grout: Step-by-Step Sealing Guide
Learn to seal ceramic tile and grout effectively with the right sealer, prep steps, and maintenance tips. Expert guidance for homeowners on bathrooms, kitchens, and floors.

You will seal ceramic tile and grout to protect against stains and moisture, improve cleanup, and extend the life of your tile project. The key steps are selecting the right sealer, ensuring a clean, dry surface, and applying thin, even coats. This guide covers choosing sealers, prep, a step-by-step process, maintenance, and safety.
Why Seal Ceramic Tile and Grout
Sealing ceramic tile and grout is a practical step that protects your investment. It reduces porosity, repels spills, and makes daily cleaning easier. A well-sealed surface resists staining and moisture intrusion, helping prevent mold growth in humid spaces like bathrooms and kitchens. According to Grout Maintenance, sealing ceramic tile and grout can extend the life of tile projects and help maintain color and shine over time.
Sealing is especially valuable in areas with frequent moisture, heavy traffic, or staining incidents (coffee, sauces, oils). When grout stays drier and less porous, it resists darkening and discoloration that can occur with everyday use. Grout Maintenance analysis notes that a proper seal acts as a barrier between grout pores and environmental grime, making routine cleaning faster and more effective.
Choosing the Right Sealer for Ceramic Tile and Grout
Choosing the right sealer is not a one-size-fits-all decision. Penetrating sealers (water-based or solvent-based) soak into grout and tile surfaces to form a protective barrier without changing appearance. Topical sealers sit on the surface for a visible finish and are more common on porous stone or unglazed tile. For typical glazed ceramic tile with cement grout, a penetrating grout sealer is often preferred to maintain grout color and uniform look. Look for low-VOC formulations for indoor use, and consider color-enhancing sealers if you want to deepen the tile or grout color. Grout sealer should be applied first to grout lines, followed by tile sealer for any porous tiles if needed. The Grout Maintenance Team recommends testing a small area first to confirm no color change on the grout.
Evaluate porosity by performing a simple water test on a small grout area: if water beads up, you may have sufficient porosity, but if it soaks in quickly, you likely need sealing. Always check product instructions for cure times and recoat intervals. When sealing showers or backsplashes, prioritize sealers designed for high-moisture zones and easy cleaning.
Preparing the Surface for Sealing
Effective sealing starts with a clean, dry surface. Begin by removing soap scum, mineral deposits, and old wax or sealers using a pH-neutral cleaner designed for tile and grout. Rinse thoroughly and allow surfaces to dry completely—this often requires 24 hours in a well-ventilated space. Inspect for grout haze or residue, and remove it before sealing. If the grout is badly worn, consider regrouting before sealing to achieve the best long-term results. A dry, even surface ensures the sealer penetrates where intended and dries evenly.
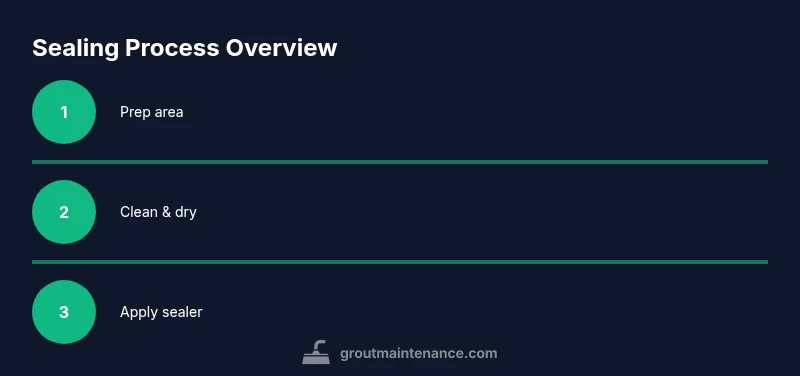
Step-by-Step Overview
This section provides a high-level view of the sealing process. The actual, detailed steps are provided in the STEP-BY-STEP block below, but here you’ll see the logical flow: (1) prep the area, (2) clean and dry thoroughly, (3) test porosity and choose the right sealer, (4) apply sealer first to grout lines, (5) apply sealer to tile surfaces if needed, (6) allow proper cure time and recoat if necessary, (7) inspect and do a final wipe. Planning for drying time helps you schedule the project so you don’t rush the cure.
Common Mistakes and How to Avoid Them
- Sealing wet surfaces: Always wait for a full dry period before applying sealers. Wet surfaces trap moisture and can cause streaks or uneven curing.
- Skipping prep: Dirt and soap scum prevent proper penetration. Clean thoroughly and allow to dry completely before sealing.
- Over-application: Thick or uneven coats can puddle and leave a milky or tacky film. Apply thin, even coats and wipe away excess.
Maintenance After Sealing
A sealed surface requires simple maintenance to maximize longevity. Use a pH-neutral cleaner, avoid harsh acids or abrasive pads, and wipe up spills promptly to prevent staining. Re-seal grout every few years or as recommended by the sealer manufacturer, especially in high-moisture areas like showers. Look for signs that indicate re-sealing is needed, such as water no longer beading or grout color fading. Regular maintenance helps your tile and grout keep their appearance longer.
Tools & Materials
- Penetrating grout sealer(Choose water-based or solvent-based based on porosity and VOC needs)
- Tile sealer (if required for porous tiles)(Only for porous or unglazed tiles)
- Foam brush or lint-free applicator(Use for even coats; replace if fibers shed)
- Sponge or microfiber cloths(For applying and wiping excess within immediate area)
- Painter’s tape(Protect edges and nearby surfaces)
- Drop cloths or plastic sheeting(Contain drips and protect floors)
- Mild, pH-neutral tile cleaner(Used in prep and maintenance; avoid acidic cleaners)
- Protective gloves and eyewear(Prevent skin and eye contact with chemicals)
- Ventilation fan or open windows(Improve air circulation during application)
- Clean water and towels(For final wipe and cleanup)
Steps
Estimated time: 60-90 minutes total, plus 24-48 hours cure time depending on product and environment
- 1
Prepare area
Clear the space, cover adjacent surfaces, and ventilate the room to ensure safety and cleanliness. This keeps dust and debris from contaminating the seal and reduces cleanup later.
Tip: Use painter’s tape to protect edges and create a crisp seal boundary. - 2
Clean and dry surfaces
Scrub tile and grout with a pH-neutral cleaner to remove soap scum, oils, and mineral deposits. Rinse well and allow full dry time, typically 24 hours in a dry, well-ventilated area.
Tip: Double-check dry time by touching a dry patch; if it feels damp, extend drying time. - 3
Test porosity and choose sealer
Perform a simple water test on grout: if water beads, you may be near the right porosity level; if it soaks in, seal is recommended. Select a penetrating grout sealer for best long-term protection.
Tip: Read the sealer label for cure times and recoat windows. - 4
Apply first coat to grout
Apply a thin, even coat along grout lines using a small brush or applicator. Do not flood; excess sealer on tile can create a hazy finish that requires buffing.
Tip: Wipe excess sealer off tile immediately to prevent streaking. - 5
Apply second coat if needed
Allow the first coat to dry per manufacturer guidance, then apply a second coat to grout lines if porosity remains. Avoid heavy buildup; two thin coats are usually sufficient.
Tip: If using a color-enhancing sealer, test on a hidden spot first. - 6
Seal tile surface (optional)
For highly porous tiles or natural stone, apply a compatible tile sealer after grout if recommended. Use a light pass and avoid over-wetting the surface.
Tip: Only seal tiles that require it; many glazed ceramics do not need tile sealer. - 7
Cure and wipe
Let the area dry undisturbed for the recommended cure time. Wipe any residual haze from the surface with a clean cloth and inspect for even appearance.
Tip: Ventilate during curing and avoid foot traffic on treated surfaces until fully cured. - 8
Clean up and protect
Remove protective coverings, wash tools, and store sealers per label instructions. Keep the area dry during the first 24 hours after application.
Tip: Label any stored containers with date opened to optimize re-seal timing.
Got Questions?
Do I need to seal ceramic tile and grout at all?
Sealing is recommended for most ceramic tile with cement grout to prevent staining and moisture intrusion. It makes cleanup easier and helps grout stay visually consistent in bathrooms and kitchens.
Sealing is usually recommended, as it helps prevent stains and moisture issues and makes cleaning easier.
How long does sealing take, and can I walk on it soon after?
Most sealers cure to touch within a few hours and fully cure within 24 to 48 hours. Avoid heavy traffic on treated surfaces until cure time passes.
Cure times vary by product; usually 24 to 48 hours before light use, longer for full cure.
Can I seal over an existing seal?
In most cases you should not seal over an old sealant. If the old layer is degraded or peeling, remove it first and reseal for best results.
If the old seal is damaged, remove it and reseal rather than applying over it.
What sealer should I use for subway tile?
A penetrating grout sealer is typically used for cement grout and low-porosity subway tile. Choose a product compatible with glazed tile if applicable.
Use a penetrating grout sealer for grout with subway tile, especially if grout is porous.
Will sealing darken grout or tile colors?
Some sealers can darken grout slightly. Always test on a small area first and choose a color-matching or clear sealer if color stability is critical.
Test first; some sealers may deepen color slightly, so check a hidden spot.
How often should I reseal?
Sealing frequency depends on use and product. Bathrooms may require more frequent resealing, while low-traffic areas might last longer. Follow the manufacturer’s guidance and inspect periodically.
Follow product guidance and inspect periodically to know when resealing is needed.
Watch Video
The Essentials
- Choose the right sealer for grout and tile type.
- Prepare thoroughly: clean, dry, and test porosity.
- Apply thin coats and wipe excess promptly to avoid haze.
- Maintain with gentle cleaners and schedule re-sealing as needed.