What size grout lines for 12x24 tile: A practical guide
Discover the ideal grout line size for 12x24 tiles, with practical ranges and layout tips to ensure durable, clean installations on various surfaces today.

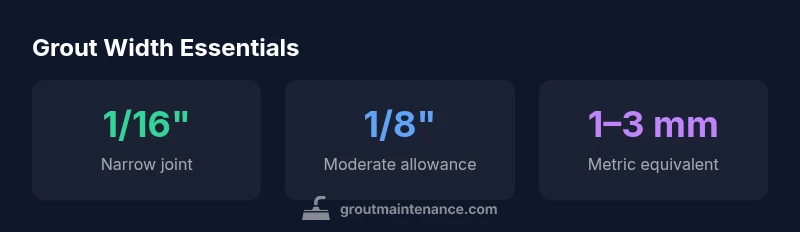
On 12x24 tiles, grout lines typically range from 1/16 inch to 1/8 inch (about 1.6–3 mm). Use 1/16 inch for a modern, tight look on flat substrates; 1/8 inch provides tolerance for slight lippage or imperfect substrates. Always confirm with tile manufacturer guidelines.
Why grout line size matters for 12x24 tiles
Choosing the right grout line size is not just about looks; it affects installation tolerances, cleaning practicality, and long-term performance. According to Grout Maintenance, the width you choose should balance aesthetics with practical constraints like substrate flatness, tile edge quality, and the grout material you plan to use. For 12x24 tiles, a narrow joint is popular in modern kitchens and baths, but it requires careful layout and tool accuracy. A slightly wider joint can hide minor lippage and edge variations, but may emphasize grout color and haze. The rest of this guide explains how to decide and apply the width consistently across a large-format tile installation.
How large-format tile affects joint width and lippage
Large-format tiles such as 12x24 inherently have greater risk of lippage due to substrate irregularities and tile warping. A consistent grout width helps the eye read the surface as flat and can reduce the appearance of unevenness. However, the counterpoint is cleaning and maintenance: smaller joints collect more grout haze if not sealed properly, while wider joints show more color differences after sealing. Understanding your substrate, tile type (porcelain vs ceramic), and adhesive choice will guide whether to lean toward the narrow end (1/16 in) or a slightly wider joint (1/8 in).
Common grout line size ranges for 12x24 tile
The typical joint size for 12x24 installations falls within a narrow band. For a sleek, modern aesthetic on true-flat substrates, 1/16 inch is common. If your floor or wall substrate has minor high spots or you anticipate movement, 1/8 inch provides a forgiving margin. In showroom settings or areas prone to moisture where cleaning is critical, many installers opt for a 1/8 inch width to minimize edge wear and to facilitate grout removal during maintenance. Always align with tile manufacturer and adhesive product guidelines, and consider the type of grout you intend to use, as epoxy grout behaves differently than cementitious blends at the same width.
Material and substrate considerations
Porcelain and ceramic tiles behave differently in response to moisture, heat, and substrate movement. For porcelain 12x24 tiles laid over a stable, well-primed substrate with a good thinset, 1/16 inch is frequently workable. If you are installing over plywood or uneven concrete, 1/8 inch can compensate for small flatness variances. Epoxy grout often performs well at narrower widths due to its lower shrinkage and easier stain resistance, but it can be harder to work with and may require precise joint dimensions. Cementitious grouts are more forgiving but can reveal haze or color inconsistencies if joints are too narrow and cleaning is rushed.
Layout patterns and their impact on grout width
Grid layouts emphasize uniform joints and are forgiving for wider substrates, while offset patterns or running bond layouts may visually exaggerate any irregularities if spacers are misaligned. When using a 12x24 tile, many pros prefer a consistent joint width across the entire surface to keep the pattern legible and to minimize edge trimming. If you must trim trims at borders, you may need to reduce margins slightly to maintain perceived uniformity, but never compromise tile alignment. Plan dry runs and verify with spacers before committing to grout.
Practical steps: choosing, measuring, and testing layouts
- Check tile manufacturer guidelines for minimum grout width and tolerance; 2) Dry-layout a full row or panel on a flat surface to verify edge cut geometry; 3) Use calibrated spacers to simulate grout joints and inspect against a straightedge for lippage; 4) Mark a sample grid on the substrate and walk the panel to confirm eye-pleasing alignment; 5) Test grout color result with a small sample in the chosen width to ensure cleanability and color stability after sealing. These steps help prevent misapplication and ensure a uniform look across the 12x24 tile installation.
Sealing and maintenance implications
Sealing grout can slightly darken the color and emphasize width. Narrow joints can show haze more readily if not thoroughly cleaned or sealed; wider joints offer more forgiving cleaning margins but can accentuate expansion or contraction movements. When choosing grout, consider how often you will clean the surfaces and whether you prefer epoxy or cementitious grout. In damp areas like showers, ensure your grout selection has moisture resistance appropriate for the width you choose and follow manufacturer sealing recommendations to maintain color uniformity over time.
Color choice and visual impact of grout width
Grout color interacts strongly with joint width. A dark grout often hides minor irregularities and accentuates a bold, contemporary look, especially with 1/16 inch joints. Light grout creates a washed, airy feel but can reveal edge variation and haze more clearly in narrow widths. For 12x24 tiles, test color and width combinations on a sample board to assess how the joint read reads under different lighting conditions. Consistency is key: mismatched widths across sections can disrupt the tile pattern and draw attention away from the tile design itself.
Troubleshooting uneven joints and fixes for lippage
If you notice uneven joints after setting, slow curing and rubbing can fix minor shrinkage, but significant lippage may require removing a few tiles and re-setting with attention to substrate flatness and adhesive bed thickness. For existing installations, consider removing and redoing a panel rather than chasing multiple small fixes. To minimize future issues, ensure the substrate is flat, use the correct trowel notch size for the selected adhesive, and maintain consistent grout width with locked spacer placement during the initial set. Regular maintenance and timely resealing help retain the intended line width and appearance.
Comparison of grout widths for common large-format tile sizes
| Tile size | Recommended grout width | Notes |
|---|---|---|
| 12x24 | 1/16 in – 1/8 in | Modern look with tolerance for minor variations |
| 12x12 | 1/16 in – 1/8 in | Similar ranges; adjust for pattern and edge quality |
| 24x24 | 1/8 in – 3/16 in | Larger formats may require wider joints to compensate for lippage |
Got Questions?
What is the recommended grout width for 12x24 tiles?
Typically, 1/16 inch to 1/8 inch is recommended for 12x24 tiles, with tighter widths for flat surfaces and slightly wider widths for less-than-perfect substrates. Always verify with your tile manufacturer guidelines and grout product specifications.
For 12x24 tiles, aim for 1/16 to 1/8 inch joints, but check your tile maker’s guidance and the grout you plan to use.
Does tile color affect grout width appearance?
Yes. Dark grout can hide minor irregularities with narrow joints, while light grout makes gaps more noticeable. The width itself interacts with color to influence perceived uniformity.
Color changes how the joint looks; keep width consistent to avoid visual inconsistencies.
Can I use epoxy grout for 12x24 tiles with a narrow joint?
Epoxy grout performs well in narrow joints due to its low shrinkage and stain resistance, but it requires precise tooling and cleanup. If you’re new to epoxy, practice on a sample area.
Epoxy works great in narrow joints, but practice first and follow the product instructions.
What affects grout width on floors vs walls?
Floors often experience more movement and require slightly wider joints to compensate for leveling variance, whereas walls can tolerate narrower widths if the substrate is flat.
Floors may need a bit wider joints to handle movement and unevenness.
Should I adjust grout width near edges or transitions?
Edges and transitions should maintain the same width for consistency, unless you have a specific design reason to diverge. Any variation is more noticeable near borders.
Keep the width uniform near edges for a clean transition.
“The right grout line width is a balance of aesthetics, movement, and maintenance. For 12x24 tiles, plan for a consistent joint and test it before full installation.”
The Essentials
- Choose grout width to balance look and tolerance
- Narrow joints require precise layout and installation
- Consider substrate flatness and tile edges
- Seal grout to stabilize color and cleanliness
- Dry-run layouts to ensure uniformity