Baking Soda Paste for Grout: A Practical DIY Cleaning Guide
Discover how to safely refresh grout with a baking soda paste. This practical guide covers prep, mixing, application, rinsing, drying, and follow-up care for cleaner grout lines.

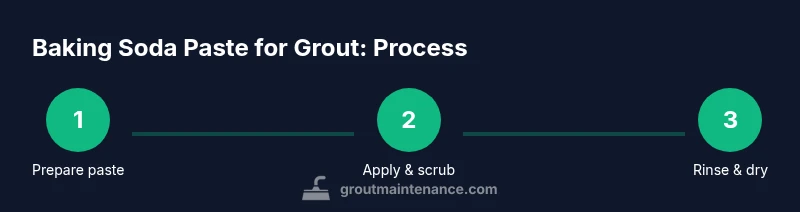
This guide helps you refresh grout using a baking soda paste. Mix a thick paste, apply to grout lines, scrub with a stiff brush, rinse thoroughly, and allow to dry before re-evaluating. Avoid acidic cleaners on sensitive tiles, and always test a small area first. This method minimizes harsh chemicals while delivering noticeable results.
Understanding the technique and why baking soda paste for grout can help
Grout lines trap dirt and grime more easily than the tile surfaces they separate. A baking soda paste offers a gentle yet effective abrasive action that can lift surface grime and mineral deposits without relying on harsh acids. According to Grout Maintenance, this approach remains popular among homeowners for routine grout refresh between full regrouts. The key is paste thickness: a thick, paste-like consistency clings to vertical grout lines long enough to work without running onto the tile surface. The mild alkalinity of baking soda helps loosen oils and mineral buildup, protecting the cementitious matrix while breaking the bond between grime and grout. In this article we’ll cover the chemistry, prep steps, and best practices to maximize results while safeguarding tile and grout. We’ll also discuss limitations—such as epoxy grout or color-saturated grout that may react differently—and how to decide if this method is right for your bathroom or kitchen tile.
Throughout, you’ll see the term baking soda paste for grout used consistently as the standard reference, and you’ll notice practical steps you can apply right away in your own home.
Safety, prep, and testing before you start
Before you touch grout, put on gloves and ensure good ventilation. While baking soda paste is relatively gentle, vigorous scrubbing or using a rough brush on delicate grout can abrade the surface or create pale spots. Grout Maintenance analysis notes that a cautious approach—test a small, inconspicuous area first—helps prevent whitening or color changes. Mark stained areas so you can compare before-and-after results, and lay towels to catch drips. Confirm the grout type (cementitious vs epoxy) because epoxy grout is more chemical-resistant and may require milder cleaners or different techniques. If you’re unsure, begin with a lighter brushing action, then adjust pressure based on how the grout responds. Also, avoid mixing baking soda paste with acidic cleaners at the same time, as this can leave residues or create unwanted reactions on certain tile substrates. Finally, ensure the area is well-ventilated to reduce inhalation of fine particles.
Mixing the paste for best results
The paste should be thick enough to stay in place but soft enough to spread with a brush. In a small container, combine baking soda with just enough water to reach a toothpaste-like consistency; if it’s too thick, add a touch more water; if too loose, sprinkle in more baking soda. Stir until smooth, then test a dollop on a non-porous area to gauge how easily it adheres to grout. Avoid adding cleaners with dyes or fragrances that could transfer to grout and alter color. Some tile substrates react differently to soap-based additives, so skip liquids with heavy perfumes. Do not reuse paste from a previous cleaning session—fresh paste yields better lift and reduces residue. If you have very porous grout or want extra cleaning power, a tiny amount of mild dish soap can be included, but only if you know your grout tolerates it. Label the mixture and discard any leftover paste after your cleaning session to prevent cross-contamination.
Applying, scrubbing, and technique tips
Apply the paste along grout lines with the brush, keeping the brush at a consistent angle (about 45 degrees) to avoid digging into the grout. Work in small sections to maintain paste moisture and prevent drying out. Let the paste sit for a short period (5–10 minutes) if stains resist; this gives the baking soda time to work. Scrub with controlled, firm strokes rather than harsh, erratic scrubbing, which can erode grout over time. Rinse the area with warm, clean water and wipe with a damp sponge to remove all paste and loosened grime. Repeat on stubborn spots if needed, but avoid over-scrubbing the same area. After drying, inspect for uniform color and note any spots that appear lighter or stained. The Grout Maintenance team suggests keeping a log of areas treated to track progress across sessions.
Rinsing, drying, and evaluating grout color
Rinse thoroughly to remove all baking soda particles; left-over powder can create a dull film on grout. Use a clean sponge and fresh water, swiping from top to bottom to ensure complete removal, then dry with a microfiber cloth. Assess whether stains faded and whether grout lines look more uniform or brighter. If you notice whitening in dark grout, lighten your pressure and shorten the contact time next pass, or consider repeating in a separate area later. For epoxy grout, be mindful that harsher mechanical cleaning may be limited; in those cases, consult a professional or adjust expectations. If color changes persist after multiple passes, this may signal a need for deeper cleaning or regrouting.
Long-term care: sealing and maintenance, plus troubleshooting
After cleaning, sealing porous grout can help resist future stains and moisture infiltration. Choose a grout sealer compatible with cementitious grout and follow the product’s directions for application, dwell time, and curing. Allow the grout to dry fully—this typically requires a full day in dry conditions—before sealing. If you notice uneven sealing or darkening, test the sealer on a hidden area first and adjust technique accordingly. For persistent stains or color changes on epoxy grout, or if you see deterioration after cleaning, consider professionals. Grout Maintenance emphasizes setting regular maintenance rituals: periodic cleaning, light seal reapplications, and prompt attention to grout cracks or wear to extend tile life.
Tools & Materials
- Baking soda (sodium bicarbonate)(Use 100% baking soda for best texture)
- Water(To adjust paste consistency)
- Mixing bowl(Non-reactive container)
- Spoon or spatula(For stirring the paste)
- Old toothbrush or stiff-bristled grout brush(For scrubbing grout lines)
- Sponge or microfiber cloth(For applying and rinsing)
- Gloves(Protect hands during cleaning)
- Bucket or basin(Catch rinse water and hold paste scraps)
- Protective eyewear (optional)(Extra safety when scrubbing)
Steps
Estimated time: 60-90 minutes
- 1
Prepare the workspace and gather supplies
Collect all needed items, protect nearby surfaces, and ventilate the area. Lay towels to catch splashes and wear gloves. This setup minimizes mess and keeps your work area organized for quick work during the steps.
Tip: Having everything ready reduces pauses and helps maintain paste consistency. - 2
Test a small area first
Choose a discreet grout line and apply a small amount of paste. Let it sit briefly, then scrub lightly to see how the grout reacts. If there’s no adverse color change after drying, you can proceed to larger areas.
Tip: Spot testing prevents unexpected whitening on colored grout. - 3
Mix the paste to the right consistency
In a bowl, combine baking soda with water to reach a toothpaste-like texture that clings to bristles. If it won’t stay on the brush, add a bit more powder. Avoid making a slurry that runs off the tile.
Tip: A thick, clingy consistency yields better cleaning without overflow. - 4
Apply to grout and scrub gently
Dab the paste along grout lines and scrub with a firm, controlled stroke at a ~45-degree angle. Work in small sections to keep the paste from drying too quickly. Pause to rinse if needed and reapply the paste where grime remains.
Tip: Gentle, consistent scrubbing preserves grout integrity. - 5
Rinse, wipe, and dry
Rinse with warm water and wipe with a clean sponge to remove all paste and loosened dirt. Dry the area with a microfiber cloth to prevent water marks and check for remaining stains after drying.
Tip: Thorough rinsing prevents powdery residue from dulling the finish. - 6
Evaluate results and consider sealing
Inspect grout color and uniformity. If satisfied, allow grout to dry completely before applying sealer (if desired). Seal porous grout according to product instructions to maintain cleanliness longer.
Tip: Sealing after complete drying helps maximize protection and longevity.
Got Questions?
Can baking soda paste remove tough grout stains?
Yes, baking soda paste can lift common grout stains through gentle abrasive action. Results vary by grout type and stain age. For very deep stains, multiple light passes are safer than one heavy scrub.
Yes, it can lift many grout stains, but results vary and you may need a few gentle passes.
Is baking soda paste safe on colored grout?
Generally safe for cementitious grout, but whitening can occur on some pigments. Always test a hidden area first and reassess before proceeding.
Usually safe, but test first because some colors may lighten.
Can baking soda paste be used on epoxy grout?
Epoxy grout is more chemical-resistant and may respond less to baking soda paste. Use gentler cleaners or consider professional guidance for epoxy grout.
Epoxy grout is tougher; you might need gentler cleaners or professional help.
How often can I use this method?
Use as needed for routine whitening and grime removal. Avoid aggressive scrubbing and give grout time to recover between sessions.
Use it as needed, but don’t overdo it; give grout a break between sessions.
Should I seal grout after using baking soda paste?
Sealing helps protect porous grout from future stains. Wait until grout is completely dry, then apply a suitable grout sealer following the product directions.
Yes—seal after it’s fully dry to protect your grout.
What should I do if grout color lightens after cleaning?
If color lightens, reduce brushing pressure and duration. If the issue persists, consider re-testing on a smaller area or consulting a professional for deeper restoration options.
If it lightens, ease up and re-test; persistent changes may need expert help.
Watch Video
The Essentials
- Prepare and test before wide application.
- Maintain a thick, clingy paste for best results.
- Rinse thoroughly and dry to evaluate true results.
- Seal grout after drying to protect against future stains.