Before and After Grout Cleaning: A Practical DIY Guide
Discover practical steps to achieve dramatic before-and-after grout cleaning results. Learn prep, cleaning, scrubbing, rinsing, sealing, and maintenance to protect grout and keep tile surfaces looking fresh for longer.

Goal: restore grout to a clean, uniform appearance from before to after cleaning. You’ll protect nearby tiles, choose the right cleaner, scrub with a grout brush, and seal for lasting brightness. The effectiveness depends on stain type and grout porosity. According to Grout Maintenance, starting with a small test area helps you gauge color changes and avoid damage before committing to the entire surface.
What before and after grout cleaning really means
Before and after grout cleaning isn’t just about removing surface dirt; it’s about understanding how grout holds stains, oils, and mineral deposits over time. A true before shows grout lines that look dull, dark, or spotted, pulling attention away from the tile itself. An after shows brighter, more uniform lines that make tile colors pop and corners feel refreshed. The difference often comes down to recognizing grout porosity and choosing the right cleaner for the job. The Grout Maintenance Team notes that a planned approach—protection of surrounding surfaces, a test area, and a finish such as sealing—produces durable results that look cleaner for longer. When done well, the improvement isn’t just cosmetic; it also makes daily cleaning easier and helps prevent further staining.
Brand-backed insight: Grout maintenance science
According to Grout Maintenance, grout is a porous matrix that can trap oils and minerals. Treating it with a neutral cleaner first, then addressing stubborn stains with an appropriate brush and technique, yields the most uniform look. Sealing afterward locks in brightness and reduces future staining, especially in high-traffic areas like showers or kitchen backsplashes. The practical takeaway: plan your steps, test first, and finish with a sealant to protect your hard work.
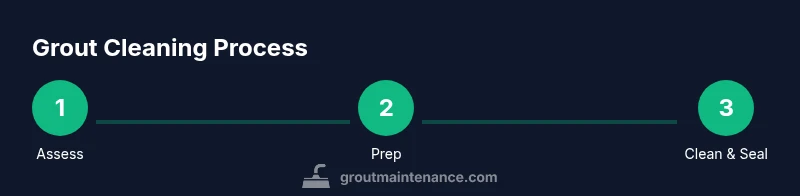
Assess grout condition and select a cleaning approach
Grout lines come in different formulations—cementitious, unsanded, or epoxy—and each responds to cleaners differently. Cementitious grout is porous and tends to stain; epoxy grout is more durable and resists most stains but can be harder to clean if it’s old. Stains fall into categories like surface dirt, mildew, mineral buildup (hard water), or grease. For fresh or light staining, a neutral cleaner and a soft brush may suffice. For deep or colored stains, you may need a specialized grout cleaner, tests on a hidden area, and possibly a second cleaning pass. Always check for compatibility with your grout type and tile surface to avoid etching or color loss.
Prep area and protect surroundings
Preparation is your safety net against damage. Clear the area, remove small rugs, and cover nearby surfaces with plastic or drop cloths. Ventilate the space to manage cleaning fumes, especially in bathrooms and kitchens. Wear gloves and eye protection, and keep children and pets away from the workspace. If you’re cleaning a shower, consider turning on a fan or opening a window to ensure good air flow. A proper setup minimizes cleanup later and protects your tiling from accidental cleaner splashes.
Test area first to avoid surprises
Choose a discreet corner or an inconspicuous grout joint for a test. Apply a small amount of cleaner and scrub with a brush, then rinse and observe color changes, texture, and any adverse effects on tile glaze. This step helps you decide whether the cleaner is a good fit for the entire surface and whether sealing afterward is advisable. If color changes or haze occur, adjust your cleaner choice or dilution and re-test before proceeding.
Cleaning workflow overview: the core sequence
A typical workflow proceeds in stages: protect, apply cleaner, scrub, rinse, and evaluate. Start with a small area to gauge effectiveness, then repeat the process across the surface. For larger rooms, work in manageable sections (2–3 square feet at a time) to prevent cleaner from drying too quickly. After scrubbing, rinse thoroughly with clean water, using a damp cloth to wipe away suds, and move to the next area. The goal is to remove residue completely so the grout color remains true to its intended shade.
Scrubbing techniques that boost results
Use a stiff-bristled grout brush or an old toothbrush for precision in corners and along seams. Apply steady pressure, but avoid aggressive scrubbing that could wear out the grout edges. For deep stains, reapply cleaner to the teeth of the brush and work in a circular motion to lift embedded grime. If the grout is very porous, consider a two-pass approach: first release the surface film, then go back for deeper cleaning. In some cases, a low-pressure steam cleaner can help loosen grime without harming the grout, especially in tile floors and showers.
Rinsing, drying, and evaluating results
Rinse with plenty of clean water to remove cleaner residue, then dry the surface with a towel to prevent new mineral deposits from forming as water dries. Evaluate the after-cleaning look in good lighting; compare to the pre-clean photo or memory of the space. If some stains persist, repeat the cleaning cycle on those lines or consider a targeted treatment with a stronger cleaner appropriate for your grout type. Patience pays off when you want a uniform result across all joints.
When to seal; choosing a grout sealer
Many homeowners opt to seal grout after cleaning to safeguard brightness and reduce future staining. Choose a penetrating, breathable sealer that suits cementitious or epoxy grout and is compatible with your tile. Apply according to product instructions, typically working in small sections and wiping off excess to prevent haze. Allow sufficient cure time before exposing grout to moisture; this can vary from a few hours to a full day. Sealing is a proactive step that amplifies the impact of your before-and-after results.
Maintenance plan to keep results looking fresh
A simple maintenance routine goes a long way: clean grout regularly with a neutral cleaner, wipe down surfaces after use, and reseal every 1–3 years depending on traffic and cleaning frequency. For bathrooms, quick daily wiping prevents soap scum and mineral buildup from becoming deeply embedded. Periodic deep cleans every few months help maintain brightness and deter mildew growth. This consistent care reduces the likelihood of needing intensive renovations in the future.
Tools & Materials
- Neutral grout cleaner or pH-balanced cleaner(Avoid acidic cleaners on cementitious grout; test on hidden area first)
- Stiff-bristled grout brush(Small head for corners, larger head for flat joints)
- Soft sponge or rag(Used for rinsing and wipe-downs)
- Bucket with clean water(Fresh water for rinsing)
- Gloves and eye protection(Protect skin and eyes from cleaners)
- Ventilation (fan or window)(Important for fume control)
- Grout sealer (penetrating, breathable)(Only if you plan to seal after cleaning)
- Drop cloths or plastic sheeting(Protect adjacent surfaces)
- Steam cleaner (optional)(Useful for deeply embedded grime on some surfaces)
Steps
Estimated time: 2-3 hours
- 1
Prepare and protect
Clear the area, move fixtures as needed, and cover nearby surfaces. Put on gloves and eye protection, and ensure good ventilation. This initial setup reduces cleanup time and prevents chemical exposure.
Tip: Pro tip: tape off the edges of adjacent tiles to keep cleaner from seeping onto groutless areas. - 2
Test a small area
Apply cleaner to a hidden grout joint and scrub gently. Rinse and observe color change and any adverse effects on tile glaze. If you see uneven color or haze, adjust your approach before continuing.
Tip: Pro tip: only test on a 1-2 inch square to minimize risk. - 3
Apply cleaner to grout lines
Spray or dab cleaner along the grout lines, focusing on stained joints first. Avoid pooling cleaner on tile surfaces to minimize potential etching or haze.
Tip: Pro tip: work in sections to prevent cleaner from drying too quickly. - 4
Scrub with purpose
Use the grout brush to scrub each joint with firm, vertical then horizontal strokes. Concentrate on the most stained joints; avoid aggressive scrubbing that could wear grout.
Tip: Pro tip: use older toothbrushes for tight corners or stubborn stains. - 5
Rinse thoroughly
Rinse each section with clean water, removing all cleaner residue. Repeat until water runs clear and joints look evenly clean.
Tip: Pro tip: wipe grout lines with a damp cloth after rinsing to remove suds quickly. - 6
Assess and repeat if needed
Check for remaining stains. If heavy staining persists, reapply cleaner to those joints and scrub again. Some stains require a second pass for full removal.
Tip: Pro tip: do not rush a second pass to avoid over-scrubbing. - 7
Dry and inspect
Dry the area with a towel and inspect color uniformity under bright light. A true clean will show consistent grout color with no dark damp spots.
Tip: Pro tip: using a handheld light helps reveal residual dampness or haze. - 8
Seal the grout (optional but recommended)
If you choose to seal, apply a penetrating grout sealer according to the product instructions. Ensure the grout is completely dry before sealing to prevent trapping moisture.
Tip: Pro tip: seal in two coats if recommended by the product for enhanced protection. - 9
Cleanup and maintenance plan
Clean tools, wipe surfaces, and plan a maintenance routine to keep grout looking fresh. Schedule periodic deep cleans and reseal as needed to maximize longevity.
Tip: Pro tip: record your cleaning date to track resealing intervals.
Got Questions?
What does 'before and after grout cleaning' mean in practical terms?
It refers to restoring grout lines from dull or stained to bright and uniform. The result is cleaner-looking tile with improved color balance and easier maintenance.
Before and after grout cleaning means turning dingy lines into clean, bright joints. The result improves tile appearance and makes future cleaning easier.
How long does grout cleaning take on a typical backsplash or shower?
Time varies by area and stain severity. A small shower might take 1–2 hours, while a larger floor or multiple zones could take several hours. Plan for a couple of sessions if needed.
Most small spaces take about one to two hours; larger areas may require more time or multiple passes.
Can I whiten grout with bleach or chlorine cleaners?
Bleach can help with some stains but may discolor colored grout or damage certain grout types. Always test first and follow product guidelines. For colored grout, consider grout-safe whitening products designed for your grout type.
Bleach can help some stains, but test first and avoid colored grout unless the product is labeled safe for it.
Is sealing after cleaning necessary?
Sealing is highly recommended for cementitious grout to resist stains and moisture. Epoxy grout is more resistant and may not require sealing, but check manufacturer guidance. Sealing can extend the life of cleaner-looking grout.
Sealing helps cementitious grout resist future stains and moisture; it’s a smart step for most homes.
Can I use the same cleaner on all grout types?
No. Cementitious grout often needs a neutral cleaner, while epoxy grout can tolerate stronger cleaners but may require specific products. Always check grout type compatibility.
Different grout types need different cleaners; check your grout material before choosing a cleaner.
What if stains persist after cleaning?
If stains persist, repeat the cleaning cycle, consider a stain-specific cleaner, or consult a professional for deeper remediation. Avoid over-scrubbing, which can damage grout.
Persisting stains may require a second pass or a dedicated stain remover; avoid aggressive scrubbing.
Watch Video
The Essentials
- Protect surfaces before cleaning starts
- Choose a cleaner compatible with your grout type
- Seal after cleaning to lock in brightness
- Test a small area to avoid surprises