Cleaning Stained Grout: A Practical DIY Guide
Discover proven methods to remove stains from grout in kitchens and bathrooms, prevent future staining, and keep tile lines looking bright with safe, practical techniques from Grout Maintenance.

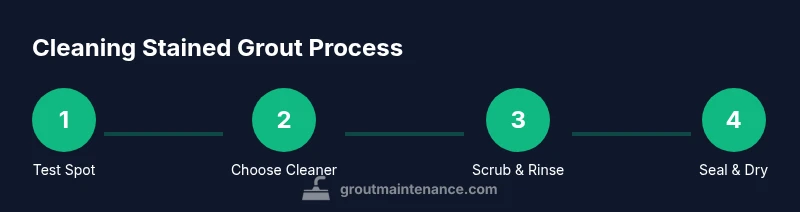
You will learn a practical, steps-based approach to remove stains from grout in kitchens and bathrooms. We'll cover testing a small area, choosing the right cleaners, scrubbing techniques, and when to seal to prevent future staining. Safety and ventilation tips are included for common household methods.
Why Cleaning stained grout matters
Keeping grout clean matters for both aesthetics and hygiene. Stains can indicate mold or mildew growth, especially in showers and damp areas, and can cause tile lines to appear dull or dirty even after a surface wipe. For homeowners and DIY enthusiasts following the best grout care practices, cleaning stained grout regularly reduces the risk of deeper damage and extends tile life. According to Grout Maintenance, the most noticeable stains come from everyday use— spilled sauces, coffee, or mineral deposits—so addressing them early keeps kitchens, bathrooms, and entryways looking bright. When grout remains stained, porous cement-based grout can absorb pigments, making it harder to restore its original color. That’s why a proactive cleaning routine, paired with proper sealing, is essential for long-term grout health.
Understanding grout materials and stain types
Grout comes in several formulations, from cementitious to epoxy. Cleaners that are safe for cementitious grout may not suit epoxy or polymer-based variants, so identifying the grout type is crucial before choosing a method. Stains can be mineral-based (hard water, rust), organic (mold, mildew), or dye-based (tomato sauce, wine). What works well on one type may worsen another, so adjust your approach accordingly. For hydrogen peroxide and oxygen bleach, test in a hidden area first, as some colors can fade or darken. The Grout Maintenance team emphasizes that color-safe options exist and that mild, non-abrasive cleaners often yield the best results for everyday staining.
Safety, testing, and prep before cleaning stained grout
Prep steps set the stage for success. Ventilate well and wear gloves to protect skin; keep children and pets away from cleaning solutions. Use a small, inconspicuous test spot on a dry grout line to verify that the cleaner does not discolor or damage color and seal. If the test area remains unchanged after a few minutes, proceed to treat the rest of the grout. Always have clean water on hand for rinsing and a towel ready to dry surfaces to prevent new staining from lingering moisture. The prep phase also includes laying down a drop cloth to catch splashes on nearby surfaces.
Cleaning methods: when to use at-home remedies vs. chemical cleaners
For light staining, a baking soda paste with a splash of water can work wonders without harsh chemicals. Apply the paste, let it sit for several minutes, and scrub with a soft brush, then rinse. For tougher stains, hydrogen peroxide (3%) or oxygen bleach can lift pigments; always follow label instructions and ventilate. Avoid mixing cleaners, especially bleach with ammonia or acids that can release dangerous fumes. If grout is sealant-protected, you may see improvements with milder cleaners, but for deep stains on cementitious grout a commercial grout cleaner may be necessary. The key is to match the cleaner to the stain type and grout material to prevent damage and color loss.
Stepwise approach to cleaning stained grout and evaluating results
Begin with a gentle method and escalate only if necessary. Start by testing a hidden area, then apply chosen cleaner to a small section and scrub with a grout brush. Rinse thoroughly with clean water and inspect the grout after drying. If staining remains, repeat or switch to a stronger but color-safe option. Dry the area completely to reveal the true color and assess whether sealing is appropriate. Remember, sealing is most effective after the grout has dried fully and reached a stable color.
Maintenance and prevention after cleaning stained grout
To prevent future staining, dry the grout after cleaning, re-seal when recommended by the grout manufacturer, and ventilate bathrooms to reduce moisture. Regular light cleaning with a non-abrasive cleaner is preferable to heavy scrubbing, which can wear down the grout surface over time. Consider a color-matching sealer for uniform protection and re-check grout lines every 6–12 months, especially in high-traffic zones like entryways and kitchens.
Tools & Materials
- Nitrile gloves(protect hands from cleaners)
- Soft-bristled brush(scrub grout gently)
- Stiff-grit grout brush(for stubborn stains)
- Microfiber cloth or sponge(wipe and rinse)
- Bucket or spray bottle(apply and rinse cleaners)
- Baking soda(paste base for mild staining)
- White vinegar(apply with caution; avoid on stone)
- Hydrogen peroxide (3%)(tough stains alternative)
- Oxygen bleach(safer alternative to chlorine bleach)
- Chlorine bleach(only for white grout; ventilate)
- Painter’s mask or respirator(protect lungs in poorly ventilated spaces)
- Old towels or drop cloth(protect nearby surfaces)
Steps
Estimated time: 2-3 hours
- 1
Prep and ventilate the area
Open windows and run a fan. Place towels to catch splashes and wear gloves. This reduces inhalation exposure and protects fabrics while you work.
Tip: Ventilation is essential for any chemical cleaner – never skip it. - 2
Test a small area first
Choose a discreet grout line and apply a small amount of cleaner. Wait 5–10 minutes, then rinse and observe for changes in color or texture. If no adverse effect, you can proceed.
Tip: Testing saves you from color loss or seal damage. - 3
Select a cleaner based on stain type
Light organic stains respond to baking soda paste; mineral deposits respond to vinegar or hydrogen peroxide; color-safe stains may need oxygen bleach. Avoid mixing cleaners.
Tip: Match stain type to cleaner for best results. - 4
Apply cleaner and dwell briefly
Apply cleaner to the grout lines and let it sit 5–15 minutes. Dwell time helps loosen pigments before scrubbing.
Tip: Do not let cleaners dry on grout. - 5
Scrub with an appropriate brush
Scrub along grout lines with a soft brush first, then switch to a stiffer grout brush for stubborn stains. Use circular motions to lift pigment.
Tip: Avoid circular scrubbing that damages tile edges. - 6
Rinse thoroughly and inspect
Rinse the area with clean water until no residue remains. Let dry fully and inspect color restoration. If color is uneven, repeat or adjust method.
Tip: Drying shows true color and helps spot remaining stains. - 7
Address stubborn stains with alternatives
If stains persist, repeat with a different cleaner or consider a paste of baking soda and hydrogen peroxide. Avoid harsh acids on colored grout.
Tip: Patience beats aggressive scrubbing that damages grout. - 8
Seal and dry for long-term protection
Once grout is dry and color looks uniform, apply a grout sealer according to product directions. Allow curing time before exposure to moisture.
Tip: Sealing reduces future staining and eases maintenance.
Got Questions?
What is the best cleaner for cleaning stained grout?
There is no single best cleaner; start with mild options and escalate only if needed. Consider baking soda paste for light stains or hydrogen peroxide for tougher ones, always testing first.
Start with mild cleaners and test first; escalate only if needed.
Can I use bleach on grout?
Bleach can whiten grout but may discolor colored grout and damage seals. Use sparingly, ensure good ventilation, and avoid mixing with ammonia.
Bleach can whiten grout but may harm colored grout; use carefully.
How long should grout sealers dry after cleaning?
Drying times vary by product; typically 24 hours before moisture exposure. Always follow the manufacturer’s directions for the specific sealer.
Follow the sealer’s directions; usually about 24 hours before moisture.
Why does grout stain so easily?
Grout is porous and accepts pigments easily, especially cementitious grout. Regular cleaning and timely sealing help reduce staining from spills and mineral deposits.
Grout soaks up stains because it's porous; sealing helps.
Is steam cleaning safe for grout?
Steam can loosen dirt but may damage high-porosity grout over time if used aggressively. Use moderate settings and avoid concentrated steam on sealed joints.
Steam can help but use moderate settings and avoid excessive heat.
How often should I clean grout to prevent staining?
Aim for a light clean weekly and a deeper clean every few months, depending on traffic and moisture. Regular maintenance reduces the likelihood of deep stains.
Clean grout regularly to prevent deep staining.
Watch Video
The Essentials
- Test a small area first before full application
- Match stain type with gentle cleaners when possible
- Rinse thoroughly and dry before sealing
- Seal after grout is fully dry to reduce future staining