DIY Grout Cleaner: A Practical Home Guide
Learn to make and use a diy grout cleaner with everyday ingredients. This guide covers ingredients, tools, steps, safety, surface compatibility, and maintenance to keep grout clean without harsh chemicals for homeowners and DIY enthusiasts.

With a simple diy grout cleaner, you can lift grime from tile grout using common pantry ingredients. This quick answer outlines safe mixing, surface testing, and practical usage steps for ceramic, porcelain, and concrete grout. Follow the steps, safety notes, and maintenance tips to keep grout looking fresh without harsh chemicals.
Understanding DIY Grout Cleaner: What It Is and Why It Works
According to Grout Maintenance, a diy grout cleaner is a simple mix homeowners can prepare to lift grime, mold, and stains from tile grout without resorting to harsh chemicals. The concept relies on combining gentle mechanical action with chemical helpers to loosen particles embedded in the porous grout. Different grout types (sand-and-cement, epoxy, and cementitious blends) respond differently, so testing a small area is essential before a full-clean. This knowledge aligns with practical grout care principles and supports longer-lasting tile aesthetics.
Key Ingredients and Their Roles
Baking soda is a mild abrasive and a natural deodorizer; it helps lift embedded grime when mixed into a paste. Hydrogen peroxide acts as a mild oxidizer, releasing bubbles that lift organic stains and whiten grout without the harshness of chlorine bleach. For many cleaners, this fizzing action is what dislodges mildew and soap scum from the grout pores. Some projects also use white vinegar for extra cleaning power on non-porous grout, but it should be used sparingly and never mixed with hydrogen peroxide in the same container in the same moment, as combined acids and oxidizers can create unwanted reactions. A couple of drops of dish soap can improve wetting and emulsification, helping the cleaner creep into the grout lines. Always choose 3% hydrogen peroxide and avoid metallic containers which can catalyze unwanted reactions. Epoxy grout often resists acid-based cleaners, so test first. The bottom line: your diy grout cleaner should rely on a controlled fizzing action and mild cleaning agents rather than strong detergents. This approach is safer for households with kids and pets, and it preserves grout integrity.
Safety Considerations When DIY Cleaning
Always wear rubber gloves and work in a well-ventilated area. Open windows or use a small fan to move air away from fumes. Do not mix acidic cleaners (like vinegar) with oxidizers (like hydrogen peroxide) in the same container; if you use both, store them separately and apply sequentially. Keep cleaners away from children and pets, and never mix bleach with ammonia or other cleaners. Read product labels if you choose to add soap—tiny amounts go a long way and reduce surface tension, aiding flow into grout lines. If you have natural stone tiles, avoid acidic cleaners altogether as they can etch the stone. After cleaning, rinse thoroughly with clean water and dry to prevent new mold growth.
Tools and Surfaces: What You Need to Work On
Set up a clean, well-lit workspace on a level surface. For tile grout cleaning, ensure you have a spray bottle for even application, a stiff nylon brush for grout lines, and a softer toothbrush for tight corners. Prepare microfiber towels for blotting and drying. The grout type matters: cementitious grout accepts color-safe cleaners, while epoxy grout resists harsher acids; always test a hidden area first. Use a non-abrasive scrub to prevent scratching glazed ceramic tile, and avoid metal tools that can scratch the grout or tile surface. If you’re cleaning delicate natural stone or unglazed pavers, adjust your method to a milder solution and shorter dwell time.
How to Use DIY Grout Cleaner on Different Tile Types
Ceramic and porcelain grout usually respond well to baking soda and hydrogen peroxide, with a gentle brushing after a short dwell. For natural stone or polished marble, skip acidic vinegar and stick to a hydrogen peroxide paste; always test first in a small, inconspicuous area. Cementitious grout benefits from mild scrubbing and a thorough rinse; epoxy grout, meanwhile, requires gentler approaches and avoidance of strong acids. After applying the cleaner, let it sit briefly (5–10 minutes) to loosen grime, then scrub with a circular motion. Rinse thoroughly and dry to prevent water spots and mildew growth. If grout looks discolored or stained beyond basic cleaning, consider resealing or regrouting as a longer-term solution.
Troubleshooting Stubborn Grout Stains
Some stains resist a single round of cleaning. In those cases, reapply the cleaner, let it dwell for another 5–10 minutes, and scrub with a slightly firmer brush without damaging the grout. For oil-based stains, you can add a drop or two of dish soap to improve emulsification. If staining persists, a second treatment with hydrogen peroxide on the grout joints can lift deeper grime. Always rinse between applications, and do not let concentrated cleaners sit on grout for extended periods, which can weaken the cementitious matrix. For mold or mildew, repeat applications as needed and ensure the area dries completely after cleaning.
Eco-Friendly and Cost Considerations
DIY grout cleaners using baking soda and hydrogen peroxide are inexpensive compared to store-bought products. A small bottle of 3% hydrogen peroxide and a bag of baking soda cover many cleanings. The environmental footprint is relatively low, as you avoid single-use plastic bottles of harsh chemicals. You can reuse spray bottles and cloth towels, which reduces waste. If you prefer fragrance-free options, choose unscented baking soda and inert scrubbers. When you’re ready for a longer-term approach, sealing grout after cleaning can slow future staining and mold growth, reducing the frequency of cleanings.
Tools & Materials
- baking soda (sodium bicarbonate)(granulated, unscented, 1 cup)
- hydrogen peroxide (3% solution)(bottle at least 16 oz)
- white vinegar (optional)(for non-porous grout; do not mix with hydrogen peroxide)
- dish soap(a few drops to help emulsify)
- spray bottle(clear plastic, 16 oz)
- stiff nylon brush(for grout lines)
- soft toothbrush(for corners and detail work)
- microfiber towels(for drying and buffing)
- gloves (rubber or nitrile)(protect hands)
- old sheet or towel(catch drips)
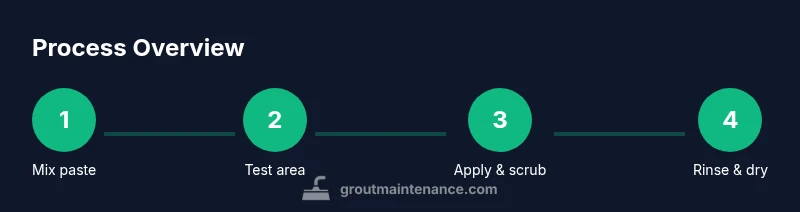
Steps
Estimated time: 40-60 minutes
- 1
Prepare workspace and materials
Clear the area and lay down towels. Put on gloves, then set up your cleaning station with a spray bottle, brush, and towels. Visually map grout lines so you can work efficiently and avoid splashing nearby surfaces.
Tip: Organize items within reach to avoid misplaced tools and repeated passes. - 2
Mix cleaner variants and test
In a small container, mix baking soda with hydrogen peroxide to form a paste. If you plan to use vinegar, keep it separate and test a hidden area to compare responses before full application.
Tip: Do not mix vinegar and hydrogen peroxide in the same container. - 3
Test a hidden area
Apply a dab of cleaner to a small grout patch and observe for discoloration, texture change, or etching over 5 minutes. If no adverse reaction occurs, proceed to the main cleaning.
Tip: Always test before committing to larger sections. - 4
Apply cleaner to grout lines
Spray or apply the cleaner to grout lines, focusing on stained sections. Let it sit for 5–10 minutes to enable grime loosening, especially in high-traffic areas.
Tip: Avoid saturating porous joints; excess moisture can promote mold. - 5
Scrub and lift grime
Use a stiff nylon brush to scrub grout lines with a circular motion. For tight corners, switch to a soft toothbrush. Work in small sections for consistency.
Tip: Use gentle pressure to prevent grout damage. - 6
Rinse and dry
Rinse with clean water and wipe with microfiber towels. Dry grout thoroughly to prevent residual moisture that encourages mold growth.
Tip: Drying is critical after cleaning. - 7
Optional: seal for protection
If grout appears clean and the area is completely dry, apply a grout sealer according to product directions. Sealing helps resist future stains and mildew.
Tip: Choose a sealer compatible with your grout type.
Got Questions?
Is it safe to mix baking soda with hydrogen peroxide for cleaning grout?
Yes, baking soda and hydrogen peroxide are commonly used together, but never mix acids with oxidizers in the same container. Apply sequentially if needed and rinse well.
You can use baking soda with hydrogen peroxide, but avoid mixing acids with oxidizers in the same container and rinse thoroughly.
Can I use this cleaner on natural stone or marble?
Natural stone such as marble is sensitive to acids; avoid vinegar and acidic cleaners. Use a hydrogen peroxide paste with minimal dwell time and test in a hidden spot.
Be careful with natural stone; test first and avoid acids.
Will this DIY grout cleaner remove mold and mildew?
Hydrogen peroxide has mild antifungal properties and can help lift mildew with repeated applications. If mold is extensive, consider professional remediation or sealing after cleaning.
It helps with mildew, but persistent mold may require additional steps.
How long should I wait after cleaning before sealing?
Wait until grout is completely dry, usually 24 hours, before applying a grout sealer. Drying times vary with humidity and tile type.
Let the grout dry completely—usually about a day—before sealing.
Is this cleaner safe for ceramic tile surfaces?
Yes, when used as directed and rinsed well, this cleaner is safe for glazed ceramic tiles. Avoid using abrasive tools that could scratch the glaze.
Yes, safe for ceramic surfaces if you follow the steps and rinse well.
Watch Video
The Essentials
- Test first, then clean for best results
- Use baking soda and hydrogen peroxide for safe cleaning
- Rinse and dry thoroughly after cleaning
- Seal grout after cleaning for long-lasting protection