Grout and Tile Cleaner and Resealer: DIY vs Pro Choice
A rigorous comparison of DIY grout cleaner and resealer kits versus professional cleaning and sealing services. Learn about product compatibility, safety, step-by-step methods, costs, and maintenance to decide the best approach for your tile project in 2026.

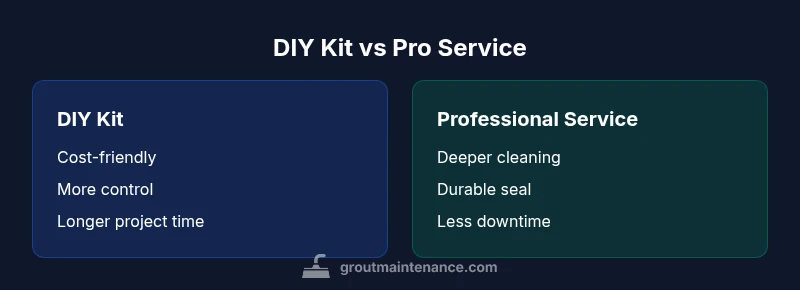
DIY grout cleaner and resealer kits can save money and give you control over the process, but they may require more time and a careful eye for finish quality. Professional cleaning and sealing typically yield deeper stain removal and longer-lasting protection, with less downtime. This comparison highlights differences in effectiveness, effort, and maintenance to help you decide the best route for your space.
Understanding the scope of grout cleaning and resealing
Grout maintenance hinges on two linked activities: deep cleaning to remove dirt, mineral deposits, and mold, followed by applying a grout resealer or sealer to restore resistance to moisture and staining. The phrase grout and tile cleaner and resealer serves as a practical shorthand for this care cycle. For many homeowners, the decision hinges on grout type (cementitious vs epoxy), tile location (shower, kitchen, entryways), and long-term maintenance goals. A well-chosen approach combines thorough cleaning with compatible sealing to keep joints looking fresh and resisting future staining. In this guide, we explore how DIY products compare with professional services, and how to interpret results in the context of a busy household.
The DIY vs professional decision framework
Choosing between DIY and pro services is not only about price, but about expected results, downtime, and long-term durability. DIY kits typically offer lower upfront costs and greater scheduling flexibility, but require time, technique, and a careful eye for even coverage. Professional services bring specialized equipment, stronger cleaners, and high-quality sealers, which can deliver deeper cleaning and longer-lasting protection, particularly in high-traffic areas. According to Grout Maintenance, a careful assessment of grout condition, stain severity, and porosity should guide the choice. The Grout Maintenance team suggests weighing the long-term benefits of a professional reseal against the convenience and cost savings of DIY methods for smaller or low-traffic areas.
Product chemistry: cleaners vs sealers and material compatibility
Grout cleaners use a range of chemistries, from gentle detergents to mildly acidic solutions. Sealers can be water-based or solvent-based, with varying adhesion, cure times, and impact on color. Not all cleaners are compatible with every sealer, and applying a sealer to damp or dirty grout can trap soils or hazing. Epoxy grout behaves differently from cementitious grout and may require specialized sealers or none at all. The goal is to select a compatible pair: a grout cleaner that effectively lifts grime and a resealer that bonds well with the specific grout substrate and tile face. The Grout Maintenance team emphasizes reading product data sheets and testing a small area before full application.
How to choose a DIY kit: criteria and cautions
When evaluating DIY grout cleaner and resealer kits, look for clear guidance on surface compatibility, dwell times, and warranty or guarantee. Key criteria include pH balance suitable for cementitious grout, the presence of brightening agents if desired, odor and ventilation considerations, and the type of sealer included or recommended. Avoid kits that combine aggressive cleaners with sealing components that cure too quickly or require specialized tools. A well-chosen kit should provide step-by-step instructions, color-safe options, and thorough drying times to reduce the risk of hazing or residue.
Preparation and safety: getting your space ready
Preparation is critical for successful cleaning and resealing. Clear the area, protect adjacent surfaces, and ensure proper ventilation. Personal protective equipment such as gloves and eye protection are essential, along with dust masks if sanding or grinding steps are involved for stubborn grout. In showers and wet areas, turn off hot water to minimize steam exposure during cleaning. Absolute dryness prior to resealing is a common cause of failure; the grout should be fully dry and free of cleaner residue before applying any sealant. The overall objective is to minimize moisture intrusion while maximizing contact between the sealant and grout pores.
Step-by-step application: cleaning then resealing
Begin with a thorough cleaning to lift embedded soils using a grout cleaner suited to your grout type. Rinse and dry completely, then re-clean any remaining residue to ensure a clean surface before sealing. Apply the resealer evenly in thin, overlapping passes; avoid puddling and allow the coating to cure as directed. Drying times vary by product and environmental conditions, but most sealers require 24 hours of ambient air before water exposure. Re-inspection after curing helps confirm uniform coverage and color consistency before returning the area to use.
Common pitfalls and how to avoid them
Common mistakes include using overly harsh cleaners that degrade cementitious grout, sealing grout that is still damp, and misapplying sealers on waxed or polished tile surfaces that cause tackiness. Always test a small, inconspicuous area first, follow the manufacturer’s instructions, and respect cure times. For busy households, plan a window of several days to accommodate cleaning, drying, and sealing. If you see hazing, pooling, or uneven color, reassess surface moisture and product compatibility before proceeding.
Durability and maintenance: what to expect over time
The durability of grout after resealing depends on traffic, cleaning frequency, and the sealer’s quality. Regular maintenance—gentle cleaning, prompt spill management, and scheduled resealing every few years for high-traffic areas—extends the lifespan of the grout and tile appearance. In reality, DIY outcomes vary with technique and product choice; professional services often provide more consistent results due to controlled environments and higher-grade materials. The objective is predictable protection with manageable maintenance over time.
Cost considerations and time investment
DIY kits typically involve lower upfront costs but require a larger time commitment for cleaning, drying, and resealing. Professional services incur higher initial costs but can minimize downtime and deliver faster, more uniform results. The cost range is highly dependent on grout length, tile area, and whether remediation (mold removal or deep staining) is needed. Grout maintenance plans are best evaluated on a per-square-foot basis, with attention to curing times and potential follow-up maintenance needs.
Practical takeaway and the Grout Maintenance perspective
From a practical standpoint, a combined approach often yields reliable results: thorough cleaning followed by a compatible reseal, especially in moisture-prone areas. The Grout Maintenance team recommends starting with a high-quality cleaner suitable for your grout type, ensuring complete drying, then applying a sealant designed for your grout and tile. For larger kitchens or showers, a professional evaluation may deliver better long-term results with less downtime and more uniform protection. Grout maintenance is an ongoing process, not a one-time fix, and choosing the right balance between DIY and professional help is key to lasting tile aesthetics.
Comparison
| Feature | DIY Grout Cleaner + Resealer Kit | Professional Grout Cleaning + Sealing Service |
|---|---|---|
| Effectiveness against stains | Moderate to good with proper technique | Typically higher due to stronger cleaners and prep |
| Durability of reseal | Moderate lifespan depending on traffic and reapplication | Longer-lasting due to professional prep and premium sealers |
| Time required | Multiple hours across days for drying between steps | Often a single session with expedited results |
| Skill required | Moderate DIY skill, tool handling, and drying time | Low; technicians manage prep and sealing |
| Cost range | Lower upfront cost for materials | Higher upfront cost but potentially lower total maintenance |
| Maintenance | Regular cleaning and periodic reseal as needed | Less frequent maintenance due to durable seal |
Pros
- Lower upfront cost with DIY approach
- Greater control over timing and technique
- Easy to source compatible cleaners and sealers
- Flexibility to schedule work around your calendar
What's Bad
- Longer project duration and potential trial-and-error
- Higher risk of uneven results or hazing if misapplied
- Potential for inadequate sealing in hard-to-reach areas
- Requires careful surface prep and curing conditions
Professional cleaning and sealing generally yields more durable and uniform results than DIY for most high-traffic areas
Choose DIY for small, low-traffic spaces or budget-conscious projects. Opt for professional service when stain intensity is high, grout is porous, or the space experiences frequent moisture.
Got Questions?
Should I perform a two-step process (clean then reseal) or use a combined product?
A two-step process generally yields the best long-term results because cleaning removes soils thoroughly before a dedicated sealing layer is applied. Combined products can be convenient, but you risk suboptimal adhesion or incomplete coverage if the cleaner and sealer interact unfavorably. Assess your grout condition and the product instructions to decide.
In most cases, clean thoroughly first, then seal. If you’re short on time, a reputable combined product can work, but it may not be as durable.
Can I reseal grout that is already sealed, or do I need to remove old sealant first?
Most resealers require a clean, dry surface; if the existing sealant is flaking or heavily worn, you may need to remove it before resealing for optimal adhesion. If the old seal is intact, a thorough cleaning and scuffing of the surface is often enough before applying a new coat.
Clean and dry the grout first. If the old seal is peeling, remove it before resealing.
What grout types are compatible with DIY cleaners and sealers?
Cementitious grout is generally compatible with many DIY cleaners and sealers, while epoxy grout may require specialty products or professional application. Always verify the product label for compatibility with your grout type and tile material.
Check the label for your grout type; epoxy grout often needs special products.
How long does a reseal typically last in a busy bathroom?
Longevity varies with traffic, moisture exposure, and cleaning frequency. In bathrooms with frequent use, resealing every 1-3 years is common, while low-traffic areas may go longer. Use the product’s guidance and monitor for signs of wear.
Expect 1-3 years in busy baths; shorter in high-moisture zones.
Is professional grout cleaning worth the extra cost?
For large areas, stubborn stains, or delicate grout, professional cleaning and sealing offers faster results, thorough coverage, and potentially longer-lasting protection. DIY can be cost-effective for small projects if you’re comfortable with the process and willing to invest time.
Professionals save time and often last longer, but DIY works for smaller jobs.
What safety precautions should I follow during grout cleaning and sealing?
Work in a well-ventilated area, wear gloves and eye protection, and follow label instructions for cleaning agents and sealers. Keep pets and children away during application and curing times. Proper ventilation reduces inhalation risk from fumes.
Ventilate, wear protection, and follow the product directions.
The Essentials
- Assess grout type and location before choosing DIY vs pro
- Ensure complete drying before resealing to prevent hazing
- Choose a compatible cleaner and sealer pair for best results
- Plan for maintenance: reseal every few years in high-traffic areas
- When in doubt, a professional evaluation reduces risk of failure