Grout Like New: DIY Cleaning vs Pro Restoration – A Practical Comparison
Compare DIY grout cleaning and sealing with professional restoration to achieve grout like new results. This analytical guide covers methods, costs, timing, durability, safety, and maintenance for homeowners and DIY enthusiasts.

According to Grout Maintenance, DIY grout cleaning and sealing can often achieve grout like new results for small to moderate areas. For larger or heavily stained spaces, professional restoration may deliver more uniform, durable outcomes. This quick comparison highlights when DIY is viable and when a pro is worth the investment, based on area size, staining, and downtime.
The Grout Like New Promise: Expectations and Realities
Restoring grout to a look that feels like new is a common goal for homeowners who want tile surfaces to perform as well as they look. The phrase grout like new signals more than whiteness: it implies uniform color, stable texture, and a barrier against moisture that reduces staining. In practice, your ability to hit that standard depends on the grout type, tile material, stain depth, and the condition of surrounding grout lines. According to Grout Maintenance, setting realistic expectations is essential. DIY methods can deliver satisfying improvements when staining is light and grout joints are intact, but there are limits. Heavily stained, crumbling, or cracked grout may require more intensive work such as regrouting or professional restoration to achieve accurate, durable results. The goal is not perfection but a predictable, maintainable appearance that supports tile longevity. Throughout this article, we compare DIY cleaning, sealing, color restoration, and professional services to help you decide your path toward grout like new.
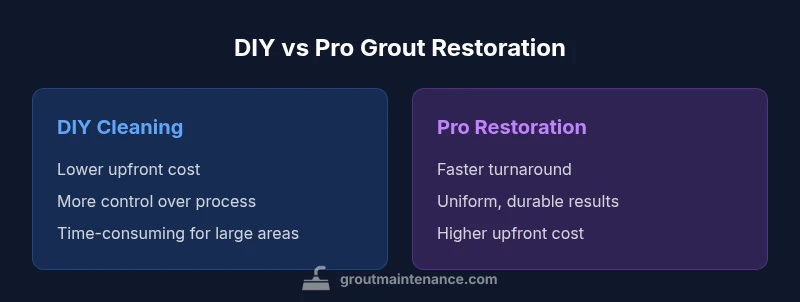
Key Differences: DIY Cleaning vs Professional Restoration
The core decision is the scope of work and the level of durability you expect. DIY cleaning focuses on surface-level soil, soap scum, and haze, followed by sealant to reduce future staining. Professional restoration, by contrast, can involve deeper cleaning, re-grouting where necessary, resurfacing with specialized products, and sometimes color restoration to unify shades across a large area. For grout like new results, the dirt you remove and the color you restore should match the room’s traffic and moisture exposure. DIY methods work best on smaller areas or homes on a tight budget, while pro restoration is favored in showers, kitchens, and high-use floors where consistent results matter most. Grout Maintenance emphasizes checking joint condition before starting, because loose or cracked grout is an early warning that the path to grout like new will require more than cleaning alone. Finally, consider downtime and project interruption; a DIY plan can be spread across days, while a pro job may need scheduled blocks of time.
Cleaning Methods that Make Grout Look New
There are several proven approaches to bring grout back toward its original tone and texture. Mechanical scrubbing with a stiff brush or a rotary tool helps remove surface grime without damaging the tiles when used correctly. Steam cleaning can loosen embedded soil, but you must avoid excessive moisture that can relax cementitious grout. Chemical cleaners come in a spectrum from simple baking soda pastes to specialty grout cleaners; always test a small inconspicuous area first and follow label directions. Enzyme-based cleaners are gentler on colored grout, while oxygen bleach and hydrogen peroxide can lift organic stains. When aiming for grout like new, rinse thoroughly to prevent residue that attracts new dirt. Sealing after cleaning locks in the improvements, but be mindful that some sealers darken or slightly alter the shade of light-colored grout. This is a pivotal step recommended by Grout Maintenance.
Sealing and Color Enhancements: Protecting the Look
Sealing is central to maintaining a grout like new appearance, especially in moisture-prone spaces. Penetrating sealers help repel water and oils, reducing staining and mildew buildup, while film-forming sealers can add a subtle sheen. For very light or white grout, color-enhancing sealers are often used to reclaim a consistent hue across all joints. Before applying any sealer, ensure the grout is completely dry and free of cleaners, since residue can interfere with adhesion. Re-sealing is typically needed every few years, depending on foot traffic, cleaning frequency, and the product used. In some cases, homeowners prefer color restorers that change the grout shade to even out variations left by aging. Grout like new finishes rely on a balanced approach: clean thoroughly, seal appropriately, and avoid over-saturation that could cause darkening. Always test sealers on a small area to confirm color and finish before wider application.
Tools, Materials, and Safety: What You Need
A DIY toolkit for grout like new is small but essential. A stiff nylon brush, a grout saw or oscillating tool, and a handheld scrubber cover most surface cleaning tasks. For tougher stains, a grout cleaner with appropriate pH balanced formula is recommended. Protective gloves, eye protection, and good ventilation are non-negotiable when using stronger cleaners. If you plan to seal, choose a compatible sealer for your grout type and tile surface; epoxy grout or cementitious grout may require different products. Prepare a plan to contain debris and protect adjacent materials from splashes. For larger projects, renting a rotary tool with a grout-cleaning attachment can speed up work. Grout Maintenance highlights staging work in sections to avoid re-soiling already-cleaned joints. Also, keep a clean water supply and avoid mixing cleaners that could create unsafe gases.
Case Scenarios: When DIY Wins and When Pro Is Worth It
Consider a small, low-traffic bathroom with light staining; a thorough cleaning plus sealing may yield grout like new results. On the other hand, a busy kitchen floor with dark grout and several cracked joints is a prime candidate for professional restoration; a pro can assess substrate integrity, re-grout where necessary, and apply color restoration for uniformity. Another scenario is tile patterns with narrow joints that are hard to reach; a pro with specialized tools can access these spaces more effectively. Grout Maintenance notes that the complexity of sealing color-matched grout across a shower stall often benefits from professional oversight. For homeowners with time constraints, a staged DIY approach may be preferred to keep life moving while gradually improving the grout appearance.
Costs and Time Estimates: Reading the True Value
DIY projects typically offer the lowest upfront cost, especially when the area is small and joints are in good condition. The time you invest will be substantial, especially if you also plan to reseal and re-clean over several sessions. Professional restoration tends to require more up-front spend but can deliver faster turnaround and longer-lasting results. When estimating value, consider not only the initial price but ongoing maintenance costs, including sealant re-application and potential grout color touch-ups. Grout like new outcomes from a pro may reduce the need for frequent cleaning and provide a more durable defense against moisture intrusion. Grout Maintenance suggests requesting a written scope of work and a projected timeline to compare fairly with a DIY plan.
Step-by-Step DIY Plan for a Small Area
- Assess the area and remove loose grout; 2) Choose a cleaning method suitable for stain depth; 3) Clean using your chosen method ensuring you reach all joints; 4) Rinse and dry thoroughly; 5) Apply a color-safe sealer if appropriate; 6) Test for uniform color and re-seal if necessary; 7) Monitor for new staining and adjust cleaning routines; 8) Schedule periodic checkups to maintain grout like new. This approach can revitalize a small bathroom or kitchen backsplash, especially when done in deliberate, methodical steps. For larger areas, repeat steps in sections to keep progress manageable.
Professional Restoration Process: What to Expect
A professional service starts with an on-site assessment of grout condition, tile integrity, and moisture risk. If needed, technicians may perform grinding, re-grouting, or epoxy sealing to restore a grout like new appearance and durability. Expect controlled dust containment and clear communication about downtime. Professionals often offer color-matching grout and advanced sealants that resist staining and mildew, creating a more uniform finish. After restoration, a proper sealant regimen and recommended cleaning schedule are provided to maintain results. Scheduling during off-peak hours can minimize disruption, while warranties or guarantees provide added peace of mind. Grout Maintenance notes that professional services can be especially valuable for large areas or complex tile configurations.
Maintenance Plan: Keeping Grout Like New Longer
The key to a long-lasting grout like new look is consistent care. Regular cleaning with non-abrasive products, prompt removal of spills, and periodic resealing help preserve color and texture. Maintain a simple schedule, such as gentle cleaning weekly and sealant reapply every few years, depending on usage and product choice. Inspect joints periodically for hairline cracks or crumbling sections and address them early to avoid larger issues. When you travel or remodel, protect exposed grout lines from moisture and dust; this prevents immediate staining or haze. A mindful routine can maximize results, reducing the frequency of major restoration.
Common Pitfalls and How to Avoid Them
Avoid over-wetting joints during cleaning, which can soften cementitious grout and prolong drying times. Don’t apply heavy coatings of sealer in one pass; build up thin layers to prevent darkening or blotching. Mixing cleaners that react adversely can create fumes or injure tile edges. Be cautious with bleach on colored grout; color-safe products or grout-safe bleaches are preferred. Never ignore mold growth behind grout lines; address moisture sources and mold remediation promptly. Finally, avoid rushing re-sealing after cleaning; allow the joints to dry completely for best adhesion and color stability. These best practices support a true grout like new appearance.
How to Choose Between DIY and Pro: A Decision Framework
Start with the area size, stain severity, and your tolerance for downtime. If the grout is relatively light and the area small, DIY methods combined with sealing can yield grout like new results. For large surfaces, heavy staining, or cracked joints, professional restoration becomes more cost-efficient over time due to durability and uniformity. Consider your desired look, maintenance willingness, and budget. Gather quotes, review portfolios, and ask about warranties. Grout Maintenance emphasizes clear communication and a written plan to set expectations. With careful planning, you can choose the path that delivers the best balance of cost, performance, and satisfaction, achieving grout like new in the most practical way.
Comparison
| Feature | DIY Grout Cleaning & Sealing | Professional Grout Restoration |
|---|---|---|
| Cost | low to moderate (DIY materials/tools) | moderate to high (professional service) |
| Downtime | short to moderate, often spread over days | shorter total downtime with professional scheduling |
| Longevity / Durability | variable; depends on technique and sealing | typically longer-lasting due to professional materials |
| Best For | small areas, budget constraints, hands-on DIYers | large areas, stubborn stains, uniform appearance |
| Skill Required | low to moderate with basic tools | low to high depending on complexity and regrouting needs |
| Maintenance After | re-sealing and periodic touch-ups | clear maintenance plan with warranties and recommended products |
Pros
- Low upfront cost for small projects
- Full control over pace and methods
- Educational experience for DIYers
- Flexible scheduling and testing options
- Can target specific problem spots
What's Bad
- Labor-intensive and time-consuming
- Results can be inconsistent on large areas
- Higher risk of mistakes that affect tiles or grout
- May require multiple cleaners and products
DIY wins for small, light stains; pro restoration wins for large, deep stains and uniform results
For small spaces or tight budgets, DIY grout cleaning with sealing can deliver grout like new results. For larger areas or stubborn staining, professional restoration delivers consistent, durable outcomes with less risk and less downtime.
Got Questions?
What does grout like new mean in practice?
Grout like new means color uniformity, restored texture, and reduced staining. It implies durable protection against moisture and easier maintenance, though results vary with stain depth and grout condition.
Grout like new means even color and texture with good protection. Results depend on stain depth and grout condition.
Can I achieve grout like new with DIY in all spaces?
DIY can work for small to moderate areas and light stains. In kitchens, showers, or large floors with deep staining, professional restoration is often the safer path to consistent results.
DIY can work for small spaces, but for large or deep stains, professional restoration is usually better.
How long does professional restoration take?
Restoration duration varies by area size and complexity, often spanning a few hours to a couple of days. Larger spaces or regrouting tasks can require more time, but you typically see faster completion than DIY over multiple weekends.
A few hours to a couple of days, depending on area size and work required.
Should I seal grout after cleaning?
Yes. Sealing after cleaning helps protect against moisture and stains and is a key step in achieving a grout like new look. Choose a sealer compatible with your grout type and tile surface.
Yes. Sealing after cleaning protects against moisture and keeps the look longer.
When should I regrout rather than clean?
Regrouting is appropriate when grout is cracked, crumbling, or has permanently lost color and texture. Cleaning alone won’t fix structural damage or large gaps between tiles.
Regrouting is needed for cracks and crumbling grout that cleaning can’t fix.
How do I choose between DIY and pro restoration?
Evaluate area size, stain severity, tile type, and downtime tolerance. For small areas with light staining, DIY plus sealing may suffice. For large areas or stubborn stains, professional restoration often delivers better durability and uniformity.
Size and stain dictate the choice. DIY for small areas; pro for large or stubborn stains.
The Essentials
- Assess area size before choosing method
- DIY saves money but requires time and effort
- Pro restoration offers uniform, durable results
- Seal after cleaning to maximize longevity