Grout Cleaning Homemade: A DIY Guide for Homeowners
Learn practical, safe grout cleaning homemade methods using common household ingredients. This comprehensive guide covers prep, recipes, step-by-step methods, maintenance, and troubleshooting for tile grout without harsh chemicals.

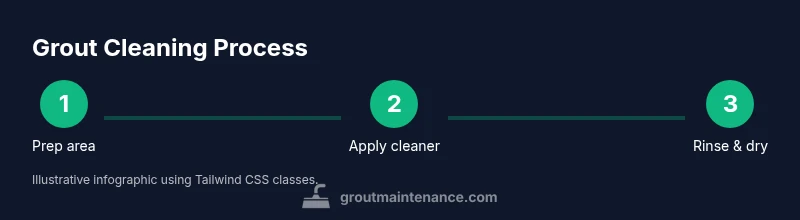
Goal: clean grout at home using simple, homemade cleaners. You’ll learn a safe, step-by-step method that covers prep, cleaner options, application, agitation, and drying. Essentials include baking soda, white vinegar, dish soap, a spray bottle, a stiff brush, gloves, and good ventilation. Follow the steps below to restore grout color without harsh chemicals.
What grout cleaning homemade means for tile care
Grout cleaning homemade refers to using common kitchen or household ingredients to remove soil, mildew, and discoloration from cementitious grout lines between ceramic, porcelain, or stone tiles. This approach emphasizes accessible, low-cost options and minimizes reliance on industrial cleaners. According to Grout Maintenance, visible grime on grout can often be improved with a routine, gentle cleaning that respects grout porosity and tile finishes. For many homeowners, this method provides a safe, effective alternative for maintaining fresh-looking grout without harsh solvents. The key is choosing the right formulation for the grout type (cementitious vs epoxy) and the soil level. When used correctly, homemade cleaners can restore color, brighten grout lines, and slow deterioration by removing daily grime before it penetrates deeper. In addition to cleaning power, the approach promotes safer households, reducing chemical exposure for families and pets. The objective is not to strip grout or cause surface etching, but to lift dirt and minor stains with non-abrasive tools and stable formulations.
Safety and prep: setting the stage for success
Before you reach for a homemade cleaner, prepare the workspace and protect yourself. Ensure good ventilation, pull back nearby furniture, and lay down old towels to catch drips. Put on gloves and eye protection to guard against splashes, especially when using mixtures that fizz or foam. Test any new cleaner on a small, inconspicuous grout section to verify it doesn’t discolor, etch, or weaken the grout. This patch test is a quick safeguard that can prevent broader damage. Grout types matter: cementitious grout usually tolerates baking soda and mild acids, while epoxy grout can be more sensitive to acidic cleaners. Grout Maintenance analysis shows that lighter soils respond best to gentler formulas, while stubborn stains may require slightly stronger but carefully applied solutions. Never mix cleaners, particularly bleach with ammonia or vinegar with bleach, as dangerous gases can form. Work in sections to keep the grout from drying out before you have a chance to scrub.
Common recipes and when to use them
There are several safe, economical recipes you can try depending on soil severity. A simple baking soda paste (baking soda with a small amount of water) is ideal for routine cleaning and light staining. For mildew or darker stains, mix baking soda with hydrogen peroxide to create a paste that lifts deeper grime. A spray solution of white vinegar and water (1:1) can help loosen grime and boost whitening on non-esteemed grout; avoid vinegar on natural stone or epoxy grout. Dish soap added to warm water creates a light, foamy rinse that can cut grease and residues from kitchen tiles. When using any acid, test first and avoid leaving acids on grout for extended periods. If you’re unsure, start with the mildest option and increase only if needed. Grout cleaning homemade is most effective for routine maintenance; for persistent stains, you may need to repeat applications or switch recipes.
Testing and patch testing: reduce risk of damage
Always begin with a patch test on an inconspicuous grout line. Apply a small amount of your chosen cleaner and wait for a few minutes to observe any adverse reaction, such as discoloration or etched grout. If the patch looks good, proceed to cover a larger area in a controlled manner. Use a soft-bristle brush for application and avoid metal brushes that can scratch tile or grout. For very sensitive grout, dilute stronger recipes further or opt for a gentler approach first. Proper testing reduces the risk of compromising grout integrity and tile glaze while giving you a clear sense of expected results. Grout maintenance is about gradual improvement, not aggressive overnight whitening.
Step-by-step method in practice: application, agitation, rinse, and dry
In practical terms, you’ll apply your chosen cleaner to the grout lines, let it dwell briefly, and then scrub with a stiff brush. Rinse with clean water and wipe dry to reveal clean lines. The goal is to lift embedded grime without eroding the grout texture. If you see color return after first pass, you can repeat on the stubborn areas. After cleaning, inspect grout for any cracking or crumbling; these indicate underlying damage that may require maintenance or replacement. Proper drying prevents new dirt from settling on damp grout. This approach supports long-term grout health and tile appearance.
Aftercare: sealing, drying, and planning maintenance
Once grout is clean and completely dry, consider applying a grout sealer if your grout is cementitious and especially porous. Sealing helps repel future spills and reduces staining, extending the interval between deep cleanings. Ensure surfaces are fully dry before applying sealer and follow the manufacturer’s instructions for cure time. Routine maintenance should include periodic quick cleans, quick checks for mold and mildew, and timely resealing as needed. Proper post-cleaning care enhances the longevity of grout and tile surfaces while keeping bathrooms and kitchens looking bright.
Troubleshooting stubborn stains and when to call a pro
If stains persist after multiple gentle cleanings, you may be dealing with deep-set grime, mineral deposits, or damaged grout. In such cases, it can be time to escalate: consider professional regrouting, epoxy grout alternatives, or specialized cleaners designed for tougher stains. If grout appears cracked or crumbling, addressing the structural integrity is important to prevent water intrusion and tile failure. Grout Cleaning homemade remains a valuable first step, but recognizing limits is crucial to avoid over-cleaning, which can degrade grout over time.
Adapting to different grout types and tile surfaces
Different grout types (cementitious vs epoxy) and tile materials (ceramic, porcelain, natural stone) react differently to cleaners. For cementitious grout, mild cleaners and test patches are usually sufficient; epoxy grout is more resistant to staining but can be damaged by acidic cleaners. Always confirm compatibility with tile and grout by checking manufacturer guidelines and performing a patch test. When in doubt, start with the gentlest option and progress gradually.
Tools & Materials
- Baking soda(Standard pantry staple; use 1/2 cup for paste per grout area)
- White vinegar(Household cleaner; avoid on natural stone)
- Dish soap(Mild detergent; 1–2 drops per cup of water)
- Hydrogen peroxide (3%)(For tough stains; do not mix with vinegar)
- Spray bottle(Spray solution evenly over grout lines)
- Stiff-bristled grout brush(5–6 inch brush or dedicated grout brush)
- Soft microfiber cloths(Wipe up residue and dry grout)
- Gloves and eye protection(Protect skin and eyes from splashes)
- Ventilation source(Open window or fan for fumes)
- Grout sealant (optional)(Clear sealant appropriate for cementitious grout)
Steps
Estimated time: 60-90 minutes
- 1
Prepare workspace and protect surfaces
Move furniture, lay towels, and ensure good ventilation. Put on gloves and eye protection. This prevents accidental exposure to cleaners and protects finishes on nearby surfaces.
Tip: Open a window or use a fan to keep air moving. - 2
Test a small area first
Choose a discreet grout line and apply a small amount of cleaner to observe any adverse reaction before wide application.
Tip: If discoloration or etching occurs, discontinue use and switch to a milder formula. - 3
Apply baking soda paste to grout lines
Spread a thick paste along grout lines. This mild abrasive helps lift dirt without aggressive scrubbing.
Tip: Let the paste sit for 5–10 minutes to penetrate grime. - 4
Spray vinegar solution and let fizz
Mist a 1:1 solution of water and white vinegar over the paste. The fizz can help loosen dirt; avoid over-wetting surrounding tiles.
Tip: Avoid combined use with bleach to prevent dangerous gases. - 5
Scrub grout with a stiff brush
Using firm, short strokes, scrub along the grout lines to lift embedded grime. Rinse occasionally to remove residue.
Tip: Work in small sections to prevent drying before scrubbing. - 6
Rinse with clean water and dry thoroughly
Rinse away all cleaner residue and wipe grout dry with microfiber cloths to prevent new dirt from sticking while damp.
Tip: Use a hot air dryer or fan to speed up drying on tile and grout. - 7
Inspect and repeat if necessary
Check grout lines for remaining stains. If needed, repeat the process or switch to a milder/stronger recipe as appropriate.
Tip: Avoid over-scrubbing, which can wear grout surface. - 8
Seal and maintain (optional)
If you have cementitious grout, apply a grout sealer after complete dryness to protect against future staining.
Tip: Follow sealer instructions for cure time and ventilation.
Got Questions?
Is grout cleaning homemade effective for all stains?
Homemade cleaners work well for light to moderate soil. Deep, mineral, or multiple-year stains may require stronger cleaners or professional regrouting.
Homemade cleaners handle light to moderate stains well; very deep stains may need stronger products or professional help.
Can I use white vinegar on epoxy grout?
Vinegar is generally not recommended for epoxy grout, as the acid can weaken the epoxy over time. Stick to milder cleaners or consult the manufacturer guidelines.
Avoid vinegar on epoxy grout to protect the epoxy from degradation.
Will DIY cleaners discolor colored grout?
There is a risk of shading on colored grout if cleaners are too acidic or left on too long. Always patch test and use the mildest effective formula.
Patch test first; colored grout can discolor with harsh cleaners.
Should I seal grout after cleaning?
Sealing cementitious grout helps resist stains and moisture. Ensure grout is fully dry before sealing and follow product directions for curing time.
Yes, sealing after cleaning can protect grout long-term.
How long does grout cleaning homemade take?
A standard cleaning of a typical bathroom can take 30-90 minutes, depending on soil level and room size. Larger areas or tougher stains will lengthen the process.
Most cleanings take about half an hour to an hour and a half.
What safety precautions are essential?
Wear gloves and eye protection, provide ventilation, and avoid mixing cleaners. Patch test first to minimize risk to grout and tile.
Protective gear and patch testing are essential safety steps.
Watch Video
The Essentials
- Start with mild formulations and patch test first
- Choose recipes based on soil level and grout type
- Rinse and dry thoroughly to prevent new staining
- Seal cementitious grout to extend cleanliness
- Know when to escalate to professional help