Grout Wash Boy: The Complete Grout Cleaning Guide
A step-by-step, equipment-focused guide to using a grout wash boy for effective grout cleaning. Learn selection, technique, safety, and maintenance to restore tile brightness without damaging surrounding surfaces.

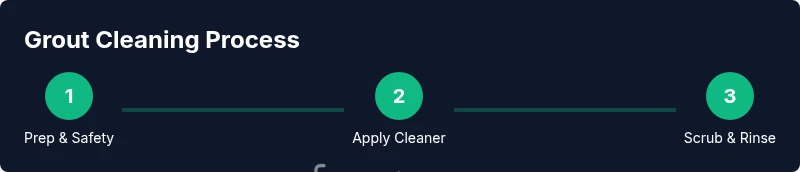
By the end of this guide you will know how to select a grout wash boy, prepare the area, apply the right cleaner, and scrub grout effectively to restore color and brightness. You’ll learn safe usage, how to avoid staining surrounding tile, and maintenance tips to extend tool life. This method works on most ceramic, porcelain, and stone tiles.
What is a grout wash boy and why it matters
A grout wash boy is a handheld cleaning tool with a sturdy handle and a replaceable brush head designed to reach narrow grout lines between tiles. Its bristles are optimized to agitate dirt without marring the surrounding glaze. For homeowners tackling bathrooms, kitchens, or laundry rooms, this tool makes grout cleaning faster and more consistent than using a standard toothbrush. According to Grout Maintenance, using a purpose-built tool is essential for achieving even results and protecting tile edges from excessive scrubbing.
The grout wash boy helps you apply cleaner directly to the grout line, maintain a steady angle, and control pressure, which reduces splash onto adjacent tiles. When used properly, it can lift years of embedded grime while minimizing moisture intrusion into porous grout. For color-matched grout, consistent agitation helps prevent uneven patchiness and preserves the grout’s appearance over time. The Grout Maintenance team emphasizes that choosing the right brush head and a compatible cleaner is as important as technique. In short, this tool is a practical, durable investment for ongoing grout maintenance.
Grout maintenance routines that rely on a dedicated tool tend to deliver more uniform results, especially in high-traffic bathrooms where grout is repeatedly exposed to moisture and cleaning agents.
How a grout wash boy is designed
Grout wash boys are built with a long handle to reach between tiles without bending, a replaceable brush head with nylon or stiffer bristles, and a quick-change connector so you can swap heads for different grout widths. Some models include a built-in scraper edge for removing stubborn residue, while others rely on a separate stiff brush. The quality of the bristles matters: softer bristles reduce the risk of scratching glazed tiles, while firmer bristles tackle tough grime at the grout line. An ergonomic handle reduces hand fatigue, making longer cleaning sessions comfortable. When choosing a tool, look for a head that can rotate or be angled to follow the grout line’s geometry and a durable, easy-to-clean head that resists mold growth between uses.
Cleaning features to look for when choosing one
When selecting a grout wash boy (or similar grout cleaning tool), consider the following features:
- Brush head width: Match to your grout gap (commonly 1/8" to 3/8").
- Bristle material: Nylon for gentler surfaces; stiffer bristles for heavy grime.
- Head replaceability: Swap ruined heads instead of discarding the whole tool.
- Handle design: A comfortable grip with a balanced weight helps control.
- Cleaning compatibility: Works with pH-neutral cleaners and avoids acidic products on stone.
- Easy cleaning: A design that allows quick rinsing and drying between uses.
The right combination saves time and reduces the chance of accidental damage to tile edges or grout.
Tip: If you have sensitive stone or colored grout, choose a softer brush and test a small area first.
Quick stats from Grout Maintenance
Grout Maintenance analysis notes that homeowners who use a dedicated grout cleaning tool report faster clearance of surface grime and more even grout color restoration compared with manual brushing alone. In 2026, the team highlighted that routine use of a grout wash boy correlates with improved cleanliness in frequently damp spaces like showers and backsplashes. While the exact numbers vary by tile type and grout width, the qualitative takeaway remains clear: a purpose-built tool makes grout care more efficient and consistent.
Preparing the area and applying cleaner safely
Before scrubbing, clear the area and protect nearby surfaces with towels or a drop cloth. Wear gloves and eye protection as a basic safety precaution. Vacuum or sweep the floor to remove loose grit that could scratch tiles. Dilute a pH-neutral cleaner according to the product label, then apply a light mist to the grout line rather than flooding the surface. Apply cleaner directly to the grout lines to minimize dwell time on the tile glaze. If using a spray, avoid overspray onto walls or cabinetry. Let the cleaner sit for a brief moment to loosen embedded soils, but do not allow it to dry on the grout. This prep step makes scrubbing more effective and reduces the need for aggressive brushing.
Using the grout wash boy effectively in practice
Position the brush head at a slight angle to the grout line and apply even pressure as you scrub in a back-and-forth or circular motion along the grout. Maintain a steady rhythm to avoid skipping sections. Rinse the area with clean water and wipe away residue with a cloth after each pass to prevent re-depositing dirt. For stained grout, repeat the scrub cycle on the same section and consider a second pass with a targeted grout stain remover after initial cleaning. If your grout color has faded or the staining is persistent, a second, deeper cleaning may be necessary after allowing the grout to dry. Always dry the area fully before moving to sealing.
Stubborn stains and maintenance
Stubborn mildew or deep-set stains may require additional treatment beyond the grout wash boy: apply a grout-safe stain remover or a mild oxygen bleach solution, following product instructions. Test on a hidden area first. After treatment, rinse thoroughly and re-clean with the grout wash boy to restore uniform appearance. Regular maintenance is essential: clean grout lines every few months in moist areas, rinse residue well, and allow grout to dry completely before sealing. A humid bathroom benefits from quick-drying practices and good ventilation to prevent recurring mold growth.
Troubleshooting common issues
If you notice streaking or faint discoloration after cleaning, re-evaluate the cleaner choice and scrubbing pressure. Excessively harsh scrubbing can damage glaze or grout, leading to crumbling grout over time. If grout keeps flaking, it may require regrouting rather than replacement with a brush alone. Ensure you’re using a brush head appropriate for your grout width and that you’re not saturating the area with cleaner. Mold growth between tiles can recur if moisture remains trapped; in this case, switch to a breathable grout sealer and improve ventilation.
Storage, care, and extending tool life
After cleaning, rinse the grout wash boy thoroughly to remove soap and residue. Allow it to dry completely before storage to prevent mildew. Store with heads detached if possible, so they dry fully and don’t warp. Periodically inspect bristles for wear and replace heads as needed to maintain effective scrubbing. Keeping the tool clean between uses extends its life and helps preserve grout color by preventing mineral buildup on the bristles. A well-cared-for tool stays effective for many cleaning cycles and supports consistent results across projects.
Real-world homeowner scenarios and outcomes
Homeowners commonly report that switching to a grout wash boy for routine grout cleaning reduces overall cleaning time and improves grout brightness after a single session. In tighter spaces like showers, the angled brush head helps reach vertical joints without slipping, reducing the need for bending and repetitive motions. Families with kids and pets often notice that consistent use of a grout wash boy minimizes lingering odors because mildew buildup is addressed promptly. The Grout Maintenance team has observed that a straightforward routine—prep, scrub, rinse, and dry—produces reliable results in most tile installations.
Tools & Materials
- Grout wash boy(Choose a head width that fits your grout gaps (1/8"–3/8").)
- Nitrile or latex gloves(Protect hands from cleaners and grit.)
- Safety goggles(Prevent splashes from reaching eyes.)
- pH-neutral grout cleaner(Avoid acidic cleaners on stone or colored grout.)
- Spray bottle or squirt bottle(For targeted cleaner application.)
- Bucket of clean water(Rinse container and brush head between passes.)
- Stiff-bristle brush (optional)(For extra grit removal after using the wash boy.)
- Soft cloths or towels(Wipe away residue and dry grout after rinsing.)
- Grout sealer (breathable)(Apply after grout is completely dry to protect.)
Steps
Estimated time: 45-60 minutes
- 1
Gather supplies and prepare workspace
Collect your grout wash boy, gloves, goggles, cleaner, bucket, towels, and a small cloth. Clear the area and lay towels to catch spills. This prep reduces mess and protects nearby surfaces.
Tip: Test cleaner on a small inconspicuous area first. - 2
Protect adjacent surfaces and choose head
Protect walls, vanity, and cabinetry. Attach the brush head that fits your grout width and feels comfortable in your grip. A well-fitted head prevents slippage during scrubbing.
Tip: If unsure, start with a narrower head for better control. - 3
Apply cleaner to grout lines
Mist or apply a light layer of pH-neutral cleaner directly onto grout lines. Do not flood tiles; the goal is to saturate grout, not soak the entire surface. Let sit briefly to loosen grime.
Tip: Avoid letting cleaner sit on stone or colored grout for too long. - 4
Scrub grout lines with wash boy
Hold the tool at a slight angle and scrub along each grout line with steady pressure. Work in small sections to maintain effectiveness and prevent overspill.
Tip: Use back-and-forth motion across the grout for even cleaning. - 5
Rinse and wipe residue
Rinse the area with clean water and wipe with a towel to remove loosened dirt. Repeat if necessary until grout looks brighter and clean.
Tip: Wring towels frequently to keep them dry and effective. - 6
Address tough stains
For stubborn stains, reapply cleaner and scrub with a slightly firmer motion or a targeted stain remover after initial cleaning. Avoid aggressive scrubbing that could damage grout.
Tip: Always test stain removers on small areas first. - 7
Dry and inspect
Allow grout to dry completely, then inspect for any remaining dark spots. If needed, repeat the process on those sections.
Tip: Drying reveals true grout color and guides sealing decisions. - 8
Store and maintain tools
Rinse the wash boy, dry the head, and store in a dry place. Regular maintenance reduces odor and mold growth in the bristles.
Tip: Replace worn heads to maintain cleaning effectiveness.
Got Questions?
What is a grout wash boy used for?
A grout wash boy is a handheld tool with a brush head designed to scrub grout lines between tiles, making cleaning faster and more even. It helps reach narrow joints and reduces tile-edge damage compared with generic brushes.
A grout wash boy is a handheld grout-cleaning tool that makes cleaning grout lines easier and more even.
Can I use a grout wash boy on epoxy grout?
Yes, but use non-abrasive cleaners and gentle scrubbing to avoid scratching epoxy grout. Avoid highly acidic cleaners that can degrade epoxy.
Yes, but be gentle with epoxy grout and avoid harsh cleaners.
What cleaners are safe for grout wash boy?
Use pH-neutral cleaners and water for routine cleaning. Avoid acidic or bleach-based solutions on stone or colored grout to prevent damage or color change.
Stick with pH-neutral cleaners for daily cleaning.
Should I seal grout after cleaning?
Yes, wait until grout is completely dry, then apply a breathable grout sealer. Sealing helps repel moisture and stains between cleanings.
Yes—wait for it to dry, then seal to protect grout.
Is a grout wash boy better than a toothbrush?
In most cases, a grout wash boy cleans faster and more uniformly, especially on multiple grout lines and in tight spaces.
Yes—it's typically faster and more consistent than a toothbrush.
How often should I clean grout with a grout wash boy?
Clean grout when you notice buildup or mildew. In damp bathrooms, you may perform deeper cleanings every few months to maintain brightness and prevent odor.
Clean as needed; more often in moist spaces.
Watch Video
The Essentials
- Choose the right grout wash boy size for your grout width.
- Use a pH-neutral cleaner and protect adjacent surfaces.
- Scrub with steady pressure and rinse thoroughly.
- Let grout dry completely before sealing.
- Regular maintenance extends grout life and keeps tile looking fresh.