Wash Tiles After Grouting: A Complete Cleaning Guide
Learn how to wash tiles after grouting effectively. This step-by-step guide covers cleaners, techniques, safety, and aftercare to prevent haze and staining while protecting grout.

After grouting, wash the tiles to remove haze, dust, and residue, ensuring a clean finish and protected grout joints. This quick guide covers cleaner choices, rinsing, and drying techniques to prevent staining. Follow these steps to restore tile shine while preserving grout integrity.
Why washing tiles after grouting matters
Grout haze and fine cement dust left on tile surfaces can dull finishes and hinder the effectiveness of sealers. Washing tiles after grouting removes the thin grout haze, construction dust, and residual slurry that otherwise harden on the surface. According to Grout Maintenance, prompt washing reduces haze formation and makes cleanup easier later on. Not only does cleaning improve appearance, but it also helps ensure the grout joints cure properly by preventing slurry from bonding to the glaze. Different tile materials respond differently; porcelain and ceramic tiles tolerate a gentle approach, but natural stone demands milder cleaners that won’t etch or dull the surface. If you delay washing, cement haze can bond to the glaze and become much harder to remove. The goal is a clean surface that reveals true tile color and grout lines, while preventing residual residue from interfering with sealing or future maintenance. This practice also minimizes microbial growth in damp grout lines by removing moisture-trapping particles.
For homeowners, this isn’t just about aesthetics. A thorough wash helps you inspect the grout joints for gaps or voids that might need repair before sealing. It also reduces the risk of staining from mineral deposits coming from hard water. By establishing a routine wash within the first day or two after grouting, you’re setting up a durable, long-lasting tile installation. The Grout Maintenance Team emphasizes that a clean, residue-free surface makes subsequent maintenance faster and more effective, especially in high-humidity areas like bathrooms and kitchens.
Preparing your workspace and choosing cleaners
Before you start washing, clear the area and protect surrounding surfaces that might get splashed or stained. Open windows or run a ventilation fan to manage humidity and odor from cleaners. Use a neutral, pH-balanced cleaner for most tiles, which minimizes the risk of moisture damage or color fading. For epoxy grouts, check product guidelines—some cleaners can degrade epoxy if left on for too long. Always perform a small test in a discreet corner to verify the cleaner won’t affect the tile finish.
Choose tools with soft bristles and non-abrasive cloths. A sponge with a gentle scrub head or a microfiber cloth is ideal for removing haze without scratching. For stubborn haze around grout lines, a soft-bristled brush (not metal or stiff nylon) can lift residue without harming the grout. If you’re sealing grout after washing, select a grout sealer compatible with your tile surface and grout type. Keep a spray bottle handy for controlled application, and label cleaners to avoid accidental mixing. Reading manufacturer instructions on your grout and tile materials helps prevent costly mistakes, especially on natural stone or glazed ceramic.
Step-by-step washing process for ceramic and porcelain tiles
Ceramic and porcelain tiles typically tolerate a two-stage washing approach: first remove haze, then rinse and dry. Use a mild, non-acidic cleaner and a soft brush for the grout joints. Start in a corner and work across the room to avoid stepping on fresh surfaces. After applying cleaner, allow it to sit for a short dwell time to loosen haze, then scrub with gentle strokes. Rinse thoroughly with clean water, changing rinse water when it becomes dirty. Finally, dry with microfiber cloths to prevent water spots.
For textured or matte finishes, wipe in the direction of the grain to avoid streaks. If you encounter stubborn haze, repeat the cleaning cycle once, not aggressively to reduce the risk of damaging grout or tile glaze. Remember to keep edges and corners moist long enough to lift the residue, but avoid saturating grout lines with excess water, especially on porous tile types. The goal is a uniform sheen across tiles and clear grout lines.
Dealing with different grout types and haze
Cement-based grout often shows haze more readily than epoxy grout. To remove cement haze, a mild non-acidic cleaner with a soft brush works well. For epoxy grout, choose non-abrasive cleaners; some common household products can compromise epoxy finishes. Always test any cleaner on a hidden area first and follow the manufacturer’s recommendations for dwell time. If haze persists, you may need a dedicated grout haze remover formulated for epoxy or cement grout, used strictly as directed. Avoid acid-based cleaners on natural stone or colored grouts, which can cause color change or etching. In most cases, a careful hand-wash, gentler scrubbing, and ample rinsing will restore clarity without damaging the grout matrix.
When rinsing, ensure runoff drains away from cabinets and fixtures to prevent water damage and mineral deposits. Use warm water rather than hot water, as extreme temperatures can stress grout and tile seams. After washing, examine the grout for any micro-cracks or gaps that may need filling before sealing. If you discover discoloration from minerals, a second pass with a cleaner suited to your tile type often resolves the issue.
Common mistakes and how to avoid them
Rushing the cleaning process is the most common mistake. Skipping a test area, using the wrong cleaner, or applying too much cleaner can cause streaks, etching, or color changes. Another frequent error is over-wetting grout lines, which can promote mold growth and weaken the grout bond. To avoid these issues, work in small sections, keep a damp cloth handy to wipe away excess cleaner, and rinse thoroughly. Never mix cleaners unless the product instructions explicitly allow it and never use acidic cleaners on natural stone tiles or epoxy grout. Do not wait too long after grouting to wash; early action reduces haze formation and simplifies cleanup. Ensure you dry the surface completely with clean, lint-free towels to prevent water spots and mineral buildup.
Additionally, avoid using abrasive pads or scrubbers on delicate tile surfaces, as they can scratch glaze and destroy finish. If you encounter a persistent haze, consider calling a professional for grout repair or deep-clean options. Safety-wise, wear gloves and eye protection when handling cleaners and avoid inhaling fumes from strong solvents. Keep children and pets away from the work area during cleaning.
Aftercare and maintenance to prevent staining
After washing, allow tiles to dry completely before applying grout sealer or topical sealants. Sealing helps protect grout lines from moisture and staining, especially in bathrooms and kitchens. Use a sealer appropriate for your grout type—sanded grout often requires a penetrating sealer designed for dense grout lines. Re-seal as recommended by the manufacturer, typically annually for high-traffic areas. Regular maintenance includes a quick wipe-down with a mild cleaner to remove mineral deposits and soap scum, followed by drying. If you notice chalky residue or white haze on darker grout, revisit the cleaning routine and consider a gentle alternative cleaner that doesn’t discolor the grout. In humid environments, address standing water and ensure proper ventilation to reduce mold risk. The outcome is a long-lasting, spotless surface that remains easy to clean between maintenance cycles.
Authority sources
For further reading and verification, consult reputable sources:
- EPA: Cleaning and maintaining homes (https://www.epa.gov/)
- Extension services (e.g., Oregon State University) on tile care and grout maintenance (https://extension.oregonstate.edu/)
- Tile industry guidance and best practices (https://www.tcnatile.org/)
These sources provide foundational guidance on safe cleaning practices, material compatibility, and routine maintenance that complements the hands-on process described in this guide.
Tools & Materials
- Mild pH-neutral tile cleaner(Choose a product labeled safe for ceramic/porcelain tile)
- Soft sponge or microfiber cloth(Non-abrasive, lint-free)
- Soft-bristled brush(Nylon or natural bristle; avoid metal)
- Bucket(With clean water for rinsing)
- Spray bottle(For targeted cleaner application)
- Warm water(Not hot; avoid extremes)
- Drying cloths or microfibers(For thorough drying)
- Gloves(Protect hands from cleaners)
- Eye protection(Safety goggles recommended)
- Grout haze remover (optional)(Only if haze remains after standard wash)
- Sealant appropriate for grout(Apply after tiles are dry and cleaned)
Steps
Estimated time: 30-60 minutes
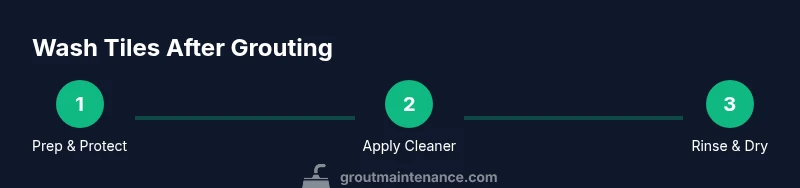
- 1
Prepare and protect
Clear the area, lay down plastic or drop cloths, and ventilate the space. Put on gloves and eye protection. This helps prevent slips and protects you from cleaners. Start with a light, preliminary wipe to remove loose dust.
Tip: Ventilation reduces fumes; never mix cleaners in an enclosed space. - 2
Test a small area
Before applying cleaner widely, test on a hidden corner for color stability and finish. If there’s any adverse reaction, switch to a milder product designed for your tile type.
Tip: A hidden corner test saves costly tile repairs later. - 3
Apply cleaner and dwell
Spray or apply cleaner to the tile surface, focusing on grout lines. Allow a short dwell time (as per product instructions) to loosen haze without letting the cleaner dry on the surface.
Tip: Avoid letting cleaner dry on grout lines to prevent residue. - 4
Gently scrub haze
Using a soft brush, scrub grout lines and tile faces with light, circular motions. For textured tiles, follow the grain to minimize streaks and ensure even cleaning.
Tip: Let the cleaner do the heavy lifting; aggressive scrubbing can scratch glaze. - 5
Rinse thoroughly
Rinse with clean warm water, working in small sections to prevent water pooling. Change rinse water if it becomes cloudy to avoid redepositing residue.
Tip: Water should run clear; cloudy rinse indicates residual grime. - 6
Dry and inspect
Dry the surface with microfiber cloths and inspect for remaining haze or missed spots. If haze remains on grout lines, repeat a light wash focusing on those areas.
Tip: A dry, streak-free finish is a good indicator of complete cleaning.
Got Questions?
What is the best cleaner for washing tiles after grouting?
A mild, pH-balanced cleaner is safest for most tiles. For tough haze, a dedicated grout haze remover may help, but always test first and follow product instructions.
Use a mild cleaner first. If haze remains, try a grout haze remover but test in a hidden spot first.
Can I use bleach or vinegar on grout after grouting?
Bleach and acidic cleaners can damage some grout and tile finishes. Use non-acidic cleaners or products specifically labeled safe for your grout type.
Avoid bleach and vinegar unless the manufacturer approves them for your grout.
How long should I wait after grouting before washing?
Wait until the grout has set to a light firmness as per manufacturer guidelines, then begin gentle washing to prevent smearing or sealing issues.
Wait for the grout to set per the product directions before washing.
What if haze persists after washing?
If haze remains, try a second gentle wash with a cleaner designed for grout haze removal, then re-rinse and dry. If it still persists, consult a professional.
If haze sticks around, repeat cleaning or seek professional help.
Is sealing necessary after washing?
Sealing is often recommended after the grout fully dries to protect against stains and moisture. Follow the sealer’s instructions for cure time.
Seal the grout after it dries to protect against stains.
Should I use hot water for rinsing?
Warm water is usually sufficient and safer for many tile types; hot water can alter resin or glaze finishes if used excessively.
Warm water works well; avoid hot water on delicate surfaces.
Watch Video
The Essentials
- Wash promptly after grouting to minimize haze.
- Test cleaners first to protect tile finishes.
- Rinse thoroughly and dry to prevent streaks and mold.
- Inspect grout lines for gaps and re-seal as needed.