What to Do After Grouting Tile: A Practical Guide
Learn practical steps for post-grout care: haze removal, curing times, sealing options, and maintenance to keep tile grout clean and durable.

After you grout tiles, the next steps include cleaning haze, letting grout cure, and sealing if recommended. You'll need mild cleaners, a grout sealer (where appropriate), soft cloths, and good ventilation. This guide walks homeowners through a practical, step-by-step plan to finish a grout job confidently.
After Grouting Tile: Immediate Clean-Up and Safety Considerations
According to Grout Maintenance, post-grout care shapes long-term durability and ease of cleaning. Start with safety: wear gloves and eye protection, ensure good ventilation, and protect adjacent surfaces with drop cloths. Cementitious grout benefits from a gentle touch, while epoxy grout, though tougher, still needs careful handling. Gather the basics: a mild, pH-neutral cleaner, soft sponge or microfiber cloths, a bucket, and clean water for rinsing. Open windows or run a fan to keep the air comfortable, especially in small bathrooms or kitchens. Grout Maintenance emphasizes that taking these precautions before you clean will reduce staining and abrasion, particularly on lighter grout colors. After the initial wipe-down, inspect the tiles and grout lines for any remaining haze or uneven joints and plan your follow-up steps accordingly.
Removing Grout Haze: Best Techniques for Cementitious Grout
Grout haze is a common after-effect of the grouting process. The key to success is removing haze while grout is still workable but not tacky. Start with a clean, damp sponge and work in small sections, turning the sponge frequently to a clean edge. Rinse the sponge often and change the water when it becomes cloudy. For stubborn haze, use a pH-neutral cleaner and a soft microfiber cloth, rubbing gently along the grout lines. Avoid harsh scrubbing that can scrape off surface grout or abrade the tile glaze. If you must use a grout haze remover, choose a product compatible with your grout type and follow the manufacturer’s directions. Grout Maintenance notes that patience pays off here: rushing the haze removal can trap residue or leave streaks that look like discoloration.
Curing Time and Gentle Cleaning Windows: When to Start Light Cleaning
Grout requires a cure window before aggressive cleaning can begin. In most cases, wait at least 24 hours for initial set and 72 hours before any heavy cleaning or sealing, though exact times depend on grout type and environmental conditions. During the curing phase, avoid exposing the grout to excessive moisture or heat, which can weaken adhesion or cause cracking. After the recommended cure period in your product documentation, start with light cleaning using a damp cloth and a pH-neutral cleaner. Ventilate well to prevent mildew in damp areas such as showers. Grout Maintenance highlights that following cure times reduces the risk of pulling out color or texture from the grout joints and helps ensure a uniform finish across the tiled surface.
Sealing Grout: Do You Need It After Grouting Tile?
Sealing is a crucial decision that depends on grout type and location. Cementitious grout in high-traffic zones or areas prone to moisture (like showers) often benefits from a penetrating sealant to resist moisture and stains. Epoxy grout, on the other hand, typically does not require sealing because of its non-porous nature. If you decide to seal, choose a sealer compatible with your grout and tile. Apply thin, even coats following the manufacturer’s directions, and allow full cure time before exposing the cured grout to moisture. Grout Maintenance suggests testing the sealer on a hidden spot first to confirm there’s no color change or slickness. Always re-check after cleaning and re-sealing if needed.
Cleaning and Maintenance Plan After Grouting
A maintenance plan helps extend the life of the grout and keep tiles looking fresh. Use a pH-neutral cleaner designed for tile grout and avoid acidic or abrasive products that can erode cementitious grout over time. Clean spills promptly, especially in kitchens and bathrooms, to prevent staining. Regularly wipe down tiled surfaces with a damp microfiber cloth and dry with a soft towel to prevent water spots. For floors, use a mild cleaner with a neutral pH and a microfiber mop head to avoid abrasive wear. Grout Maintenance emphasizes maintaining a consistent cleaning routine, which reduces the buildup of soap scum, mineral deposits, and mold that can compromise grout color.
Troubleshooting Common Post-Grout Issues
Even with careful preparation, issues can arise after grouting. If haze persists, re-wipe with a clean damp sponge and rinse the area. For discoloration, check whether it’s surface residue or embedded staining; a second round of cleaning or a dedicated grout stain remover may be needed. Efflorescence can appear as a white powder on cementitious grout; it’s moisture-related and often resolves with better ventilation and longer drying times. In color-sensitive installations, always test cleaners in an inconspicuous area first. If you’re unsure about the best product for your grout type, consult the manufacturer’s guidelines, or seek professional advice. Grout Maintenance notes that following a cautious, methodical cleaning approach yields the best long-term results and minimizes the need for re-grouting.
Authority Sources
For additional guidance, consult trusted sources on tile and grout care:
- https://www.epa.gov/
- https://extension.illinois.edu/
- https://www.thisoldhouse.com/
These sources provide broad best-practice recommendations for tile maintenance, grout care, and moisture management relevant to post-grout care and cleaning.
Tools & Materials
- Mild, pH-neutral cleaner(Use for haze removal and routine cleaning)
- Soft sponge or microfiber cloth(Non-abrasive; prevents scratching tiles)
- Bucket(For diluted cleaning solutions)
- Gloves(Protect skin from cleaners and moisture)
- Ventilation(Open windows or run a fan during cleaning)
- Grout sealer (optional)(Choose if recommended for your grout type and location)
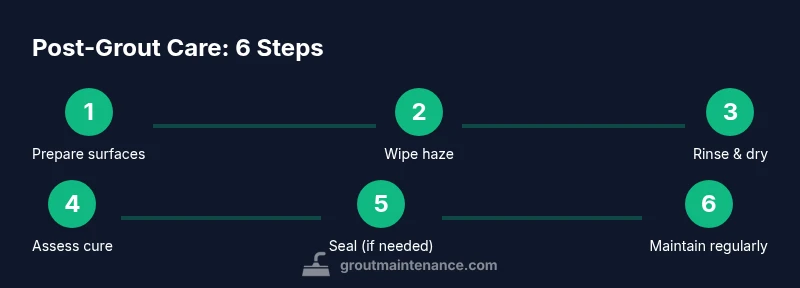
Steps
Estimated time: 1-2 hours
- 1
Prepare workspace and safety gear
Put drop cloths down to protect surrounding surfaces. Put on gloves and eye protection, and ensure good ventilation. Gather all tools and cleaners within easy reach so you don’t trail water onto finished areas.
Tip: Test a small, unseen area first to confirm no color change on grout or tile glaze. - 2
Wipe haze while grout is set but not brittle
Dampen a clean sponge and wipe grout lines in a systematic, circular motion. Rinse the sponge often and change water when it looks cloudy to prevent transferring residue back onto the surface.
Tip: Work in small sections to maintain accuracy and prevent newly cleaned areas from drying unevenly. - 3
Deep-clean tiles without harming grout
Apply a pH-neutral cleaner to the tile surfaces and grout lines. Use a microfiber cloth or soft brush to lighten any residual haze. Rinse with clean water and dry with a soft towel to avoid water spots.
Tip: Avoid acidic cleaners on cementitious grout; they can degrade the joint over time. - 4
Assess cure and decide about sealing
Check the grout’s cure status per manufacturer guidelines. If sealing is recommended for your grout type, plan to seal after the full cure period to maximize sealant performance.
Tip: Sealers work best when grout is completely dry and free of haze. - 5
Seal grout (if recommended)
Apply a thin, even coat of sealer following product directions. Allow sufficient drying time in a well-ventilated area before exposing to moisture. If you notice color change, let the area cure longer before resealing.
Tip: Always test on a small patch first to confirm no adverse color change. - 6
Final inspection and maintenance plan
Do a final walk-through to confirm all joints are clean and evenly finished. Create a simple maintenance schedule (weekly light cleaning, monthly check for haze) to preserve grout appearance and integrity.
Tip: Document the products and times you used for future reference.
Got Questions?
Do I need to seal grout after grouting tile?
Sealing is often beneficial for cementitious grout in moisture-prone areas; epoxy grout typically does not require sealing. Always follow manufacturer recommendations for your specific grout type.
Sealing is often helpful for cementitious grout, especially in showers or kitchens. Epoxy grout usually doesn’t need sealing.
How long should I wait before cleaning after grouting?
Wait at least 24 hours for initial set and up to 72 hours before heavy cleaning or sealing, depending on the grout type and environmental conditions.
Wait a day for the grout to set, and up to three days before heavy cleaning or sealing if your product allows.
Can I use bleach to clean grout after grouting?
Bleach can discolor some colored grout and may degrade cementitious grout over time. Use a pH-neutral cleaner and test first.
Bleach can discolor grout and may harm some cementitious grout, so stick with a mild, pH-neutral cleaner first.
What if grout haze remains after cleaning?
If haze persists, re-wipe with a clean damp sponge and consider a dedicated grout haze remover compatible with your grout type. Avoid aggressive scrubbing.
Persisting haze may need a second cleaning with a haze remover suitable for your grout type.
Is sealing always necessary for cementitious grout?
Not always, but sealing is recommended in high-moisture areas and on porous grout to prevent staining and moisture intrusion.
Sealing isn’t always required, but it helps in damp areas and with porous grout.
How can I prevent cracking after grouting?
Ensure proper substrate prep, allow full cure before heavy use, and avoid rapid temperature changes that stress joints.
Proper prep and slow, uniform curing prevent cracking in grout joints.
Watch Video
The Essentials
- Test cleaners before full use
- Follow cure times before sealing or deep cleaning
- Choose pH-neutral cleaners for routine care
- Seal only when appropriate for your grout type
- Maintain a regular cleaning routine