How to Tell If Grout Is Sanded or Unsanded: A DIY Guide
Learn practical, step-by-step methods to identify sanded vs unsanded grout and choose the right application for your tile project. Visual checks, joint measurements, and simple tests explained.

To tell if grout is sanded or unsanded, start with the joint width and surface feel: sanded grout is rough with visible grains and is used for wider joints, while unsanded grout is smooth and suited for narrow joints. A quick visual check, plus a gentle touch and a basic test, usually confirms the type. (Grout Maintenance Analysis, 2026)
How to tell if grout is sanded or unsanded: Quick visual clues and joint width
Determining whether grout is sanded or unsanded is a common DIY question for tile projects. If you’re wondering how to tell if grout is sanded or unsanded, start with joint width and surface feel. According to Grout Maintenance, the easiest first check is the joint width and how the grout feels when pressed with a fingernail or a blunt tool. Sanded grout contains fine sand particles that give it a gritty texture, while unsanded grout is smooth and plastic-like, ideal for narrow joints. For most floor applications with joints around 3 mm (1/8 inch) or wider, sanded grout is typical; for tight 1/16 inch or smaller joints, unsanded is usually the better choice. This quick distinction helps you avoid choosing the wrong product and risking cracking or poor performance.
Visual clues and the joint width rule
In practice, the easiest way to tell how to tell if grout is sanded or unsanded is to check the joint width. Use a ruler or a joint-width gauge and compare against common guidelines: if joints are ⅛ inch (3 mm) or wider, you’re likely looking at sanded grout; if joints are narrower than ⅛ inch, unsanded is the safer bet. Surface feel matters too: sanded grout feels gritty when you drag a finger across a cured joint, while unsanded feels smooth and slightly creamy. Grout Maintenance analyses from 2026 note that many DIYers misidentify grout type when joints are irregular, so measure first and confirm with a tactile check.
Why the texture matters for grout performance
The presence of sand in sanded grout adds strength and crack resistance for larger joints and high-traffic areas. In contrast, unsanded grout lacks that gritty texture, which makes it easier to work into narrow joints and around delicate tiles. Understanding how to tell if grout is sanded or unsanded helps you plan sealing, cleaning, and maintenance correctly. When you know the grout type, you can choose compatible sealants and determine appropriate cleaning methods that minimize scratching or wear on the surface.
A practical home test: check for sand grains quickly
If you want to verify in a pinch, perform a simple test on a small, inconspicuous area. Dip a clean tool into the grout and lightly rub along the joint. Look for grainy particles or exposed sand grains along the edge—visible grains indicate sanded grout. If the texture remains uniformly smooth with no grit, you’re likely dealing with unsanded grout. While this test isn’t 100% definitive, it’s a reliable quick check when combined with a width measurement.
Maintenance considerations after identification
Once you know how to tell if grout is sanded or unsanded, plan your maintenance accordingly. Sanded grout often tolerates a stronger cleaner and can be more resistant to cracking in wide joints, but it may require a different sealant approach than unsanded grout. Grout Maintenance emphasizes matching cleaning products and sealants to grout type to preserve color and durability. If you’re unsure, document the find and test a small area before applying any aggressive cleaners.
Common mistakes to avoid during identification
Avoid guessing based solely on color or a single joint. Lighting, differences in tile shade, and uneven joint depth can mislead your assessment. Don’t force tools into joints—the goal is to observe texture and width, not to damage tiles. When in doubt, consult a professional or perform a controlled test on a spare tile edge to confirm your grout type before proceeding with repairs or re-grouting.
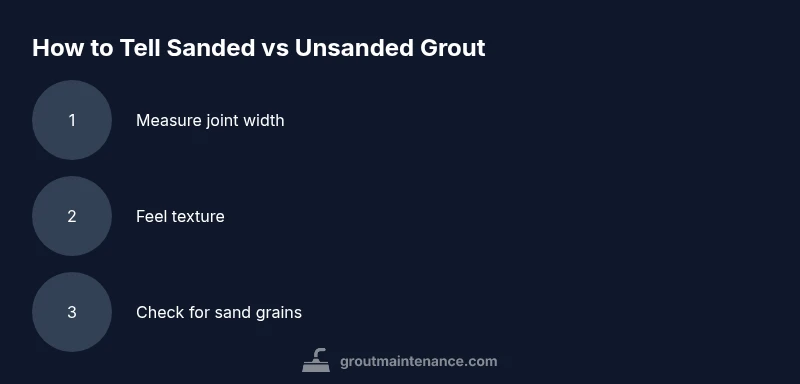
Quick reference: the identification checklist in one place
- Measure all identified joints to confirm width, looking for 1/8 inch or wider as a sanded grout cue
- Feel a curing joint to detect gritty texture versus smooth
- Look for visible sand specks under good lighting or with a magnifier
- Note tile type and recommended grout type from manufacturer guidance
- Consider sealing and cleaning methods tailored to the identified grout type
Remember, accurate identification saves you time and reduces the risk of grout failure later on.
Final practical notes and next steps
With the basics covered, you can confidently determine how to tell if grout is sanded or unsanded and proceed with the appropriate product and maintenance plan. If you discover mixed joints in a project, treat each area according to its joint width and texture, and document findings for future repairs. The Grout Maintenance team recommends testing a small, inconspicuous area before applying any sealant or cleaner to ensure compatibility with the identified grout type.
Tools & Materials
- Joint width gauge or ruler(Measure in millimeters or inches; use both metric and imperial if needed)
- Clean cloth and damp sponge(For wiping and testing after touching the grout)
- Magnifying glass (optional)(Helpful to inspect for visible sand grains)
- Blunt scraper or wooden tongue depressor(Use gently for light texture check without scratching tiles)
- Gloves and eye protection(Safety first when handling tools around tiles)
- Notebook or smartphone for documenting findings(Record joint widths and textures for future reference)
Steps
Estimated time: 20-45 minutes
- 1
Identify joint width
Start by selecting several typical joints and measure each with a ruler or gauge. Record the widest measurement to guide your guess on whether the grout is sanded or unsanded.
Tip: If you see joints consistently around 1/8 inch or wider, sanded grout is likely. - 2
Feel the texture
Gently run a gloved finger over the joint. A gritty, sandy feel suggests sanded grout; a smooth, creamier texture points to unsanded grout.
Tip: Do not press hard; you want a light drag to avoid gouging the surface. - 3
Inspect for sand grains
Use a magnifying tool or bright light to look for visible sand grains along the joint edge. Visible grains are a hallmark of sanded grout.
Tip: Look at multiple joints for consistency to avoid misclassification. - 4
Perform a light scratch test
With a blunt tool, lightly scratch a small section of grout in a non-visible area. Sanded grout tends to accumulate abrasive grit that may leave a micro-scratch pattern; unsanded usually scratches evenly without grit exposure.
Tip: Avoid aggressive scraping that could damage tiles. - 5
Cross-check with tile type
Some tile installations (like natural stone) commonly use unsanded grout, while others (ceramic, porcelain) can take either type depending on joint width. Verify with tile manufacturer guidelines.
Tip: If using stone, verify with stone-specific grout recommendations. - 6
Document and decide
Record your findings for future repairs or resealing. Decide on grout type based on joint width, texture, and tile type before proceeding with cleaning or regrouting.
Tip: When in doubt, assume unsanded for very narrow joints and consider testing a small area.
Got Questions?
Can you tell just by looking if grout is sanded or unsanded?
Often yes, but not always. Pair visual cues with joint width measurements to confirm the grout type before starting a project.
Often you can tell by looking and feeling the joints, but verify with a width measurement for accuracy.
Is unsanded grout always used for very small joints?
Yes, unsanded grout is typically recommended for joints under 1/8 inch. However, always check tile manufacturer guidelines and consider tile type before deciding.
Usually, yes for tiny joints, but check the tile specs first.
What if the joints are different sizes in the same area?
Identify the grout type for each joint individually. Treat each section according to its joint width and texture, and apply consistent grout type for repairs nearby where appropriate.
If joints vary in width, identify each type separately and repair accordingly.
Can I use epoxy grout if I’m unsure about sanded vs unsanded?
Epoxy grout is a separate category with its own considerations. If unsure about cement-based grout, consult manufacturer guidelines and consider professional guidance.
Epoxy grout has its own rules—check the specs or ask a pro.
Should I seal grout after identifying the type?
Yes, but choose a sealer compatible with the grout type you identified. Sanded and unsanded grout can respond differently to cleaners and sealants.
Seal once you know the grout type and follow the product directions.
What if I still can’t tell after tests?
If uncertainty remains, treat the area as unsanded for sensitive tile gaps or consult a tile professional for a definitive assessment.
If in doubt, ask a pro to verify the grout type.
Watch Video
The Essentials
- Measure joint width to guide grout type decisions
- Look for sand grains as a primary indicator
- Texture and test results should align with joint width
- Document findings before any repair work