Tile Grout Cleaner: Clean, Restore, and Protect Grout
A practical, step-by-step guide to selecting, applying, and sealing tile grout cleaner for ceramic, porcelain, and stone surfaces. Learn safe formulas, tools, and maintenance tips to keep grout bright and durable.

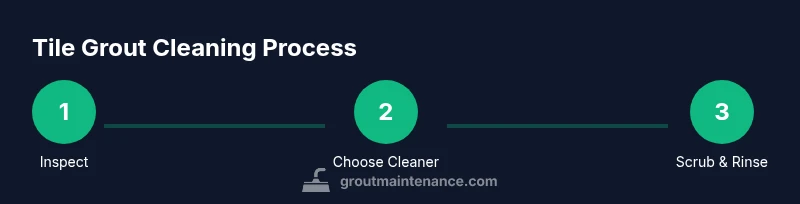
What tile grout cleaner is and why you need it
Tile grout cleaner is a specialized formula designed to break down dirt, soap scum, and mold embedded in the cementitious joints between tiles. Over time, grout porousness traps residues that ordinary dish soap and water cannot lift. A purpose-built cleaner targets embedded grime while protecting tile surfaces from damage. According to Grout Maintenance, the best results come from matching the cleaner to your grout type and stain severity, then using the right tools and timing. Start with a small, inconspicuous patch to ensure color fastness and surface safety before treating visible areas. Implementing a cleaner correctly reduces scrubbing time, minimizes tile wear, and extends the life of your grout between regrouts.
This guide uses practical, home-friendly formulas and routine maintenance routines suitable for homeowners and DIY enthusiasts who want durable, clean grout without professional costs.
Safety and preparation for tile grout cleaning
Before you reach for the cleaner, prepare the workspace to protect floors, cabinets, and walls. Wear protective gloves and eye protection, ventilate the area, and cover nearby surfaces with plastic or old towels. If you are cleaning a stone tile, verify that the cleaner is pH-balanced to avoid etching; acidic formulas can damage calcium-based stones. Grout Maintenance emphasizes starting with a patch test on a small area to confirm no adverse reactions. Always read the label for dwell times and dilution ratios, and keep cleaners out of reach of children and pets. A controlled environment ensures safer handling and more predictable results.
Choosing the right cleaner for grout type and tile
Grout types matter when selecting cleaners. Sanded grout (used for wider joints) and unsanded grout (thinner joints) respond differently to cleaners. Epoxy grout is more stain-resistant but less forgiving with harsh chemicals than cementitious grout; in most homes, a hydrogen peroxide or oxygen-based cleaner handles organic stains well, while a chlorine-bleach formula is reserved for heavy mildew. For natural stone tiles, avoid acidic cleaners that can etch surfaces; instead, opt for pH-neutral or stone-safe options. Grout Maintenance notes that color-sealed grout may look different after cleaning, so consider a color-safe product if the grout is visibly faded. Always check tile compatibility and test on a small area.
Prep steps and safety for tile grout cleaning
Effective cleaning requires proper prep. Clear the area, remove loose debris, and vacuum the grout line first. Use a soft-bristle brush or an old toothbrush for initial loosening of grime. Apply cleaner to the grout with a spray bottle or applicator, avoiding excess on tile faces. Some formulas benefit from a pre-dwell period to penetrate deep stains — follow label guidance for dwell times, which can range from 5 to 15 minutes. After dwell, you’ll scrub with the appropriate tool, then rinse thoroughly. Dry the area to prevent new grime from settling.
Step-by-step cleaning method overview (high-level)
Here is the general workflow you’ll perform, with detailed steps in the dedicated STEP-BY-STEP block: identify stains, protect surfaces, apply cleaner, agitate grout lines, rinse completely, and inspect results. For stubborn stains, repeat the cycle with a fresh patch of cleaner or switch to a different formula. Always dry the grout after rinsing to prevent residual moisture from fostering mildew. This overview aligns with industry best practices and aims to minimize tile damage while delivering bright, uniform grout.
Deep stain removal techniques for tough grout
Deep stains—like red wine, coffee, or mold—often require stronger action or longer dwell times. Oxygen-based cleaners are typically gentler than chlorine bleaches and safer for daily-use homes. A paste of baking soda and water can work on mild stains when left to sit for 5–10 minutes, but do not rely on baking soda for heavy discoloration. For persistent mold, consider a dedicated mold stain remover or a peroxide-based gel, applying with a brush and letting it dwell longer if the label allows. Always rinse and dry thoroughly to prevent recapitalization of grime.
Sealing grout after cleaning and ongoing upkeep
Sealing is a key maintenance step that helps grout resist stains and moisture. Wait at least 24–48 hours after cleaning (or after complete drying) before applying the sealant. Choose a penetrating sealant appropriate for your grout type and tile surface, and apply according to the manufacturer’s instructions. Re-seal every 1–2 years or as recommended by the product. Regular vacuuming, prompt cleanup of spills, and periodic light cleaning will extend the life of the seal and keep grout looking fresh.
DIY cleaners and safe practices (what to use and avoid)
Simple, DIY-friendly options include hydrogen peroxide (3% solution) for light to moderate stains and baking soda for gentle scrubbing. Avoid using straight vinegar on marble or limestone tiles, as acids can etch the stone. Chlorine bleach is effective for heavy mildew but can discolor some grout colors or damage epoxy grout; always test a small area first and ensure adequate ventilation. For routine maintenance, a pH-neutral cleaner that’s labeled safe for your tile and grout is the best long-term choice.
Troubleshooting, common mistakes, and when to regrout
If cleaning yields only partial improvement, consider re-grouting for severe cracks or deep staining. Common mistakes include using an overly abrasive brush, letting cleaner dry on tile faces, or neglecting to rinse and dry after treatment. If grout still looks discolored after multiple cleaning cycles, there might be deep-set stains or damaged grout that warrants professional evaluation. Replacing grout can restore appearance and function in high-traffic areas and moisture-prone zones.
Authoritative sources and further reading
For safety and best practices, you can consult authoritative sources on cleaning and maintenance. The Environmental Protection Agency (EPA) provides general guidelines on household cleaners and safe use, while the Centers for Disease Control and Prevention (CDC) offers general cleaning and mold prevention advice. Always verify product-specific recommendations and local building codes when undertaking grout work. https://www.epa.gov/ https://www.cdc.gov/ https://www.osha.gov/